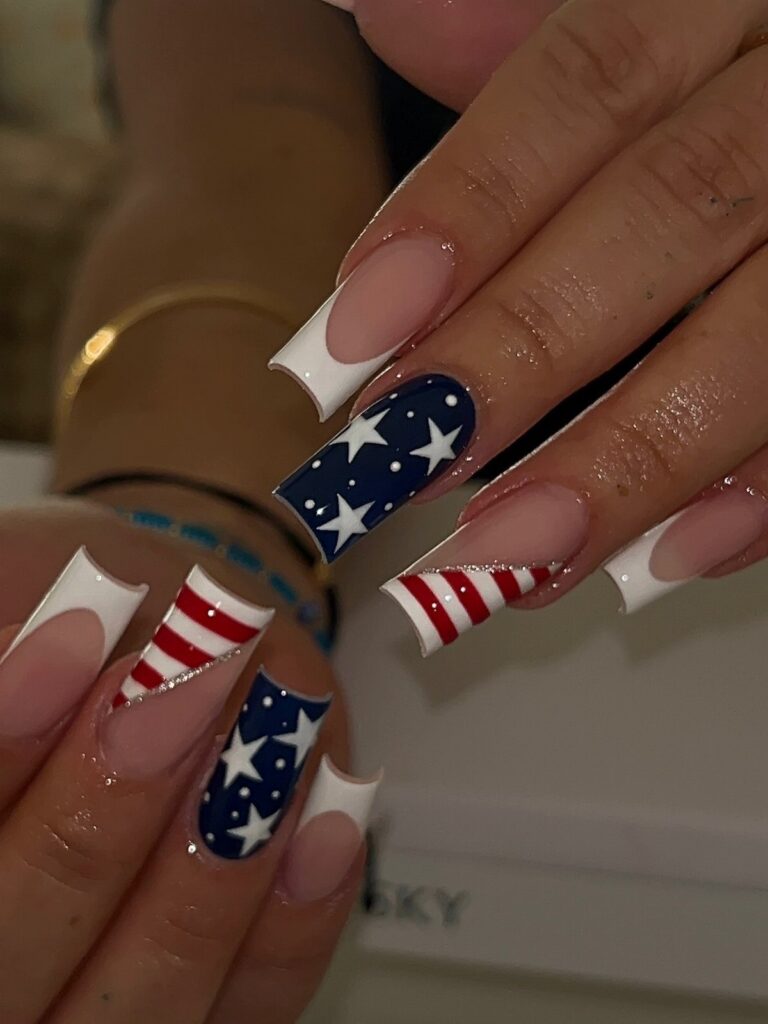
The list runs from quiet, near-bare manicures to full glitter and marble finishes, and nearly every design has a decal, a sticker, or a nail artist as a fallback.
If your lines wobble, pick one accent nail and keep the rest simple.
1. Stars and Stripes
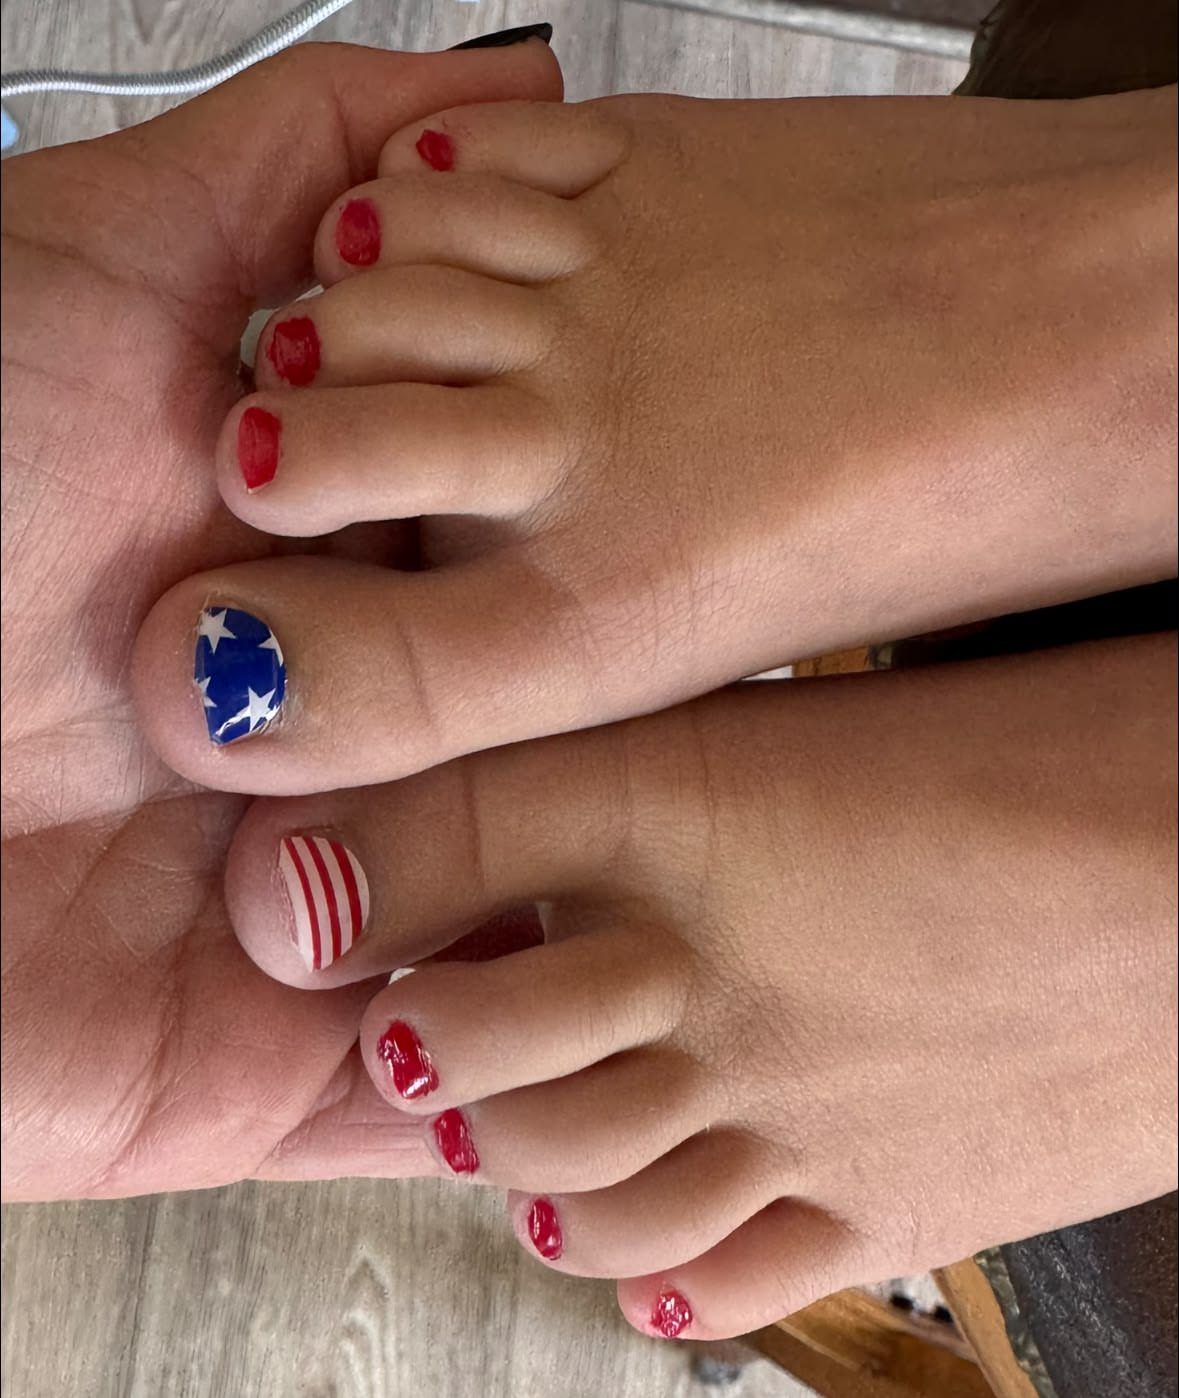
Toes get the same star-and-stripe treatment as fingers, and I think they are the better canvas. Feet sit still, and sandal season puts them on display all July.
Blue with white stars on some toes and red and white stripes on others keeps the pattern from crowding. Paint the base colors first and let them dry fully before adding stars or stripes on top.
A dotting tool makes the star points easier than a brush, and a thin striping brush keeps the lines straight on a small nail.
2. American Flag Nails
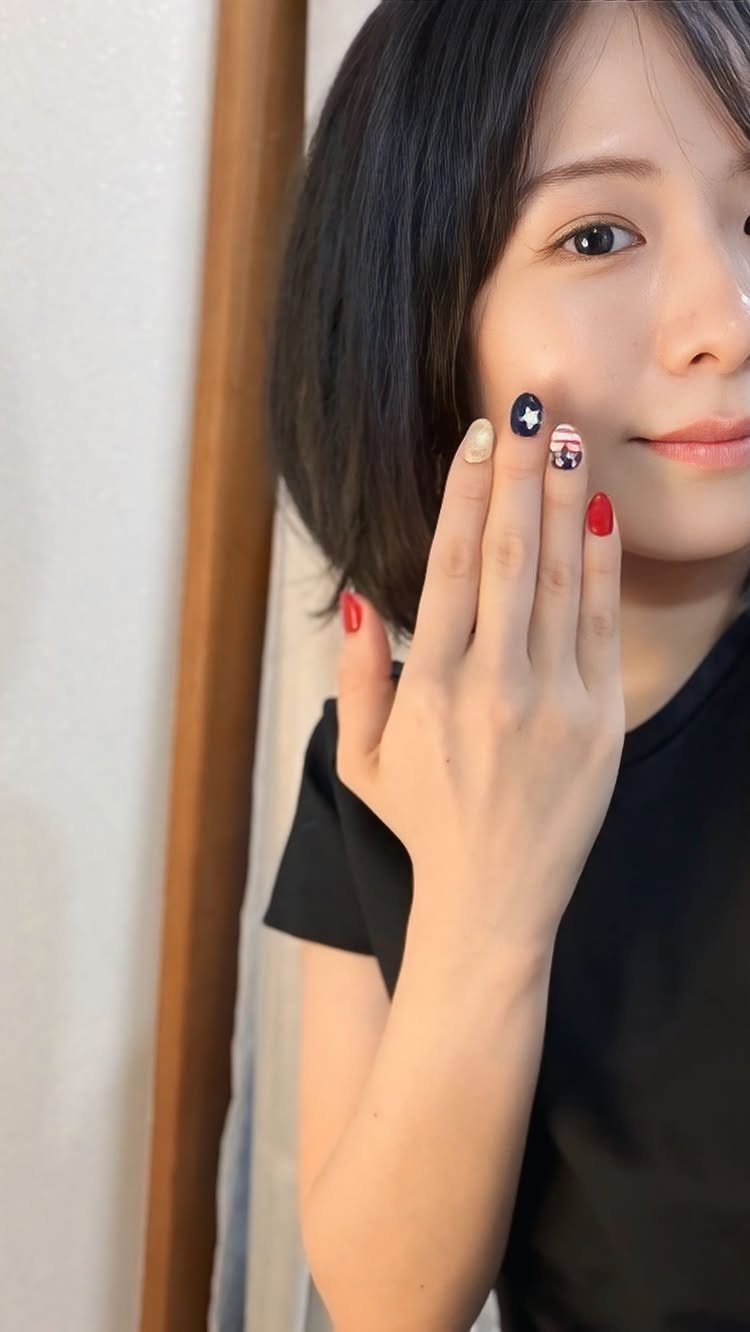
A flag on the nail is the most recognizable Fourth of July look there is, and it needs no explanation at a cookout.
I would put the full flag on a finger or two and keep the rest solid red, white, or blue.
Painting it on every finger gets busy fast, and the small surface leaves little room for stripes and stars to read clearly.
A flag sticker or decal saves the most time if freehand feels shaky. Seal it with a top coat so the edges stay flat.
Whether you’re headed to a backyard barbecue, booking a coastal getaway, or watching a firework show, Fourth of July nail ideas can be perfectly on-theme without feeling over-the-top.
3. Fireworks Nails
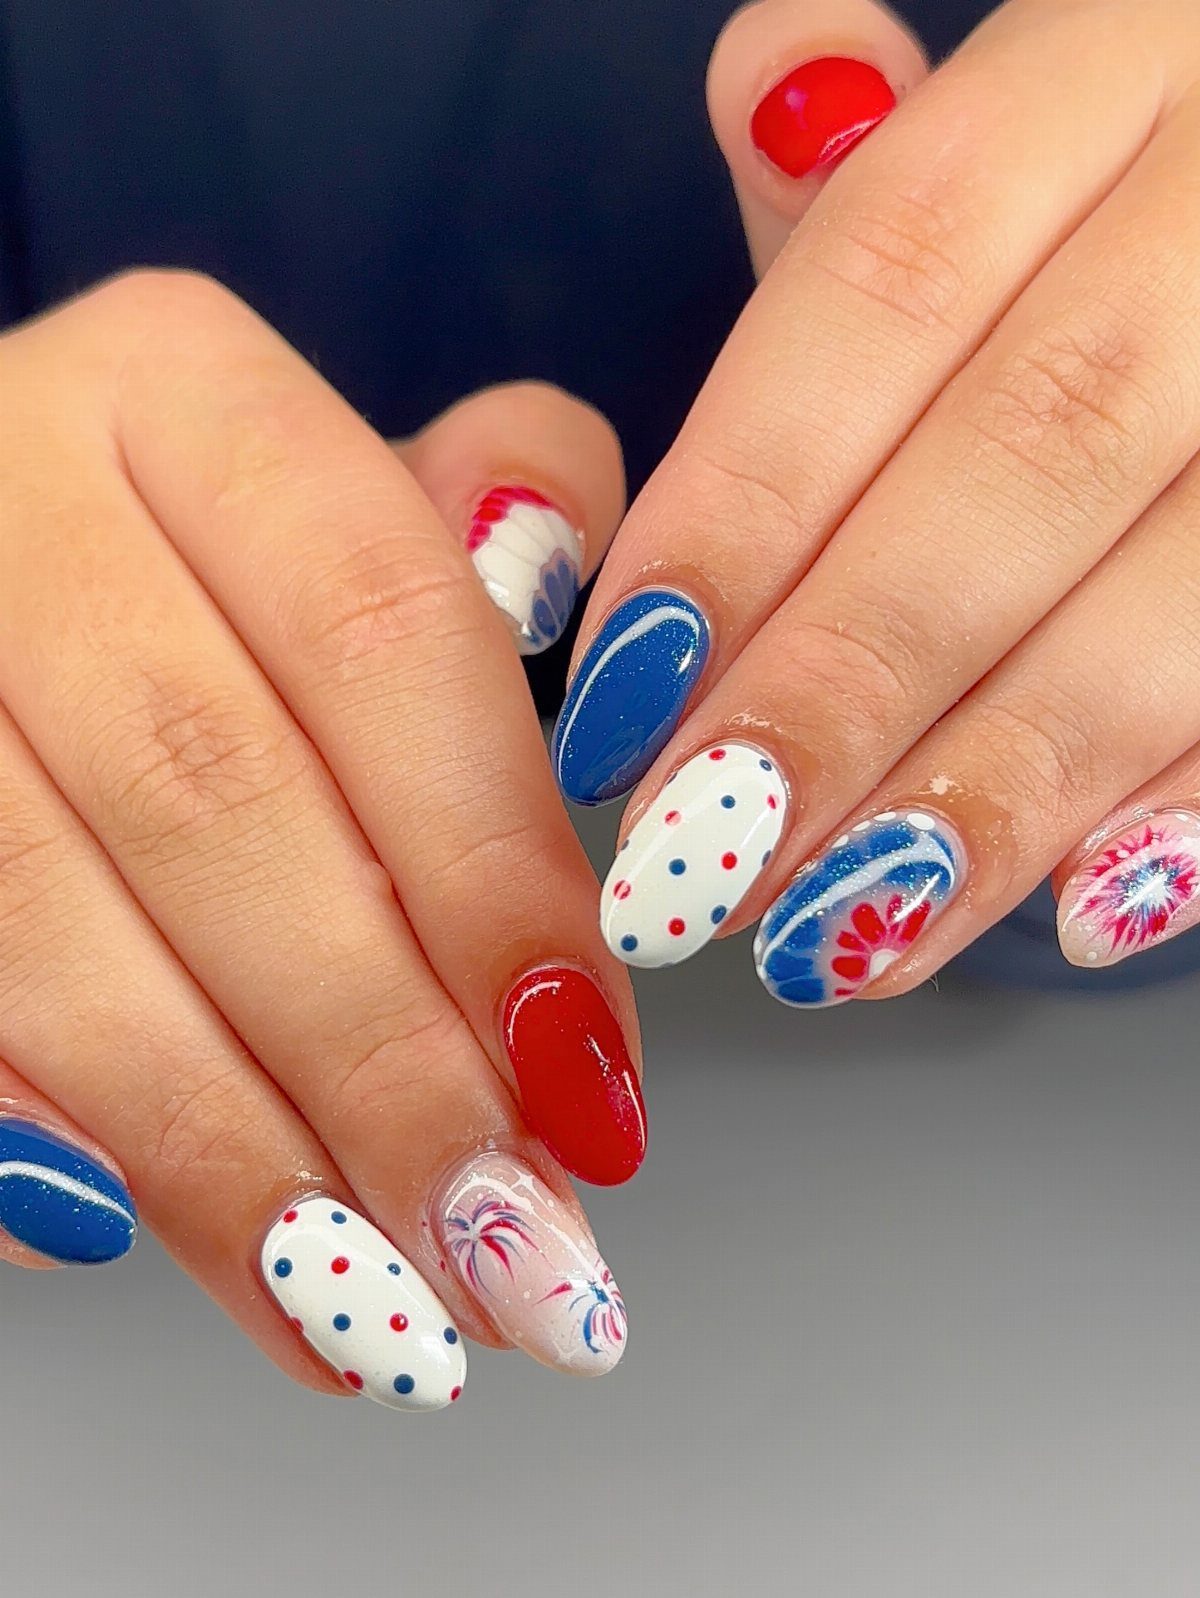
Fireworks nails reward a loose hand. Burst lines radiating from a center point, paired with scattered dots, read as a sparkler going off without any need for precision.
Use a thin brush for the lines, pulling outward from the center in red, white, or blue, then dot the spaces between with the end of a bobby pin or a dotting tool.
Keep the background dark or neutral so the colors pop.
Uneven bursts look more like real fireworks than perfect ones, which makes this forgiving for beginners.
4. Red and White Gingham Pattern
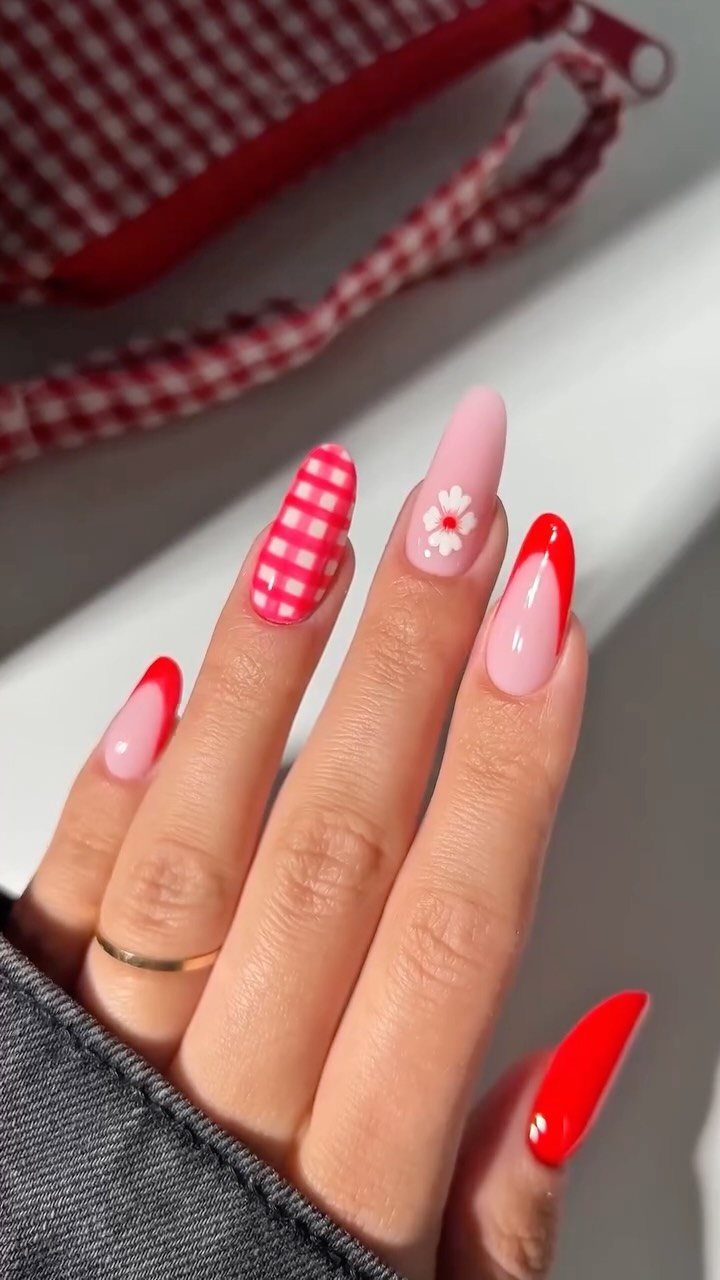
Gingham says picnic blanket before anyone says Fourth of July, and that is why it works on a nail.
Lay down a pale base, then paint wide vertical stripes, let them dry, and cross them with horizontal ones.
The overlap squares darken on their own and create the plaid effect. Red on white is the traditional combination, and it reads as gingham the second you break it into checks.
A small flower on one accent nail adds softness, and a French tip holds the design in place without crowding the pattern. Thin tape guides help the stripes stay even.
5. Hot Dog Nails
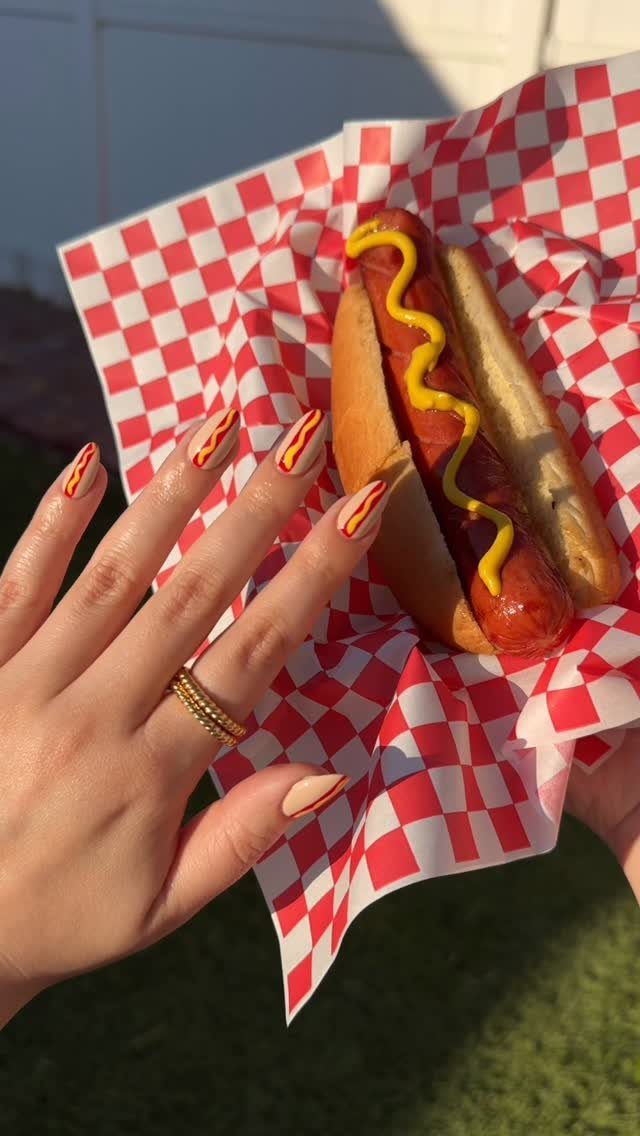
Paint a tan or warm brown bun shape, add the sausage in a deeper reddish brown, and finish with a squiggle of yellow mustard. Use a fine brush for the squiggle.
Keep it to a finger or two and paint the others in red or white, so the set reads as intentional rather than accidental.
6. Red, White, and Blue Polish Nail Design
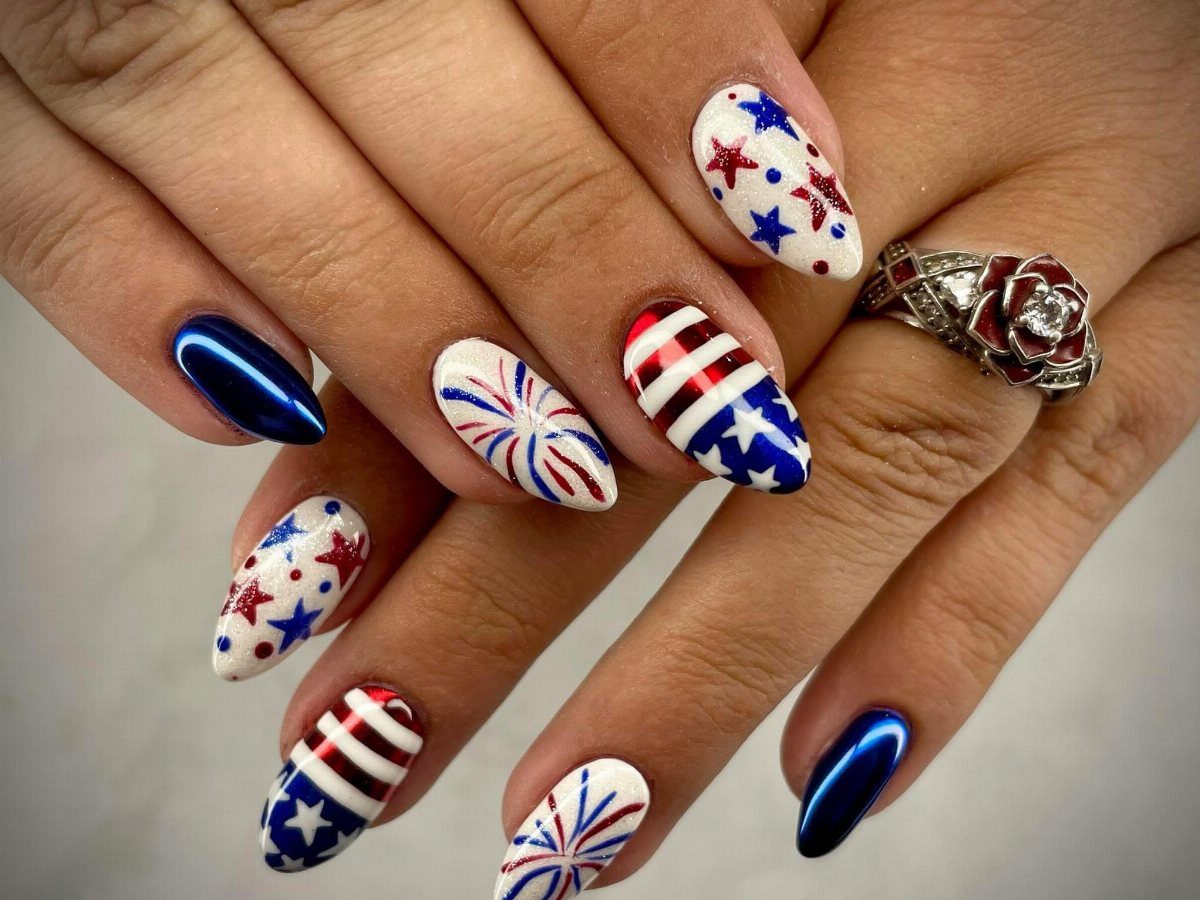
For anyone who wants the full holiday in one manicure, mix patterns across the hand: stars on one nail, stripes on another, a firework burst on a third. Almond shapes give each design a long, smooth space to fill.
I would pick one color to repeat on every nail so the set feels planned. Solid white nails between the patterned ones give the eye a rest.
Finish with a glossy top coat. A simple accessory, like a thin silver ring, keeps attention on the color.
7. Tiny Stars
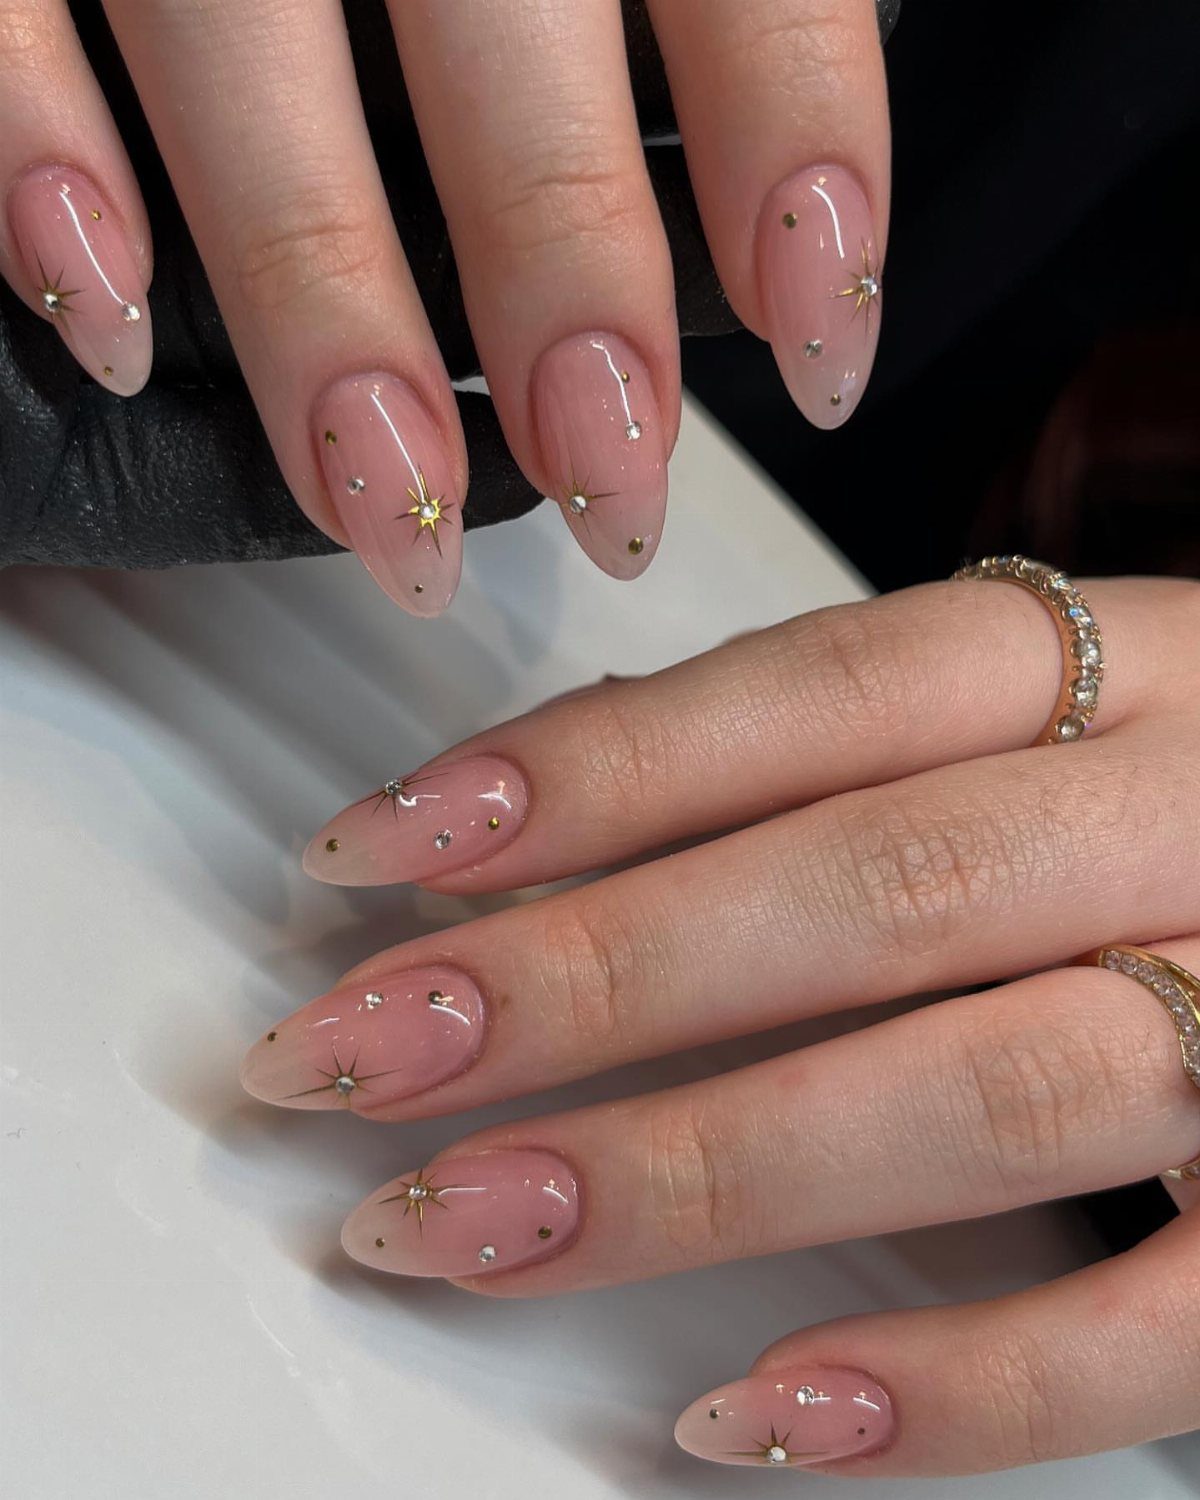
Gold stars on a nude base are the quietest way to wear the holiday. Nothing here announces July 4th until someone looks closely, which suits an office day as much as a cookout.
Keep the stars small and scattered, with a few white dots between them, and set a rhinestone or a pair of them near the cuticle.
A dotting tool and a fine brush handle the stars; set the rhinestones in wet top coat.
Gold rings finish it.
8. Bald Eagle Accent Nails
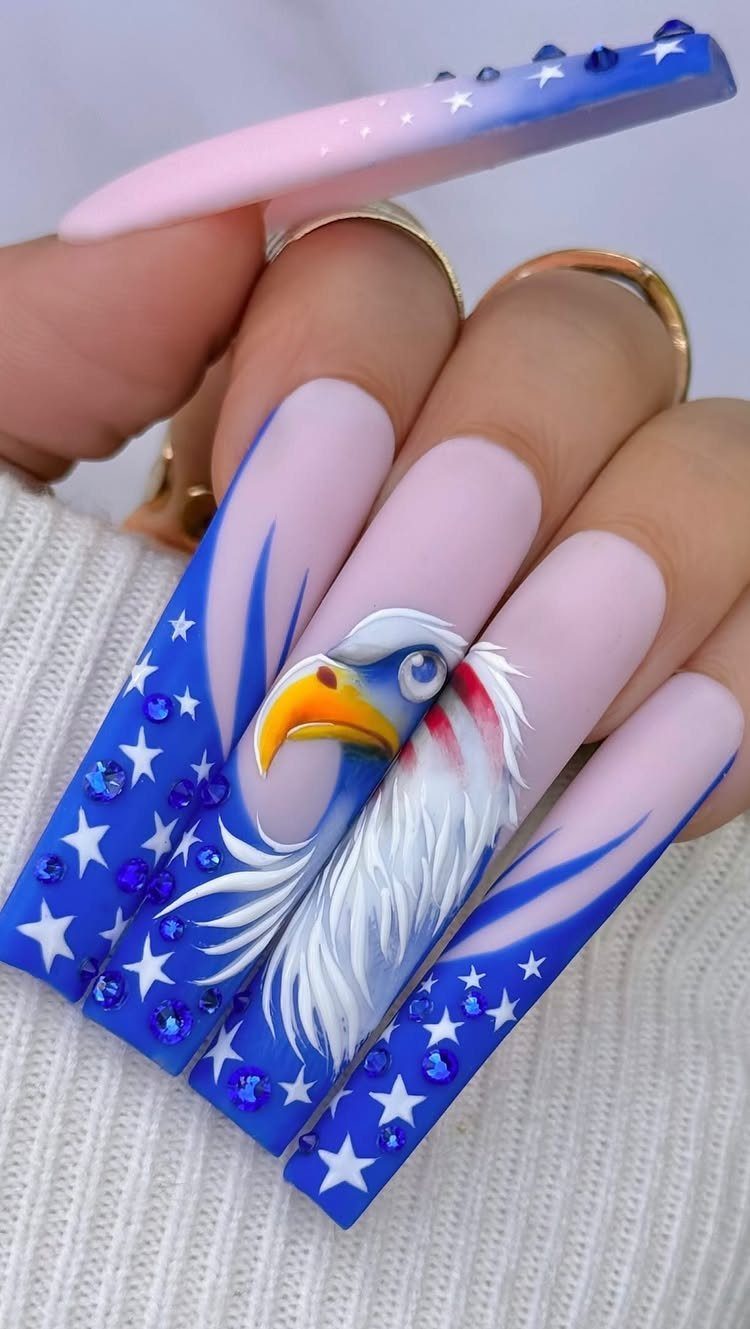
Long coffin nails give the bird room, but the detail in the feathers and eye needs a very fine brush and a steady hand.
If that feels like too much, ask a nail artist for it on one accent nail. Surround it with white stars and a few blue rhinestones, and keep the other nails simple so the eagle stays the focus.
9. Blue Gingham and Strawberry Nails
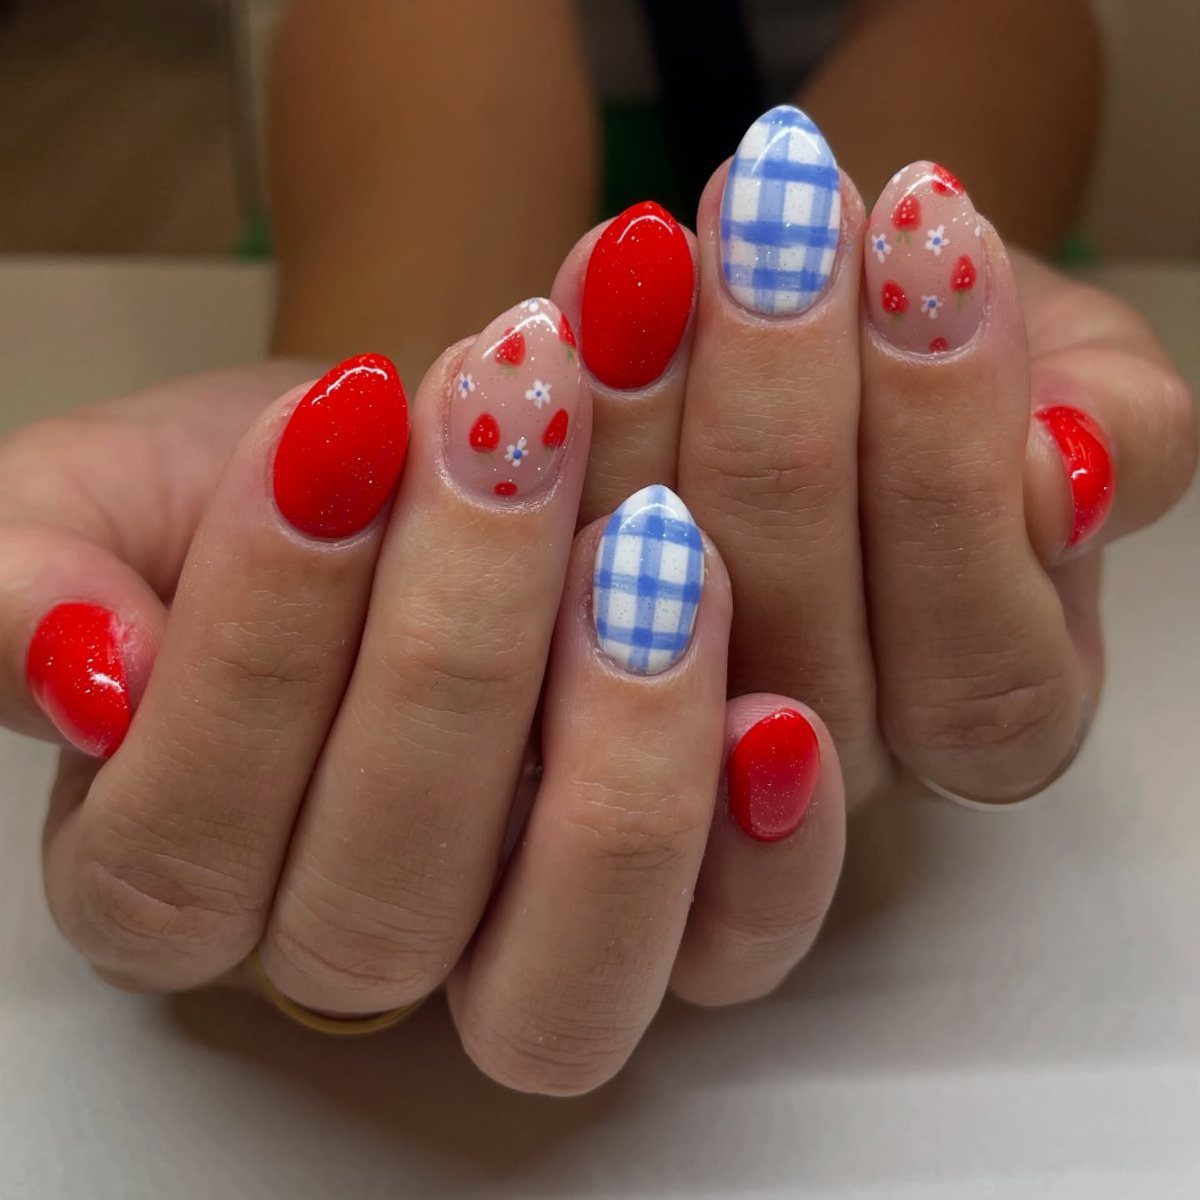
Blue gingham with red glitter and tiny strawberries reads as a picnic basket, and it is my pick for anyone who wants something sweeter than flag colors.
Paint the gingham the same way as any check: wide stripes in one direction, dry, then cross them.
Use blue on white here. Dot the strawberries on with a fine brush in red, add the seeds last, and keep them to a nail or two.
Red glitter polish on the rest ties the set together without extra work.
10. Patriotic Swirl Nails
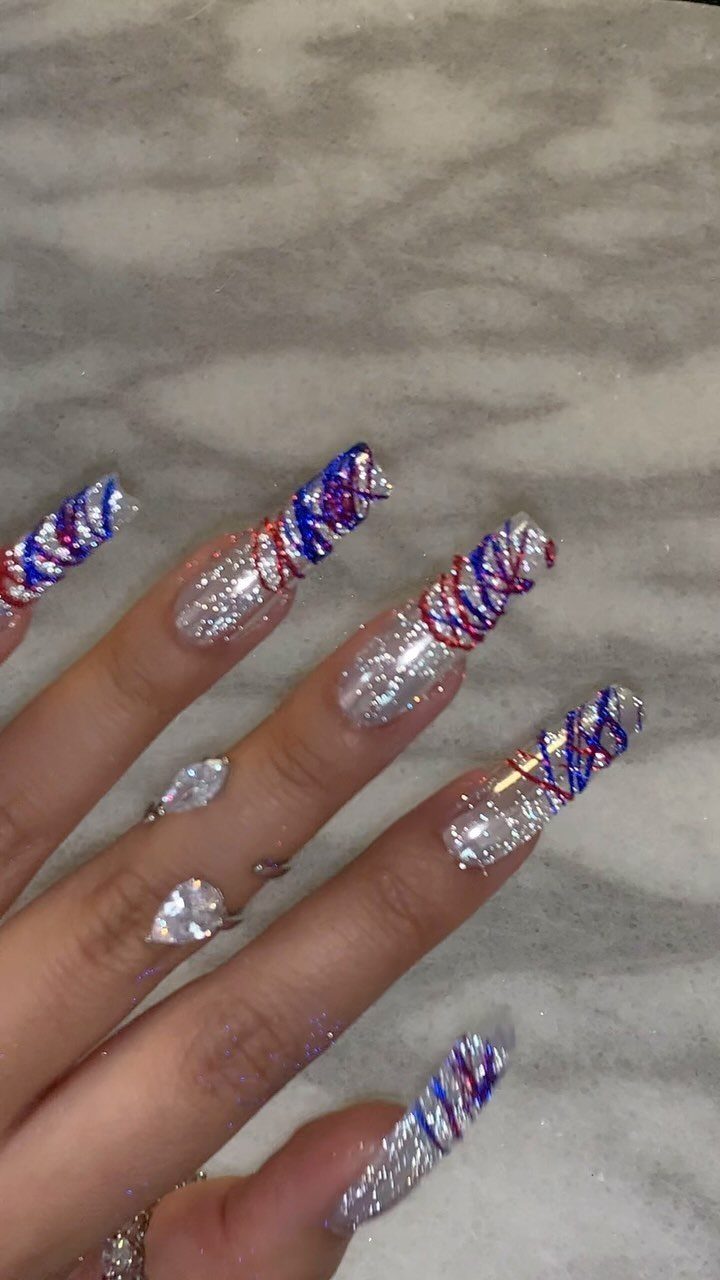
Swirls in red, white, and blue over silver glitter give long coffin nails a lot of movement. The raised, 3D look comes from layering the lines, so each color needs to dry before the next goes on.
Start with a silver glitter or gradient base. Pull the swirls with a thin brush, and keep them loose; wobbly curves look better than tight ones.
Seal with a thick top coat to smooth the ridges, or leave the swirl lines raised if you like the texture.
11. Red, White, and Blue French Tips
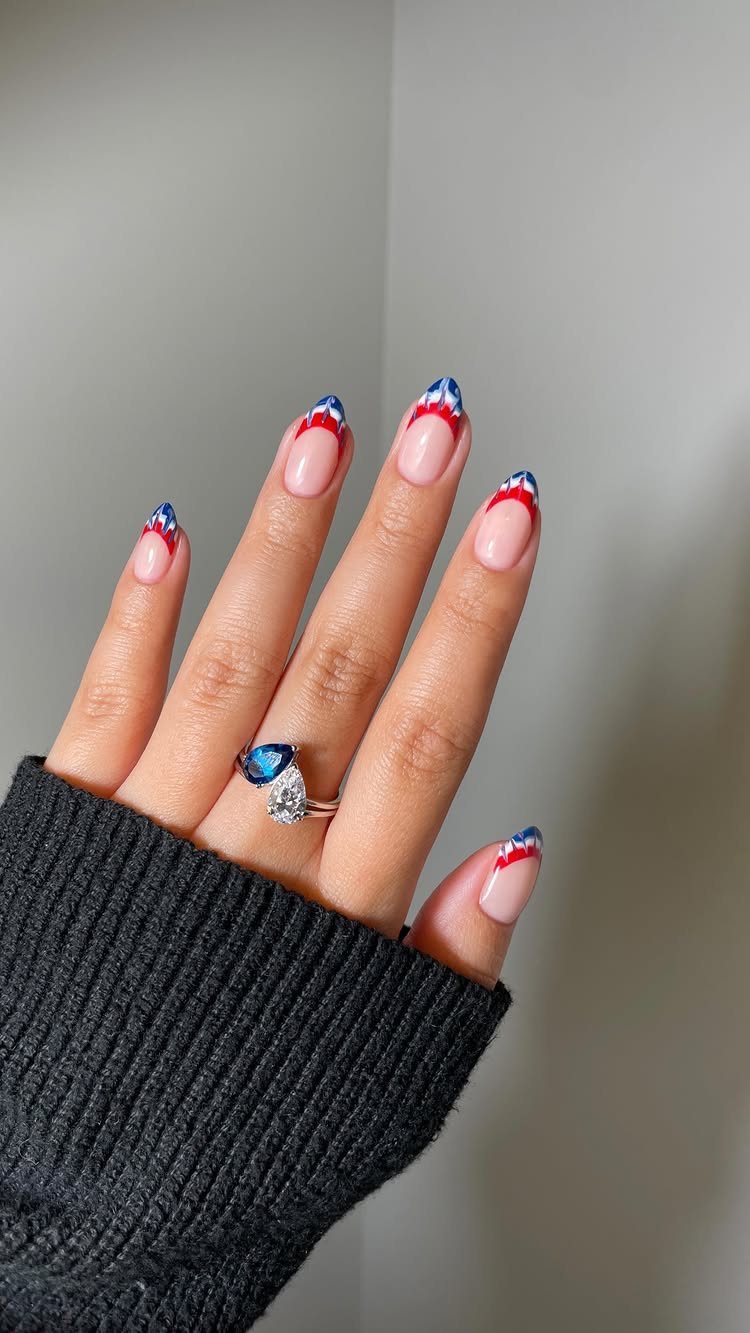
Layered tips in red, white, and blue turn a classic French manicure into a flag-colored one, and almond nails show off the curve well.
Stack the colors as thin bands at the tip, one on top of the next. Thin tape or a striping brush keeps each band even, and a narrow band reads better than a wide one on a small nail.
This is among the easiest looks to wear to work, since the base stays clean and the color stays at the edge.
12. Blue Polka Dot Bow Nails
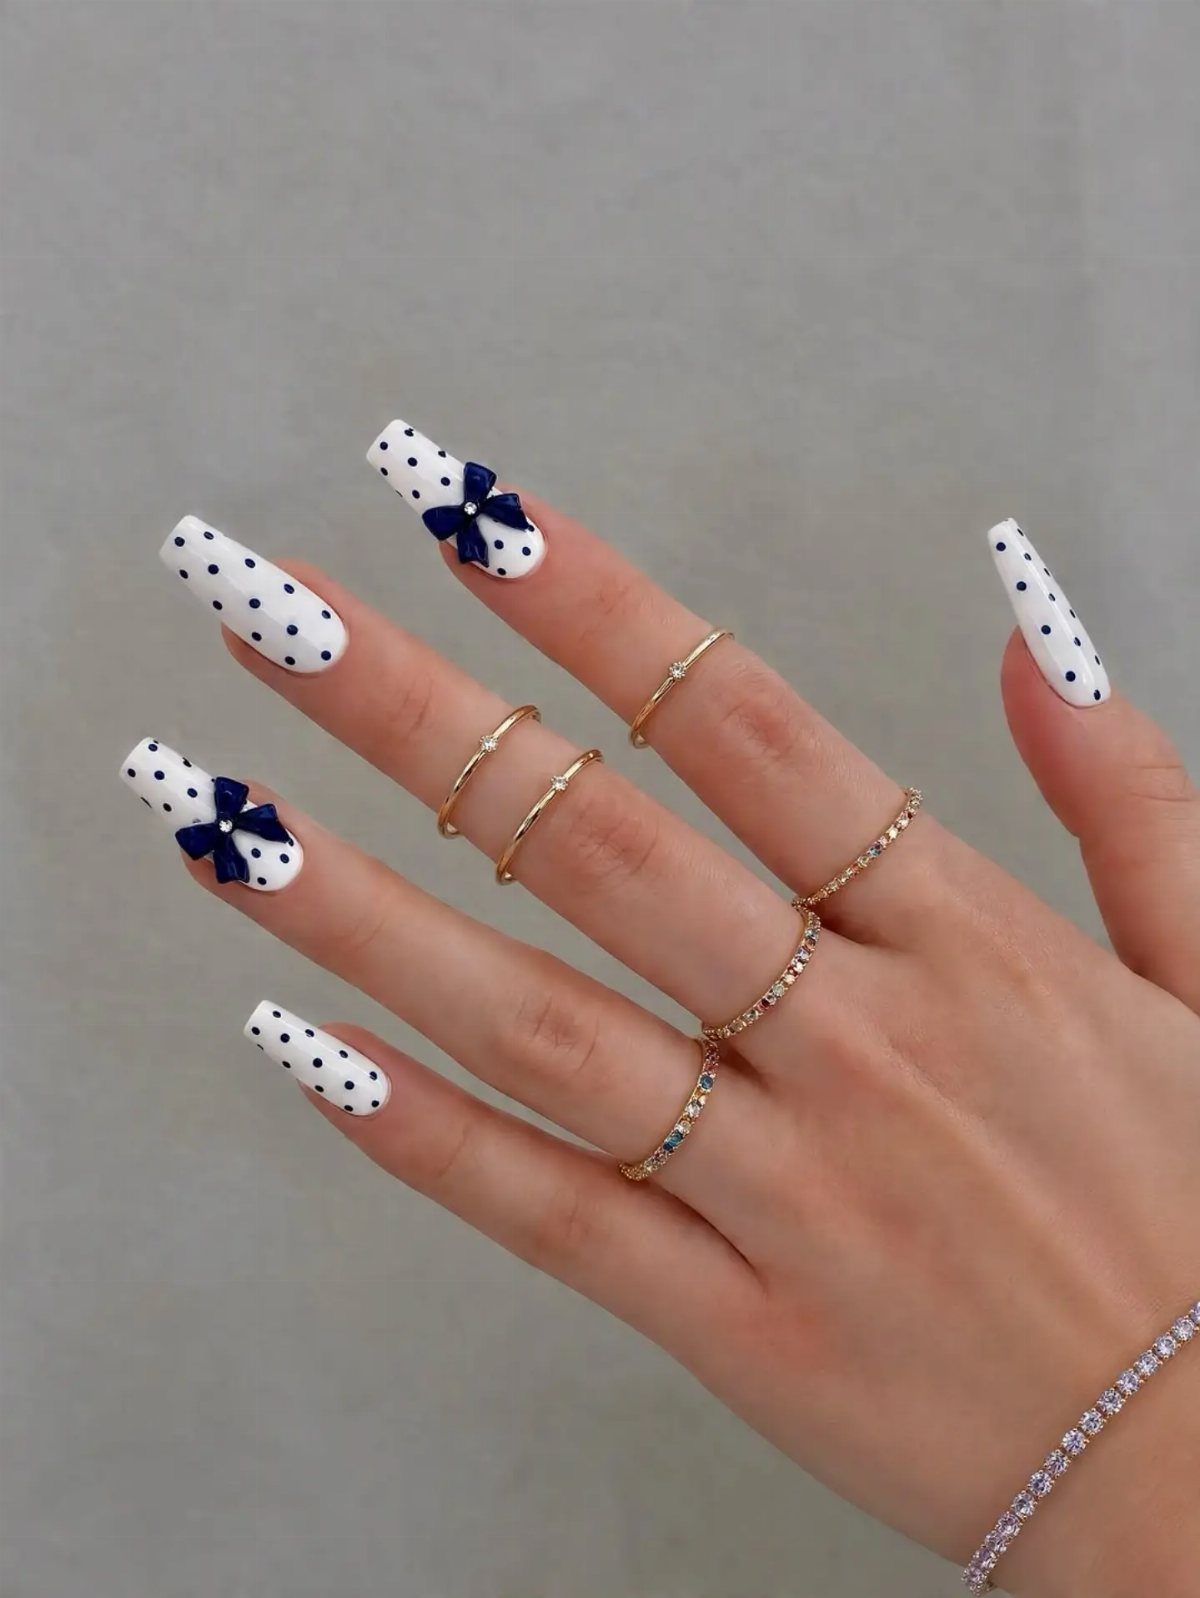
Royal blue polka dots on white have a retro feel, and the small bows give it a sweet finish. White coffin nails make a clean field for both.
Dot the blue with a dotting tool, spacing them evenly, and let them dry.
Bows are easier as a small decal or a hand-painted pair of loops with a center dot; I would put them on an accent nail or two so the set does not get crowded.
Gold rings make a good match.
13. Red Cherry Accent Nails
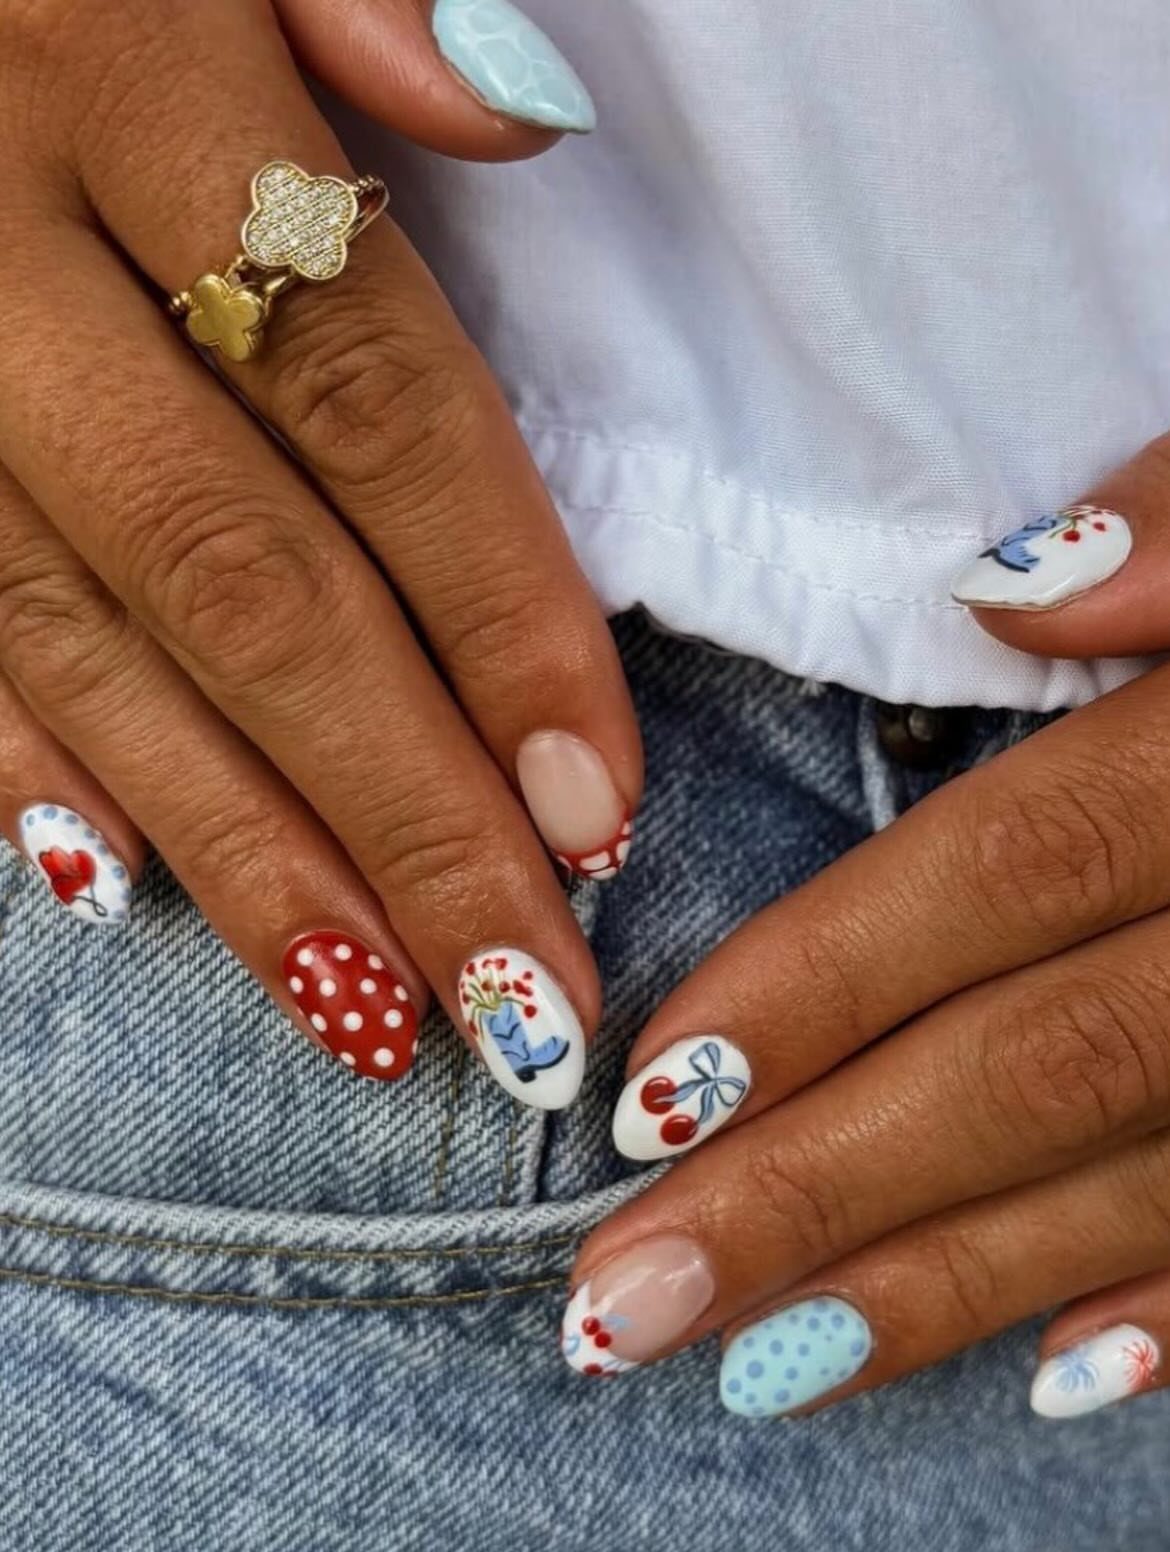
Cherries are the cutest accent on the page, and polka dots keep them from feeling like a fruit stand. Two or three cherry nails are plenty; the rest can carry dots in red, white, or blue.
Paint each cherry as a red dot with a dotting tool, then add a thin green stem with a fine brush. A tiny white highlight on each one makes it look round.
Gold rings suit this set.
14. Silver Starburst Nails
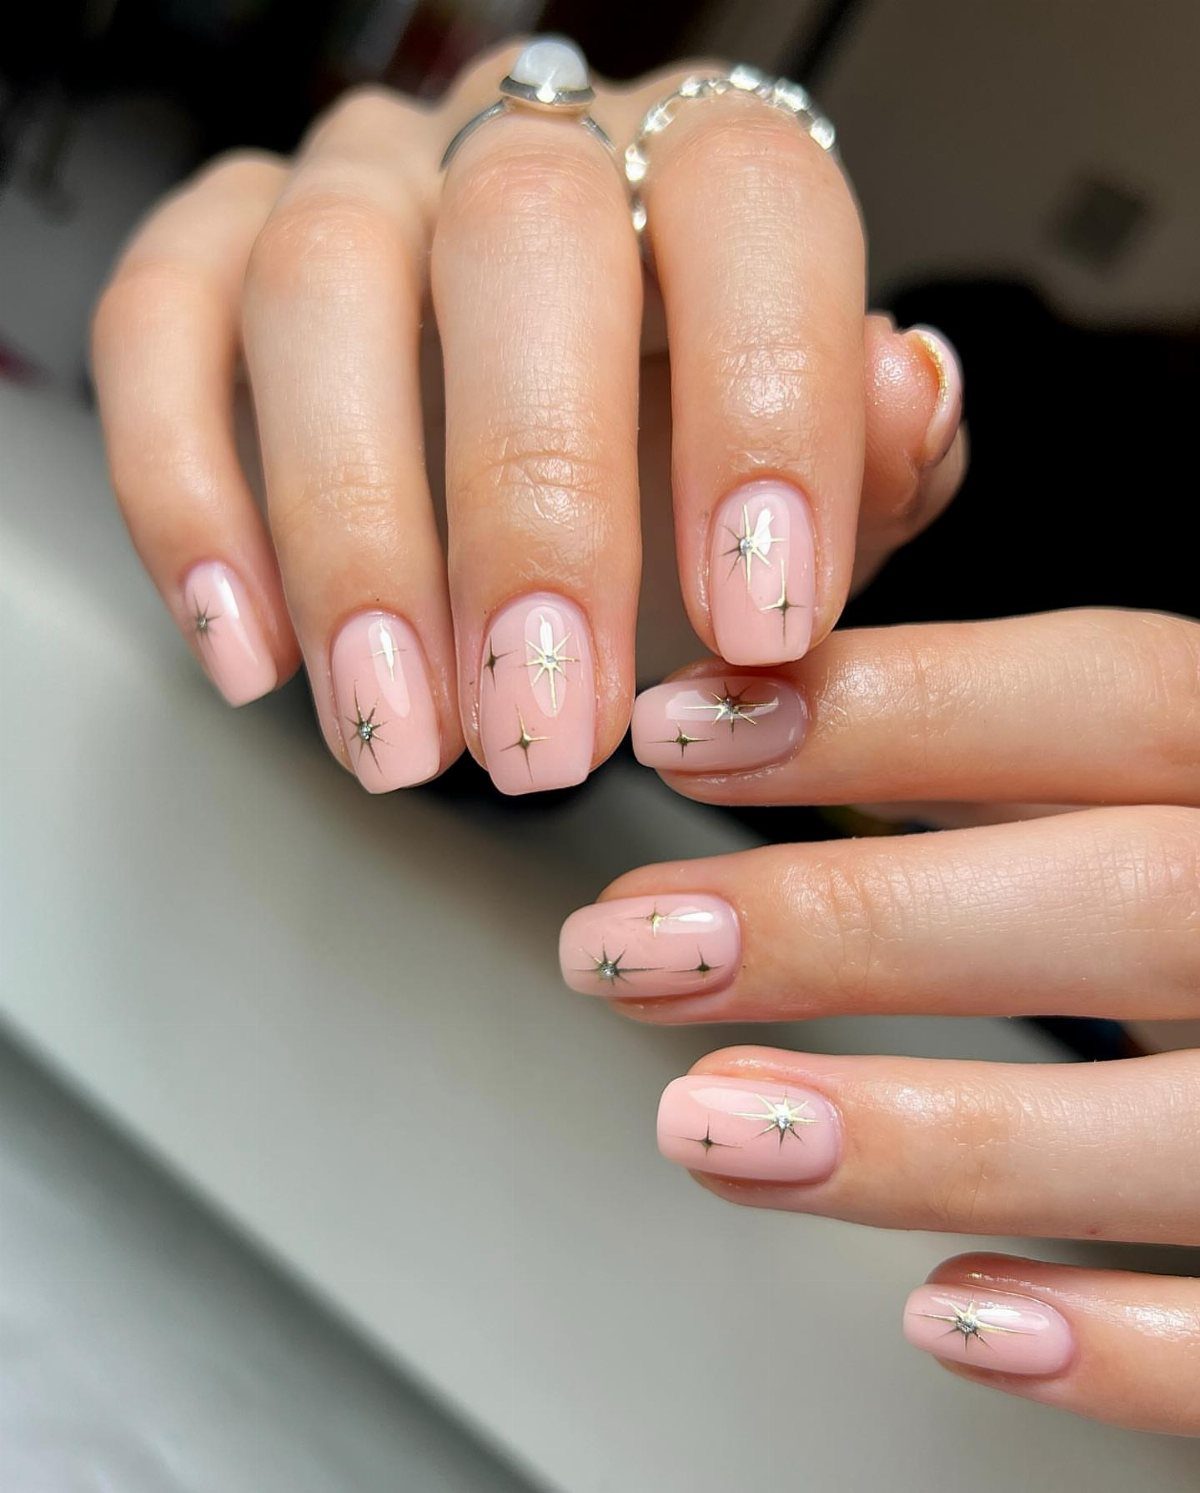
Silver starbursts on light pink are the gentlest holiday nails here. The pink does the quiet work, and the silver catches light only when the hand moves.
Use a fine brush or a striping brush to pull thin lines outward from a single point, with the longest lines crossing in the middle. Keep the bursts small and skip a few nails so the set stays airy.
Silver rings echo the metallic and finish the look.
15. Red Script and Star Accents
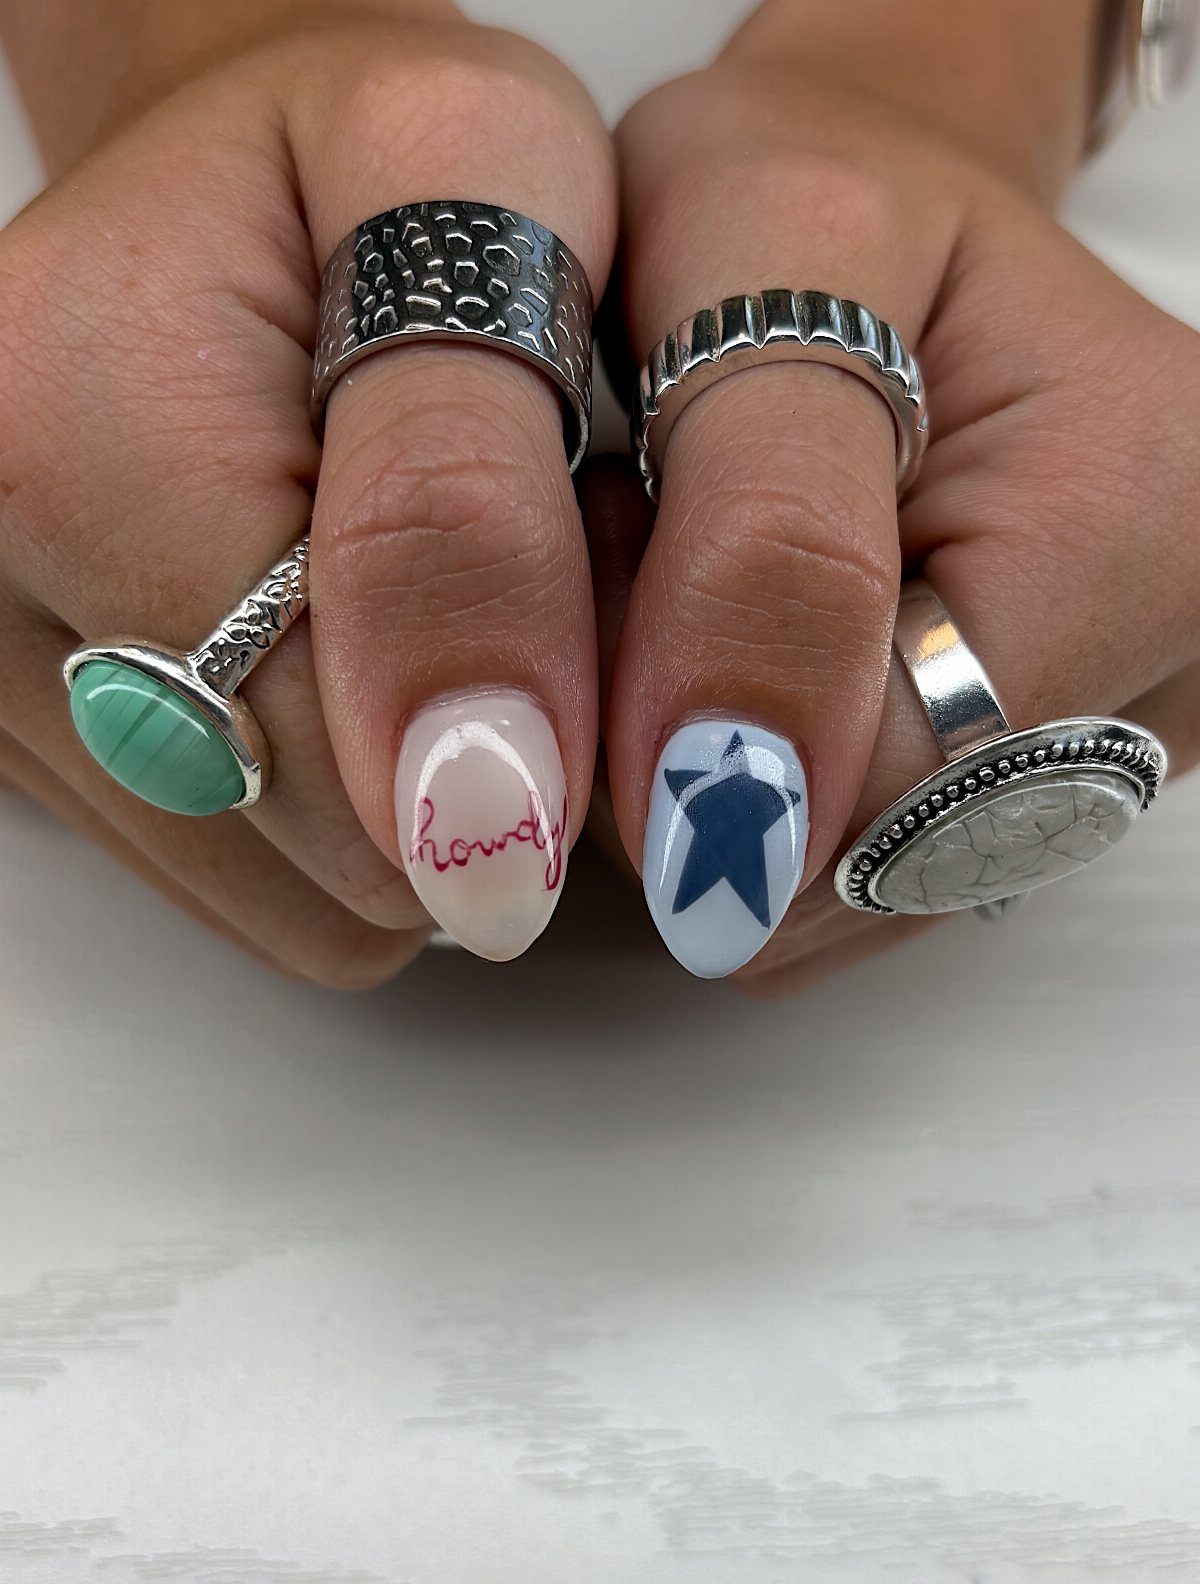
A single word in red cursive does more than a full pattern, and it reads as personal rather than themed. Pair it with one blue star on another nail and leave the rest neutral.
Practice the letters on scrap paper before touching a nail, since a thin liner brush wobbles fast. If the writing feels risky, a nail artist can add it to one nail, or a script decal does the same job.
Pick a short word. Fewer letters means fewer places for the line to wobble.
16. Red and Blue Floral Patterns
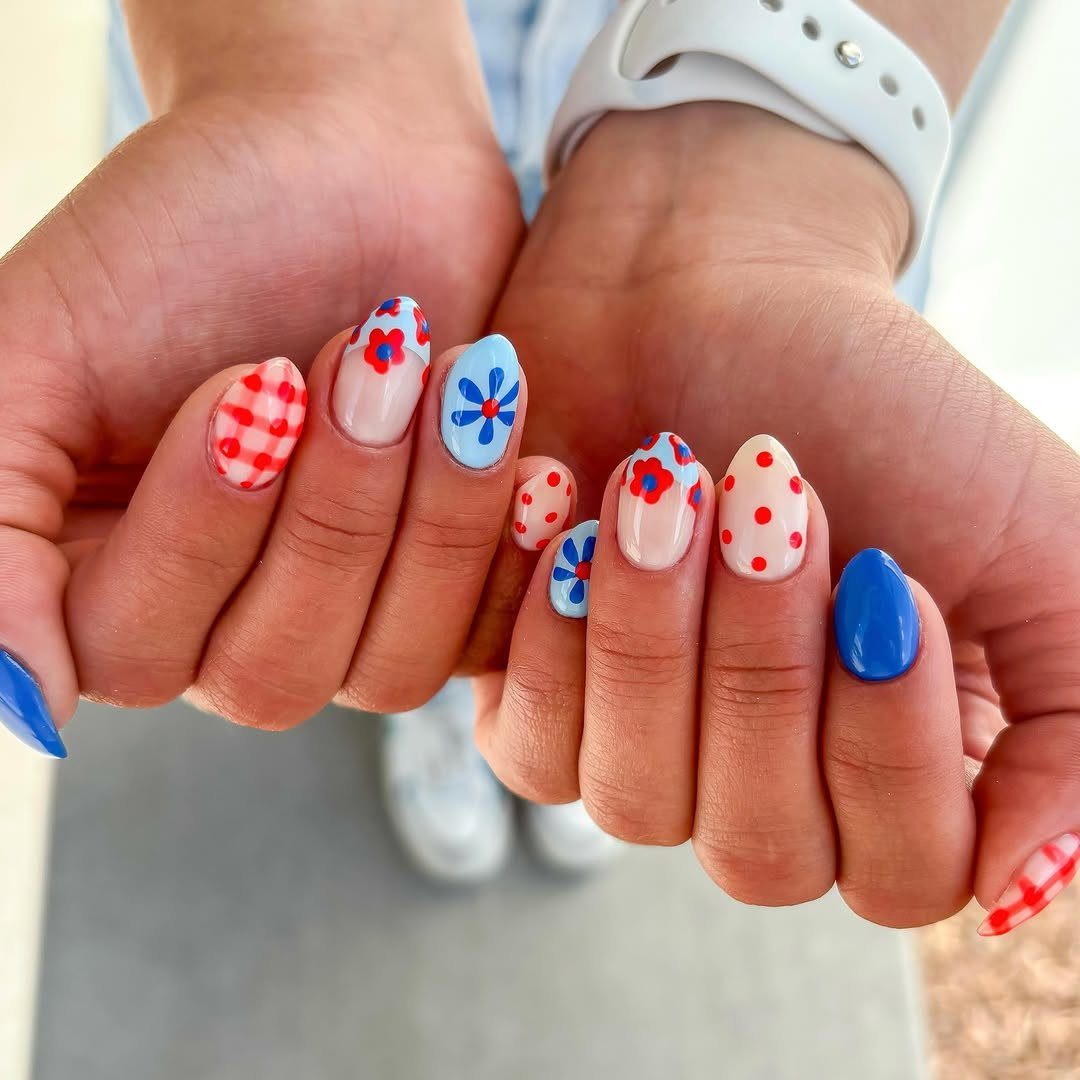
Red and blue florals work best when gingham and polka dots sit beside them, since the checks and dots keep the flowers from taking over.
I would give flowers to two or three nails and fill the rest with gingham or dots. Make the petals with a dotting tool in a ring around a center dot, then dry fully before adding any outline.
Keep jewelry minimal; a simple white watch is enough.
17. Patriotic Glitter Florals
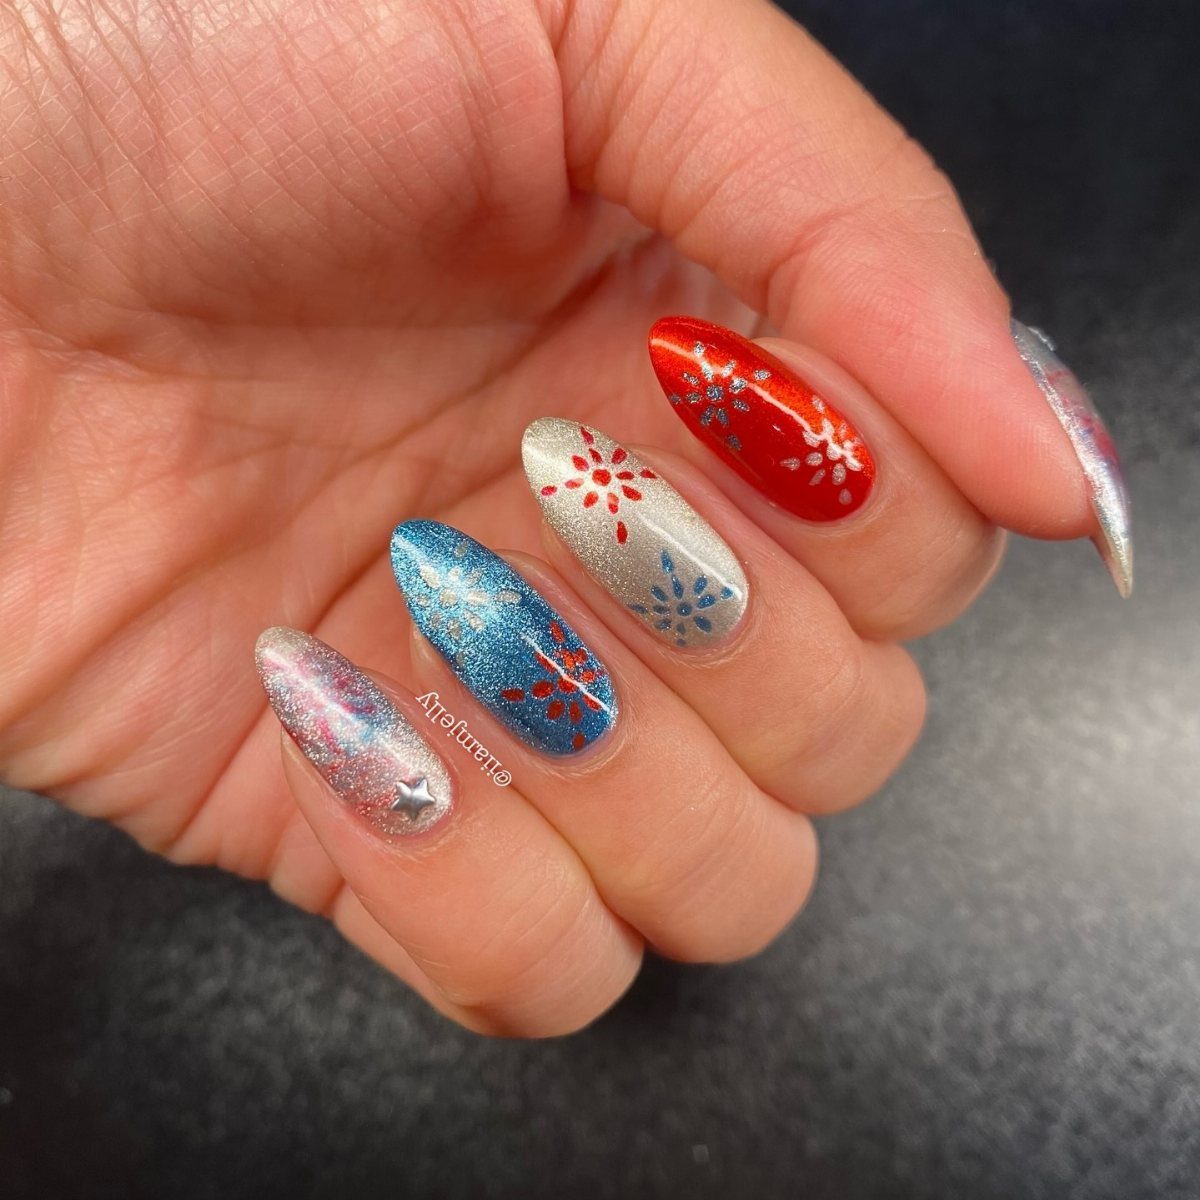
Glitter on every nail is a bolder move than most Fourth of July sets, and the star-flowers give it a point of focus. Long almond nails hold the sparkle well.
Apply the red, white, and blue glitter polish in thin coats; thick ones go clumpy and uneven.
Paint the star-flower on top once the glitter is dry, using a dotting tool for the petals and a fine brush for the points.
A glossy top coat smooths the gritty texture, which I would not skip.
18. Blue Marble Nails
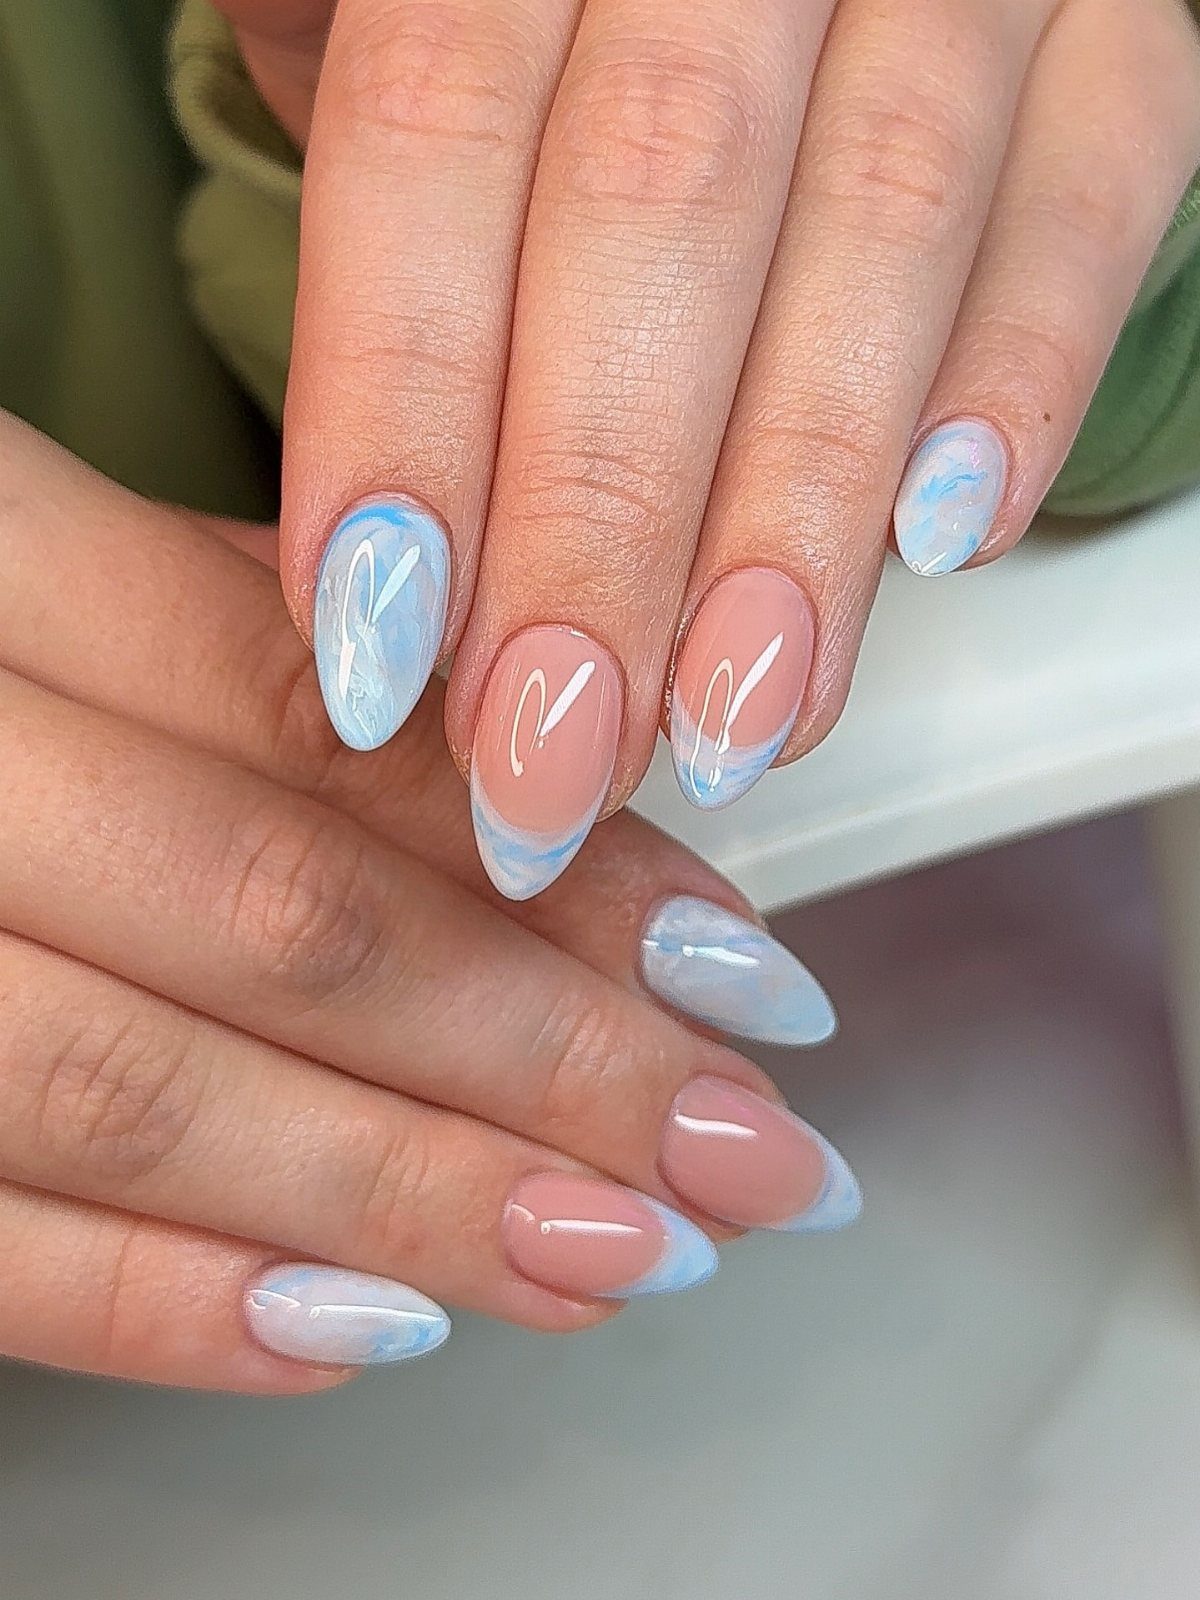
Blue and white marble is the one design here that never reads as a theme, so it suits a patriotic hint without a flag. Almond nails with white French tips keep it crisp.
Drop blue and white polish onto a wet base coat, then drag a thin brush through to swirl the colors together. Stop early; overworking turns marble into mud.
Add the French tip last with a striping brush, then seal it with a top coat.
Tips for a Chic Look
Softer shades do most of the work in a chic set. Think milky white, sheer pink, or a pale wash of blue, with the holiday showing up in one small detail.
A sheer, milky base keeps a manicure soft and current. A thin dusting of chrome powder on top is plenty; it should flash only when your hand moves.
Sheer finishes read modern because the natural nail shows through. Build them in thin layers and stop when the color looks like a hint, not a coat.
Keep star details minimal: one tiny star, or none at all. Restraint is what makes the set look expensive.
Nail Care Advice
Start every manicure with a base coat. It protects the nail from staining, which matters most with deep reds and blues, and it gives the color something to grip.
Apply polish in thin coats. Thin layers cover more evenly and are less likely to smudge or bubble than one thick one.
Letting each coat of polish dry fully before you add the next is the step people rush, and it is the one that decides whether the finish looks smooth or dented.
Clean up as you go. Dip a small brush in nail polish remover and trace along the skin to fix any stray polish.
DIY Techniques
Most of these designs need only basic tools: a dotting tool and a few nail brushes. Good-quality versions make a real difference in precision and ease, so spend your money there rather than on extra polish colors.
Practice before you paint. Practice your stripes and stars on scrap paper or a spare press-on tip first, and start on your nails once the lines stay straight.
Patience matters as much as the tools.
Practice is what separates a wobbly first try from a clean second one.