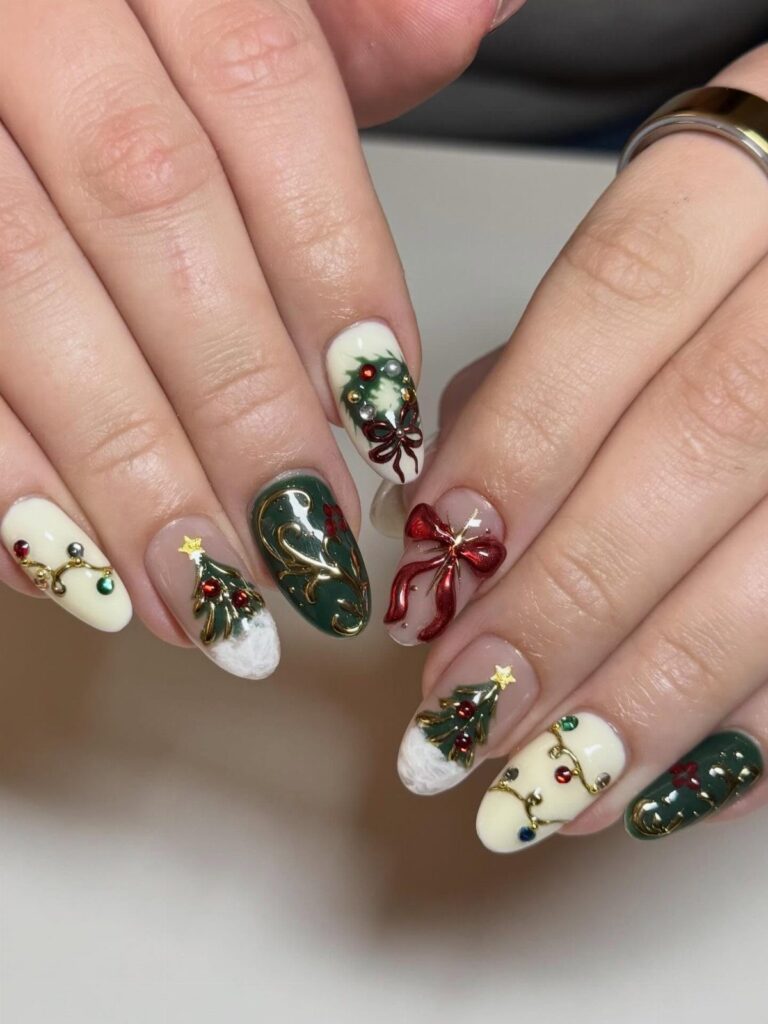
Your nail length and how steady your hand is decide which of these sets is yours.
The list runs from glittery French tips, the easiest option for a beginner, to Grinch faces that need a fine brush and patience, with plaid, wreaths and gingerbread in between.
Short nails suit French tips and stars, while long almond or coffin shapes give wreaths, Grinch faces and Santa hats the room to read. A mistake on an accent nail means repainting 1 finger, not 10.
1. Candy Cane Nails
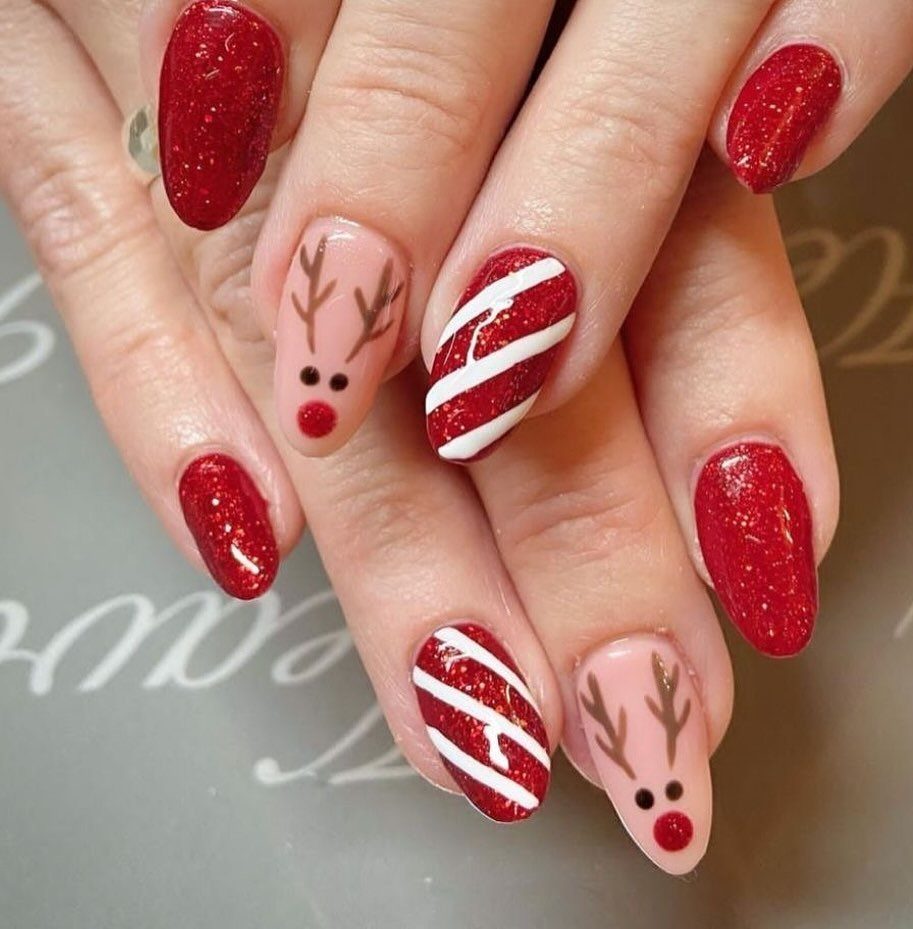
Red glitter, nude, and thin diagonal stripes can share one almond nail set, and that mix is what keeps candy cane nails from looking like a single-note costume.
A glitter ring finger with striped nails around it gives you contrast without much effort.
Stripes are the hard part.
A thin nail art brush or a striping tape strip keeps the lines even, and a clear top coat smooths the ridges. For summer, I like the reindeer faces on one or two accent nails only.
2. Snowflake Nails
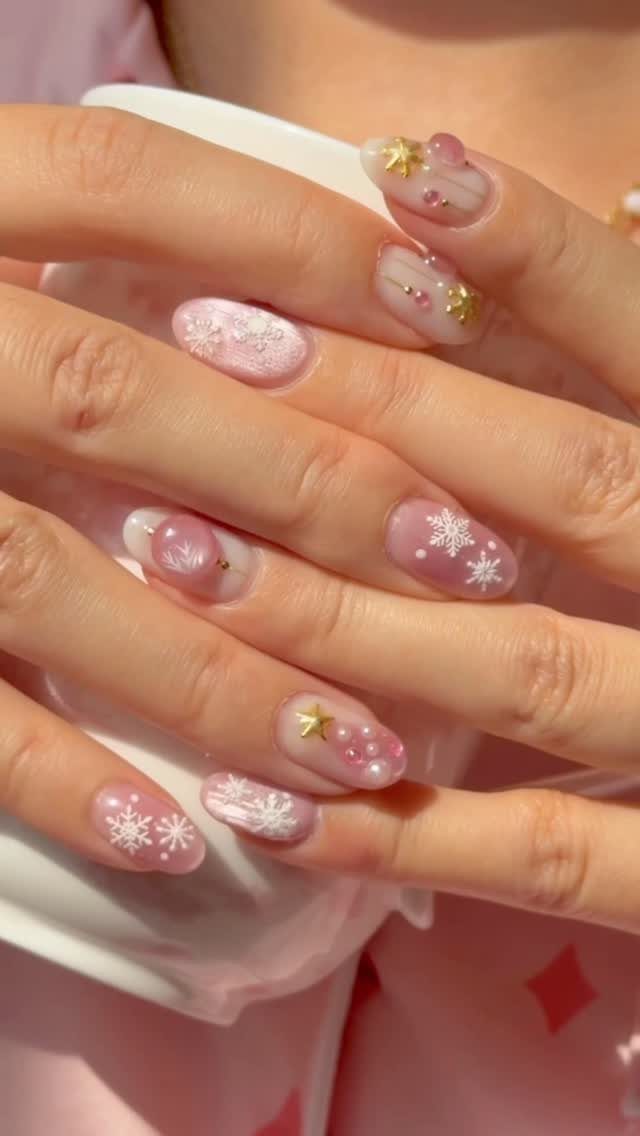
Snowflakes read as delicate on soft pink and nude, and that is the version I would pick for a July party.
White snowflakes stay crisp against a pale base, and a few gold stars and pearls add dimension without crowding the nail.
Keep the snowflakes to 1 or 2 nails per hand. Pearls are best placed near the cuticle or the center of an accent nail, and sealed in with a top coat so they stay put.
3. Gold Stars
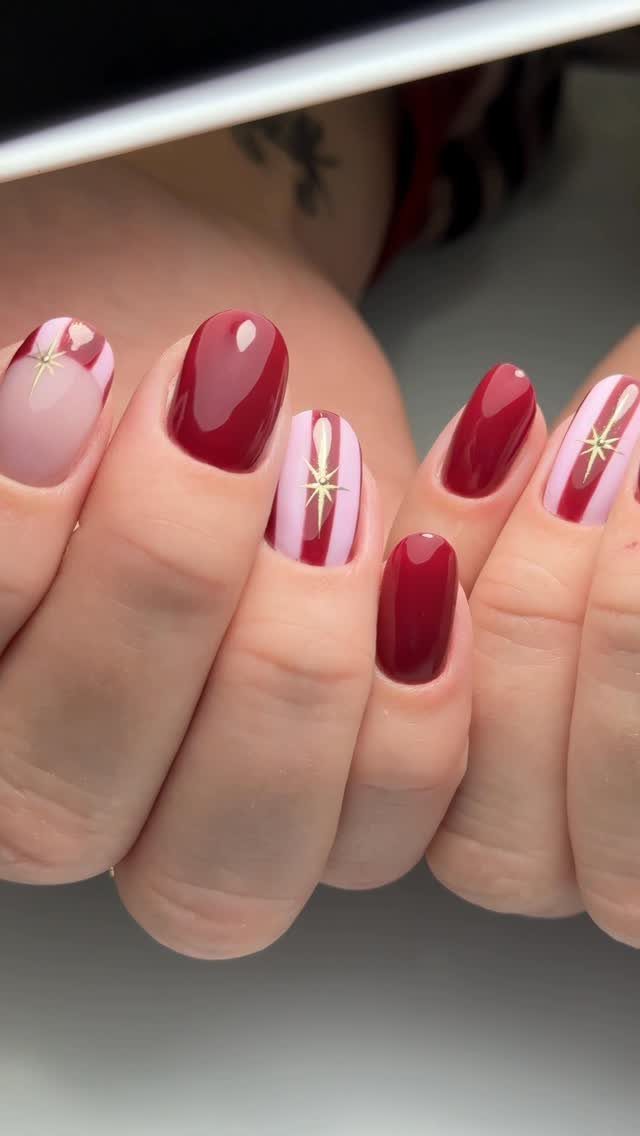
Gold stars suit anyone who wants Christmas on their hands without a full red-and-green scheme. Deep red and pink stripes set the base, and a few tiny gold stars do the festive work.
Scatter the stars, because 3 or 4 per nail looks deliberate while a crowded set looks messy.
Pick them up with a dotting tool or tweezers, then seal them under a top coat. Nails with no stars at all keep the set quiet.
4. Gingerbread Nails
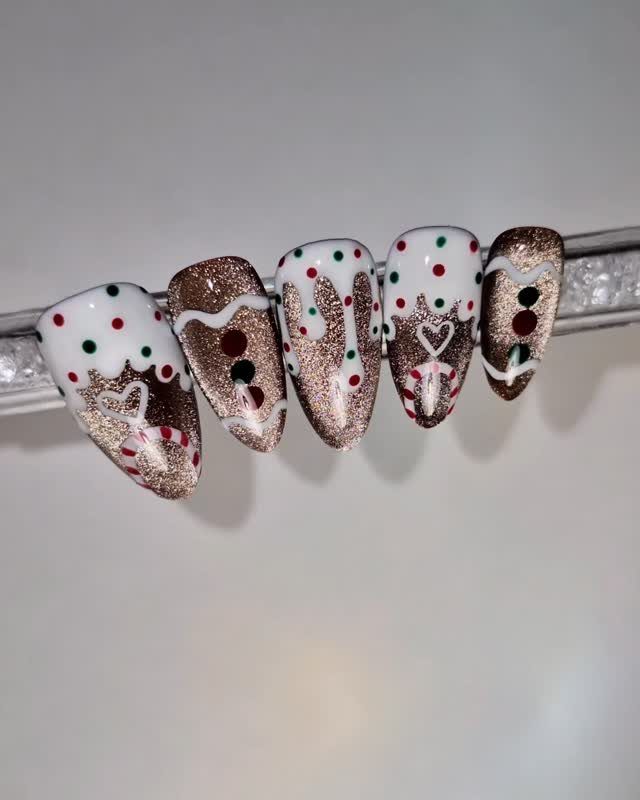
Brown glitter is the base that makes gingerbread nails work: it reads as baked cookie, and white icing swirls on top do the rest.
Small red and green dots finish the set like piped icing, with a heart or 2 scattered across the design.
Draw the icing with a thin brush or a dotting tool, and keep the swirls loose, since perfectly even lines look less like frosting. I would pick almond-shaped nails for the room they give the designs.
5. Glittery French Tips
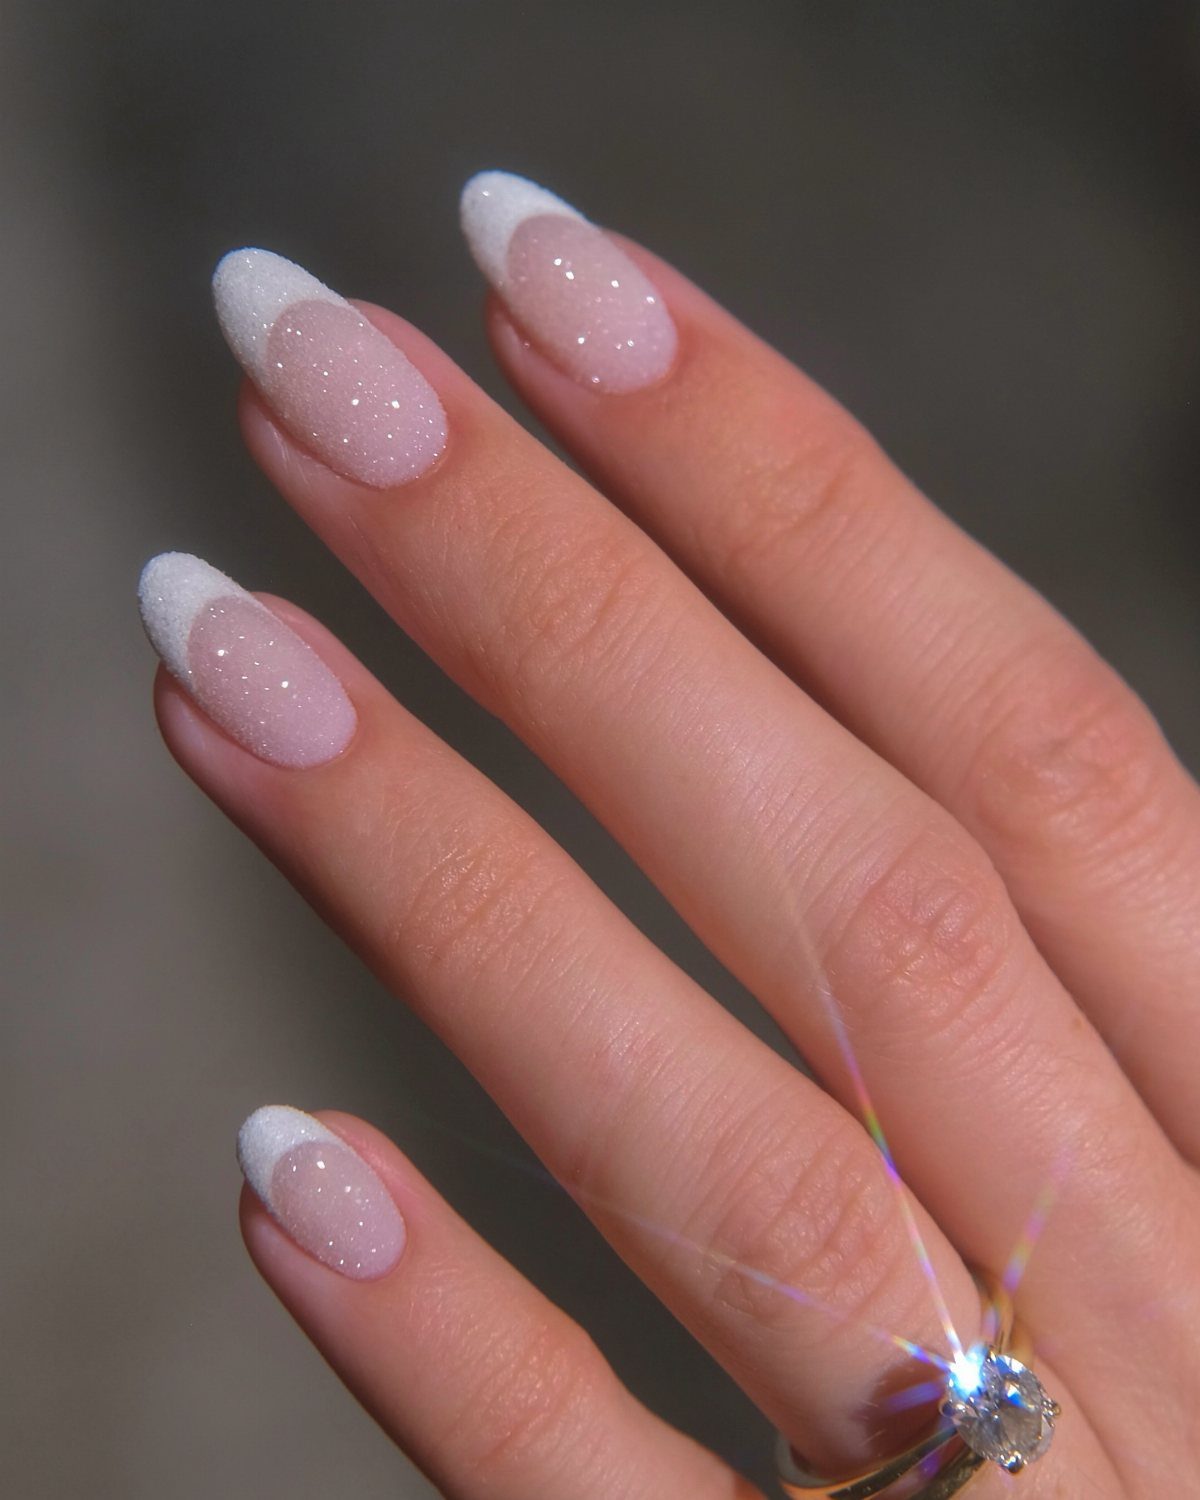
Pink glitter under a crisp white tip gives you the classic French manicure with a festive shimmer. It works on oval nails, and it looks polished enough to wear with anything in your summer closet.
Paint the white tip first, then sweep glitter polish over the rest of the nail.
Sheer pink glitter keeps the French shape clear. This is the easiest set on the list for a beginner, and I would choose it for that alone.
6. Tinsel Tips
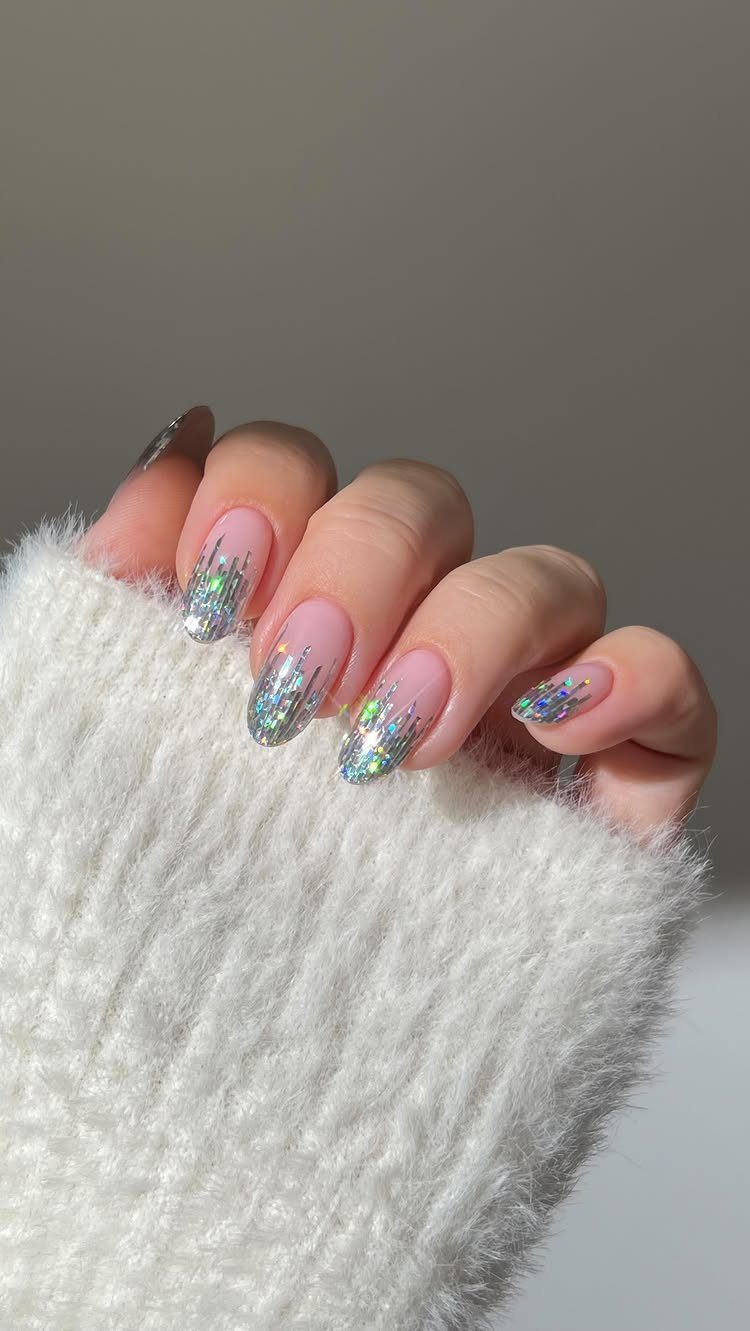
Holographic glitter on the tips catches light like a strand of tinsel, and it needs nothing else to look festive. Almond nails give the glitter a long, tapered edge to shine along.
Brush glitter polish on the tips only and leave the rest of the nail sheer or bare.
Two thin coats look better than one thick coat. Finish with top coat, since loose glitter feels rough and snags on fabric.
7. Minimalist Christmas Tree Accent Nails
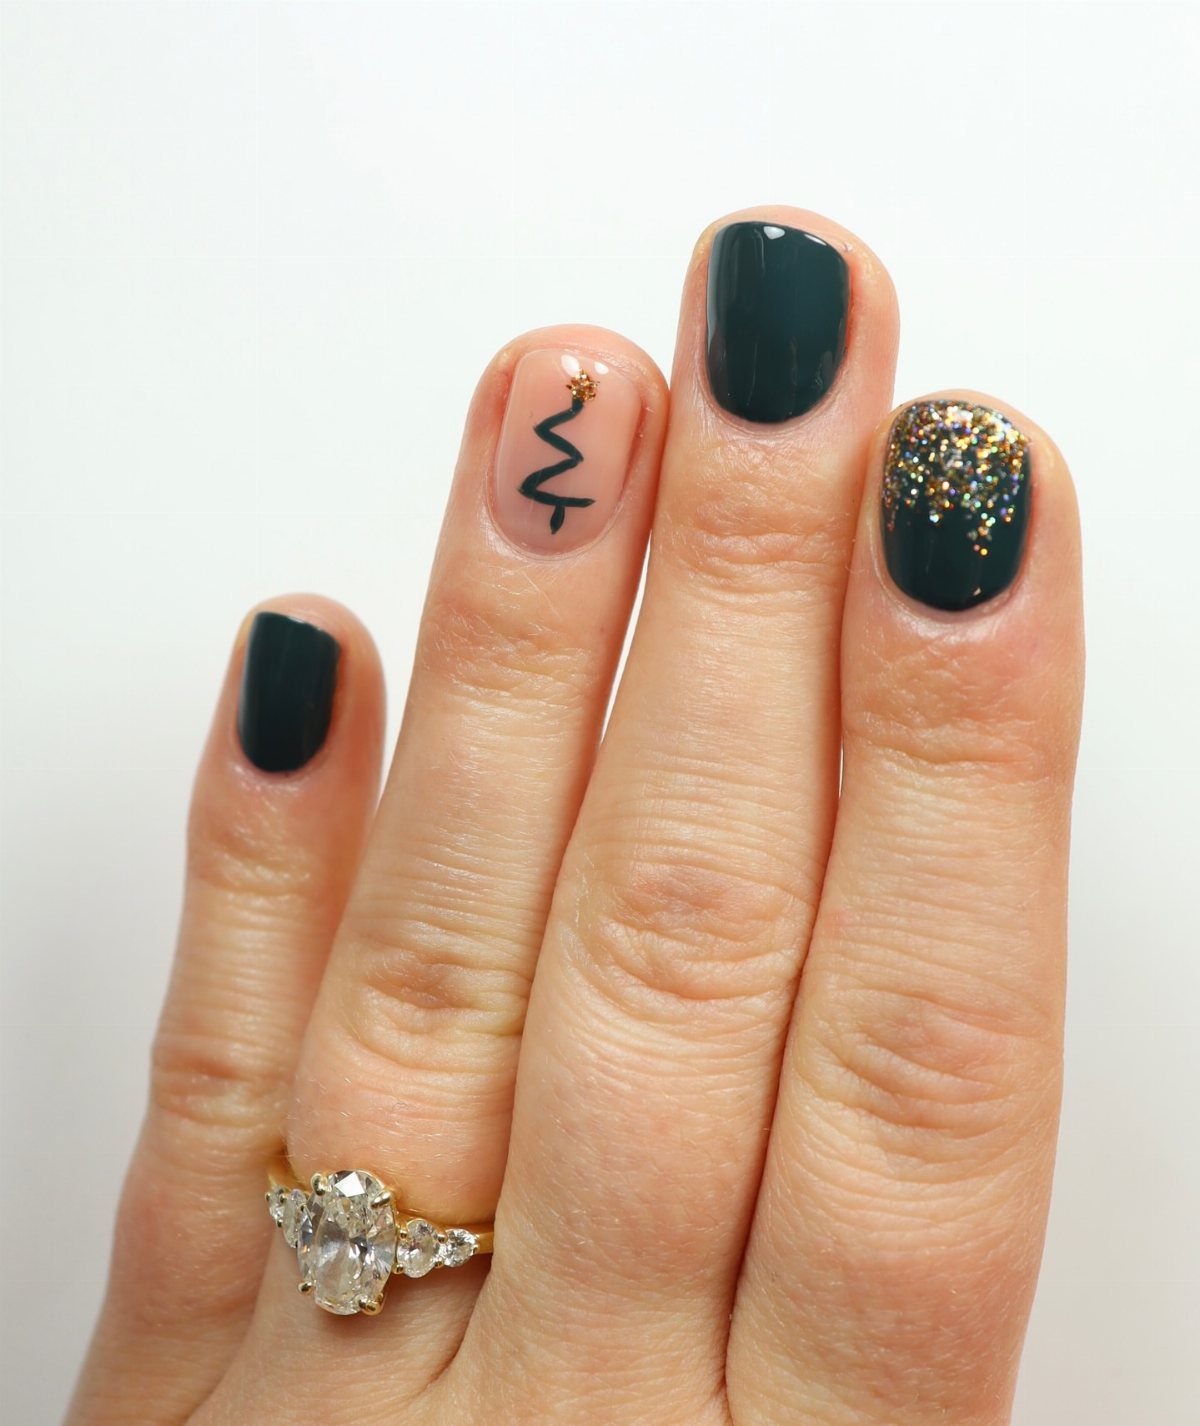
One small black tree on a single accent nail, with dark green and nude on the other nine, is the set I would pick first for wearing past the party; it reads as Christmas without announcing it.
Nothing else competes with it, so it passes in a July office as easily as at a party.
Paint the tree on the nude nail with a thin brush or a fine liner, and keep it simple: a slim triangle of short zigzag branches is enough.
Let the base dry fully first, then seal with top coat so the black line stays crisp.
I would keep the tree to one nail per hand.
8. Santa Hat French Tips
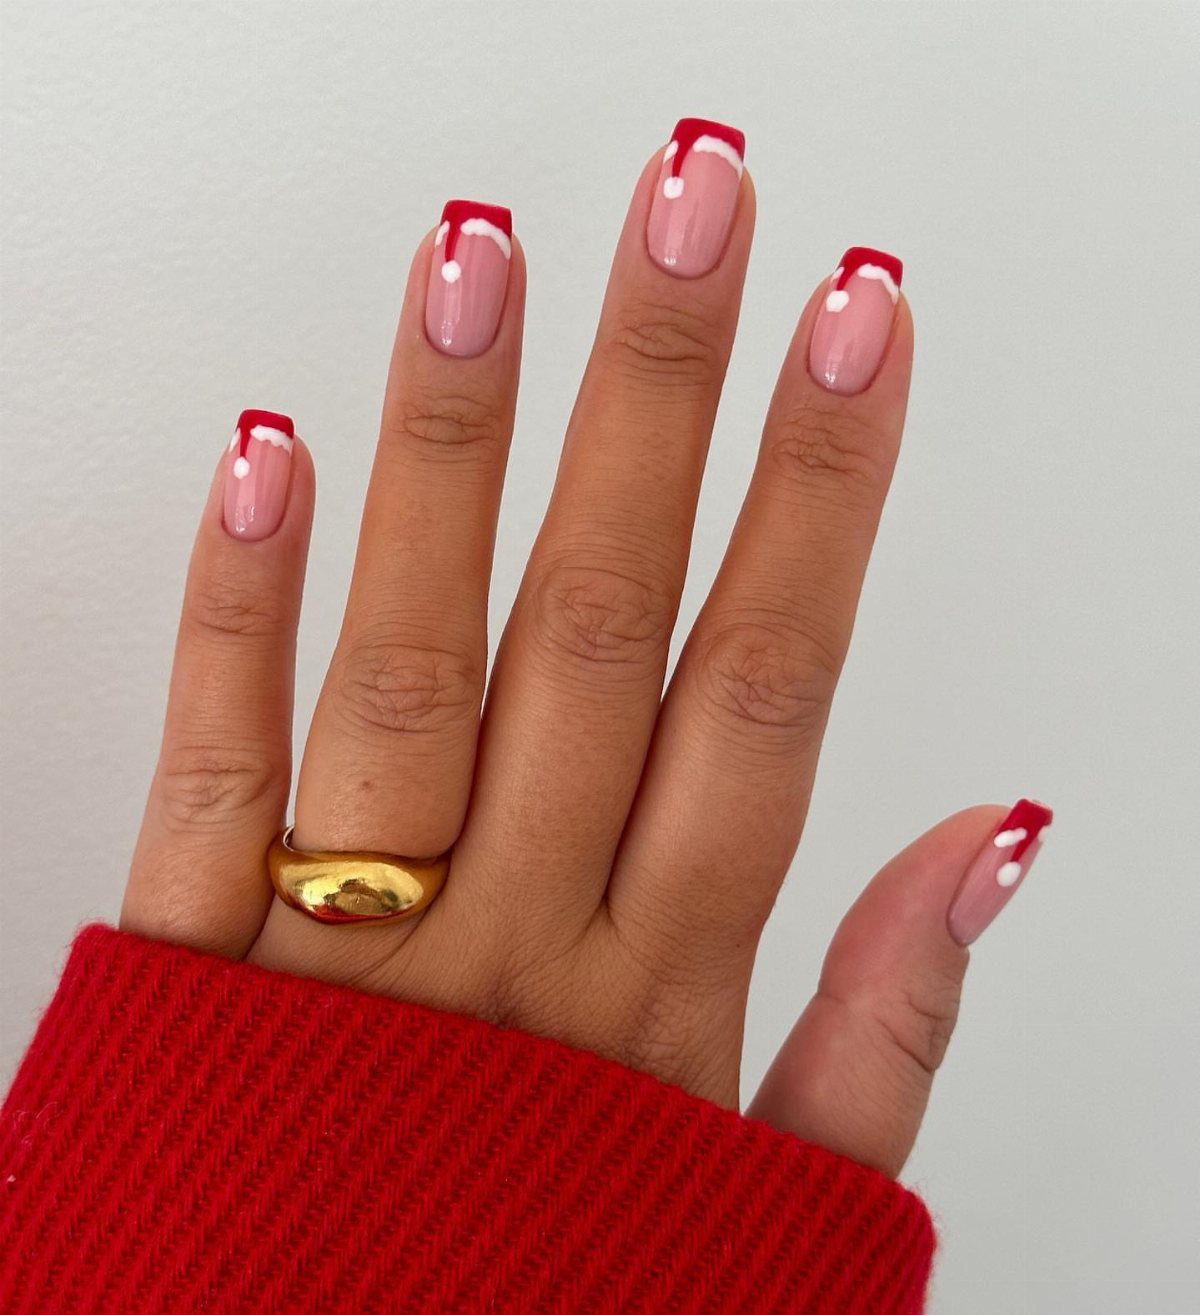
Red tips with a white band and a white pom-pom dot turn an ordinary French manicure into a Santa hat. Long nails give the hat room to read clearly, so this set favors length.
Paint the red tip first, then add the white band along the curve with a thin brush.
Place the pom-pom with a dotting tool, a single dot at the point of the nail. Let each layer dry before the next, and finish with top coat.
Red and white on every nail looks sharp, and it is easy to repeat across all 10.
9. Holly Nails
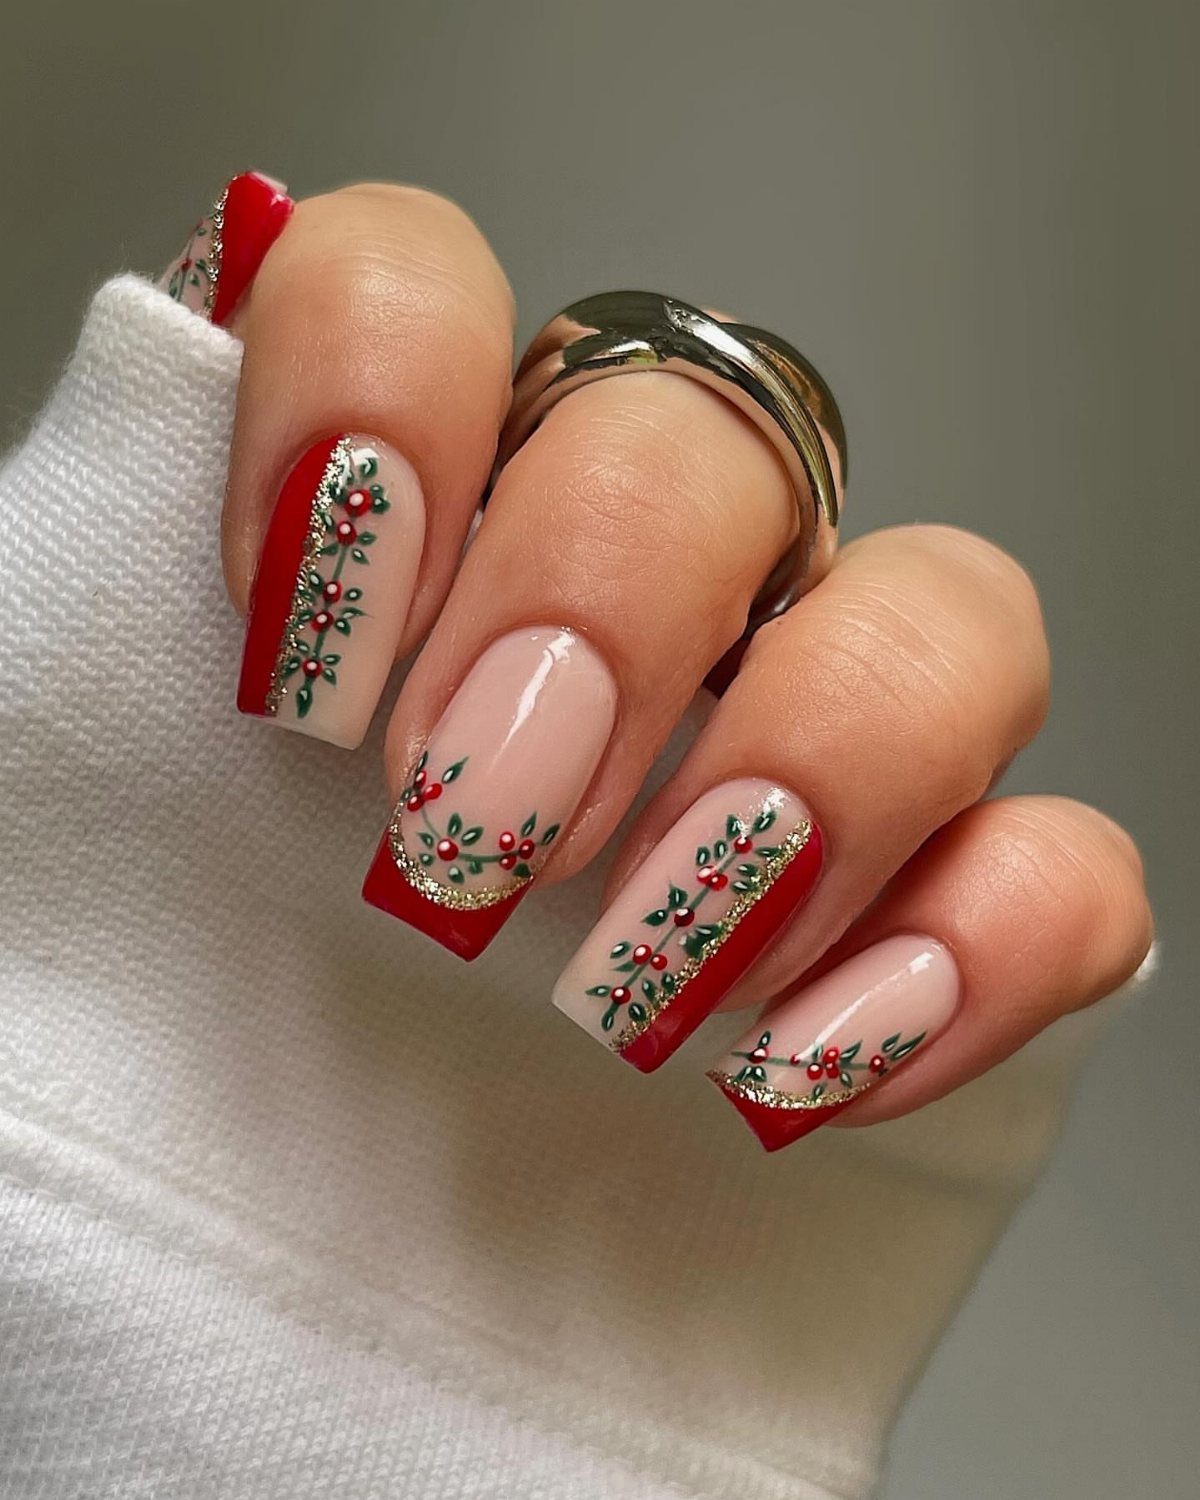
Holly gets red berries and green leaves, but a berry gives you room to shift the palette. Red and nude polish with painted berry clusters keeps the set light enough for summer.
Dot the berries with a dotting tool, then draw the leaves in pairs with a thin brush, pointed at the ends.
Coffin nails give the cluster plenty of space. I would put holly on 2 or 3 nails and leave the others plain red or nude, so the art stays easy to see.
Seal with top coat.
10. Plaid Nails
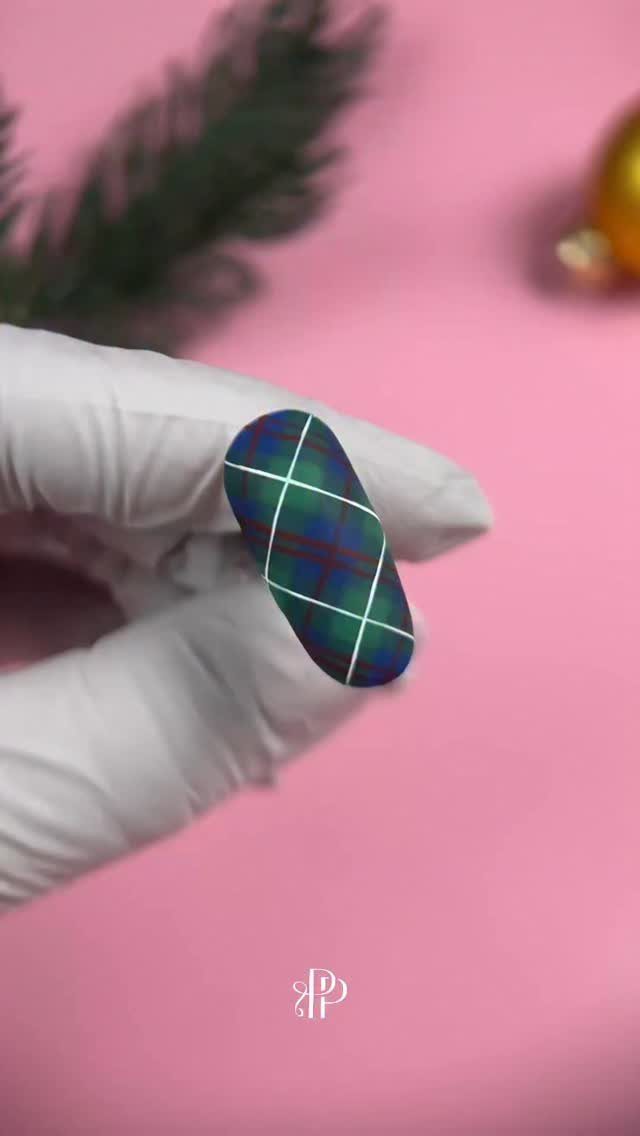
Plaid in green, blue, and white looks cozy even on a hot day, and it is built from nothing but straight lines. Start with a solid base, then lay down wide stripes in one direction and thinner ones across.
Let each color dry before crossing it, or the lines smear into mud. A clear top coat blends the ridges where stripes overlap.
Practicing on a single nail first is smart. Plaid on 1 or 2 nails per hand keeps the set calmer than all 10.
11. Grinchmas Nails
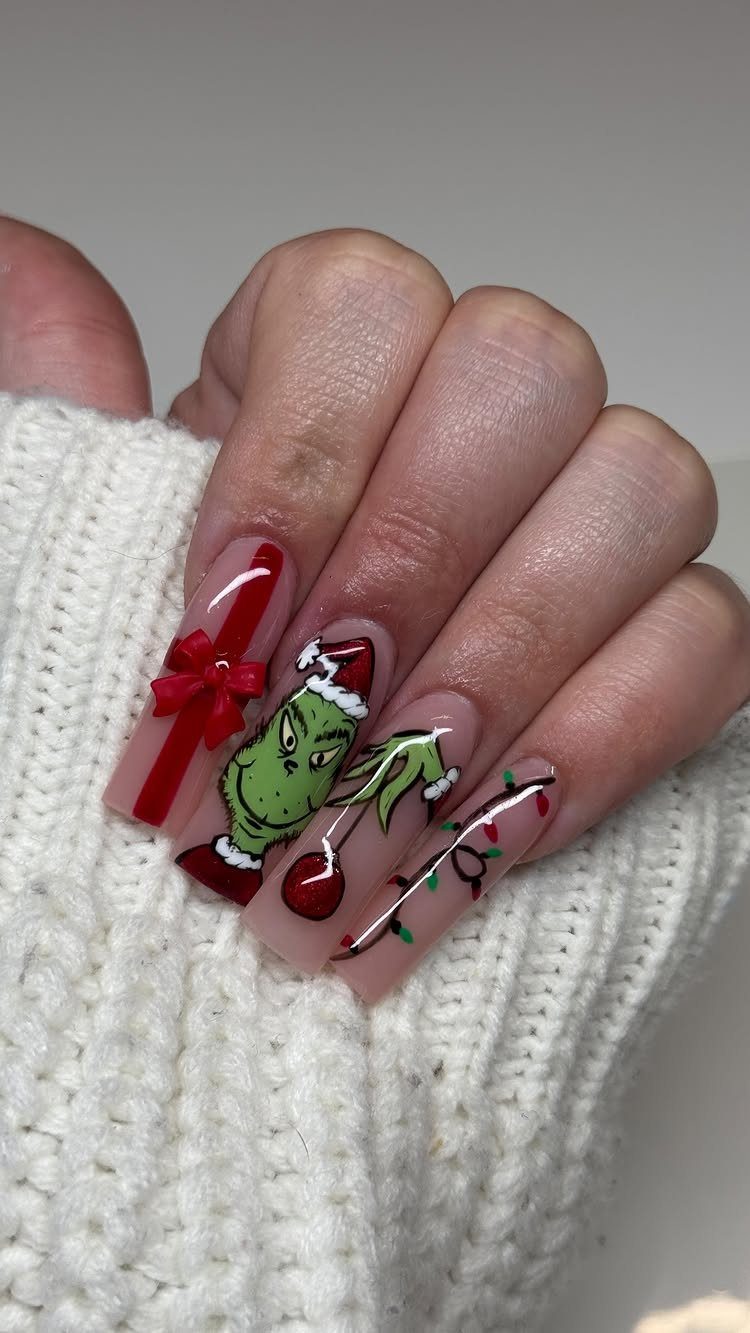
Grinch nails are for the person who wants a character on their hands, and the green face, red bow, and tiny lights give the set plenty of story. Long coffin nails offer enough canvas to fit a face.
Paint the Grinch on one accent nail only, using a fine brush for the eyes and smile.
Fill the other nails with bows and colored light dots, made with a dotting tool. Details this small take patience, so work in thin layers and seal with top coat.
I would skip the character on every nail.
12. Christmas Wreath Nails
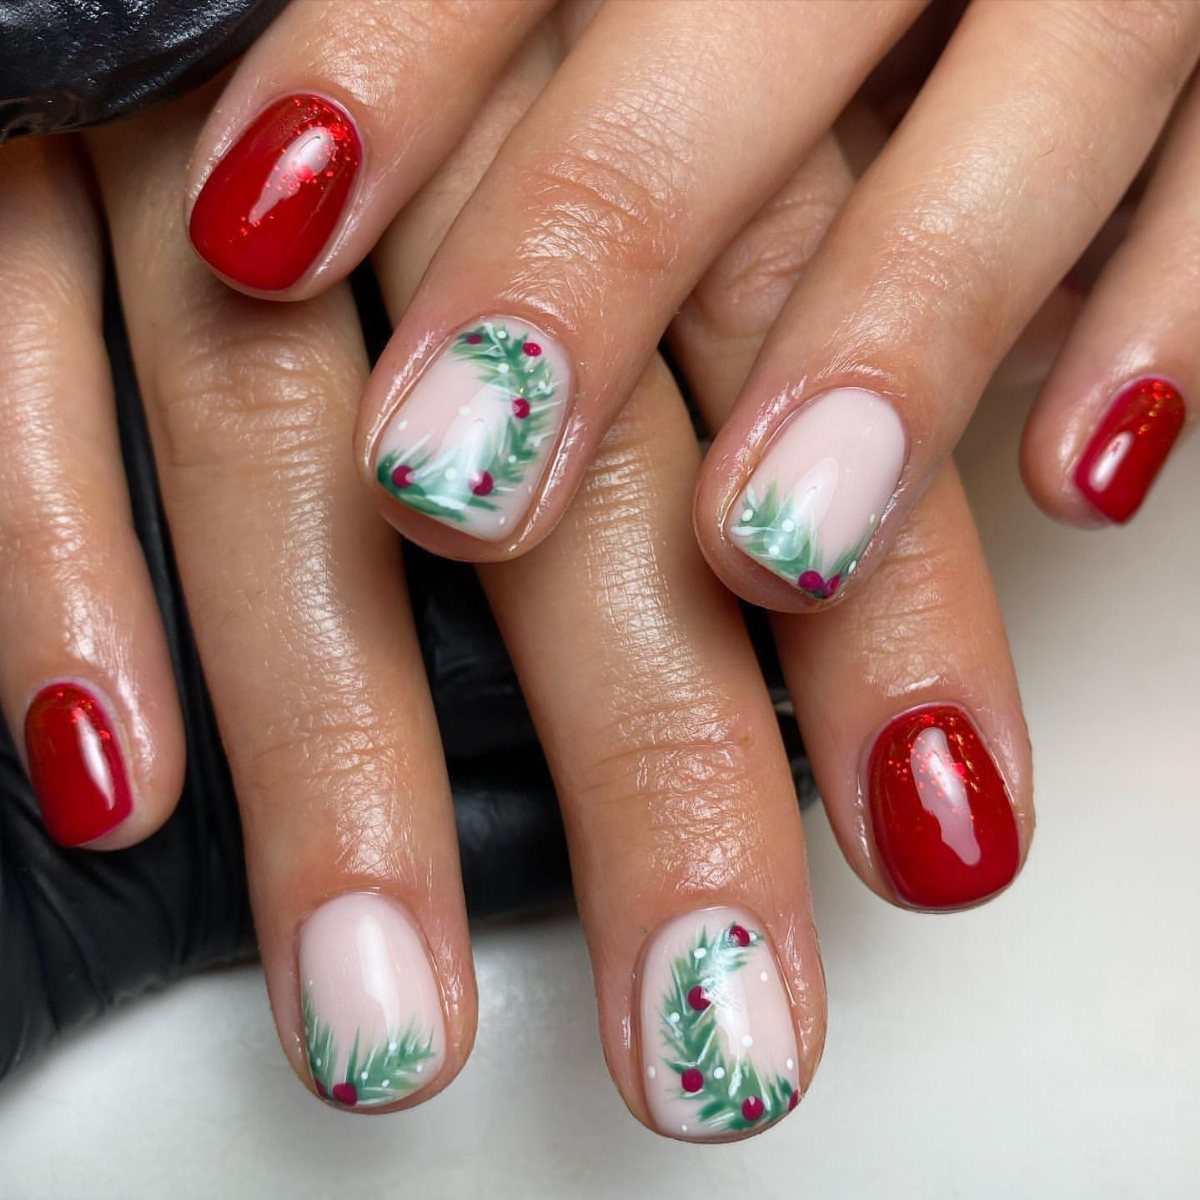
A painted wreath works best on a pale pink nail, where the green leaves and red berries stand out. Red glitter on the other nails frames it without fighting for attention.
Draw a ring of short green strokes with a thin brush, then dot the berries on top with a dotting tool.
Keep the ring slightly uneven, since a loose wreath looks more natural than a perfect circle. Put wreaths on 1 or 2 nails per hand, and let the glitter carry the rest.
13. Winter Wonderland Nails
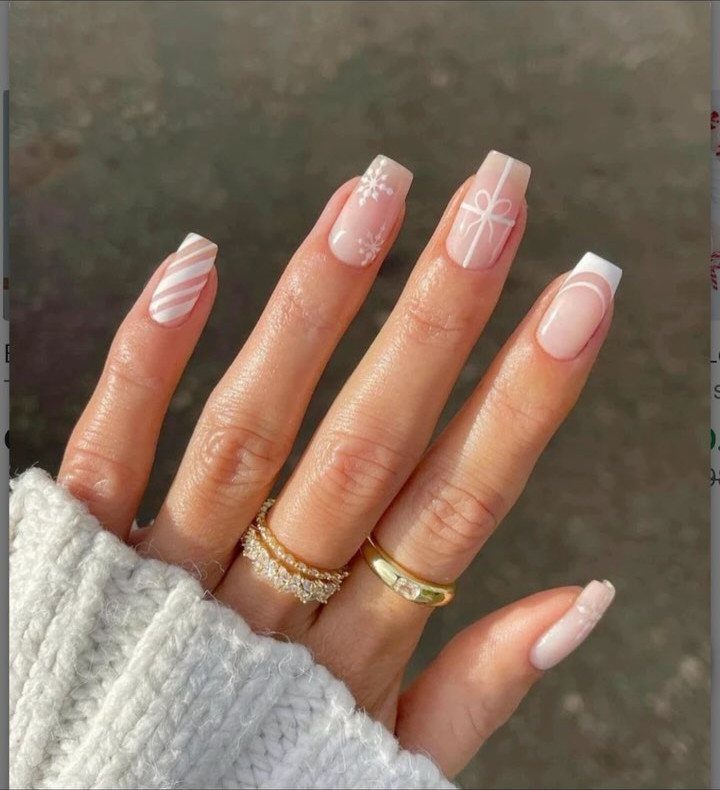
Snowflakes, candy cane stripes, and bows can live together on one long coffin set, and the mix is what makes a winter wonderland feel like a scene instead of a single motif.
I would give each nail one motif and repeat them across both hands so the set reads as planned.
White snowflakes are easiest with a thin brush, and bows work best on one accent nail per hand.
There are so many unique Christmas nail ideas to choose from for both long and short nails, including classic French manicures with a candy cane twist to Queen Elsa-approved designs featuring snowflake stickers and sparkles galore.
14. Christmas Pudding Nails
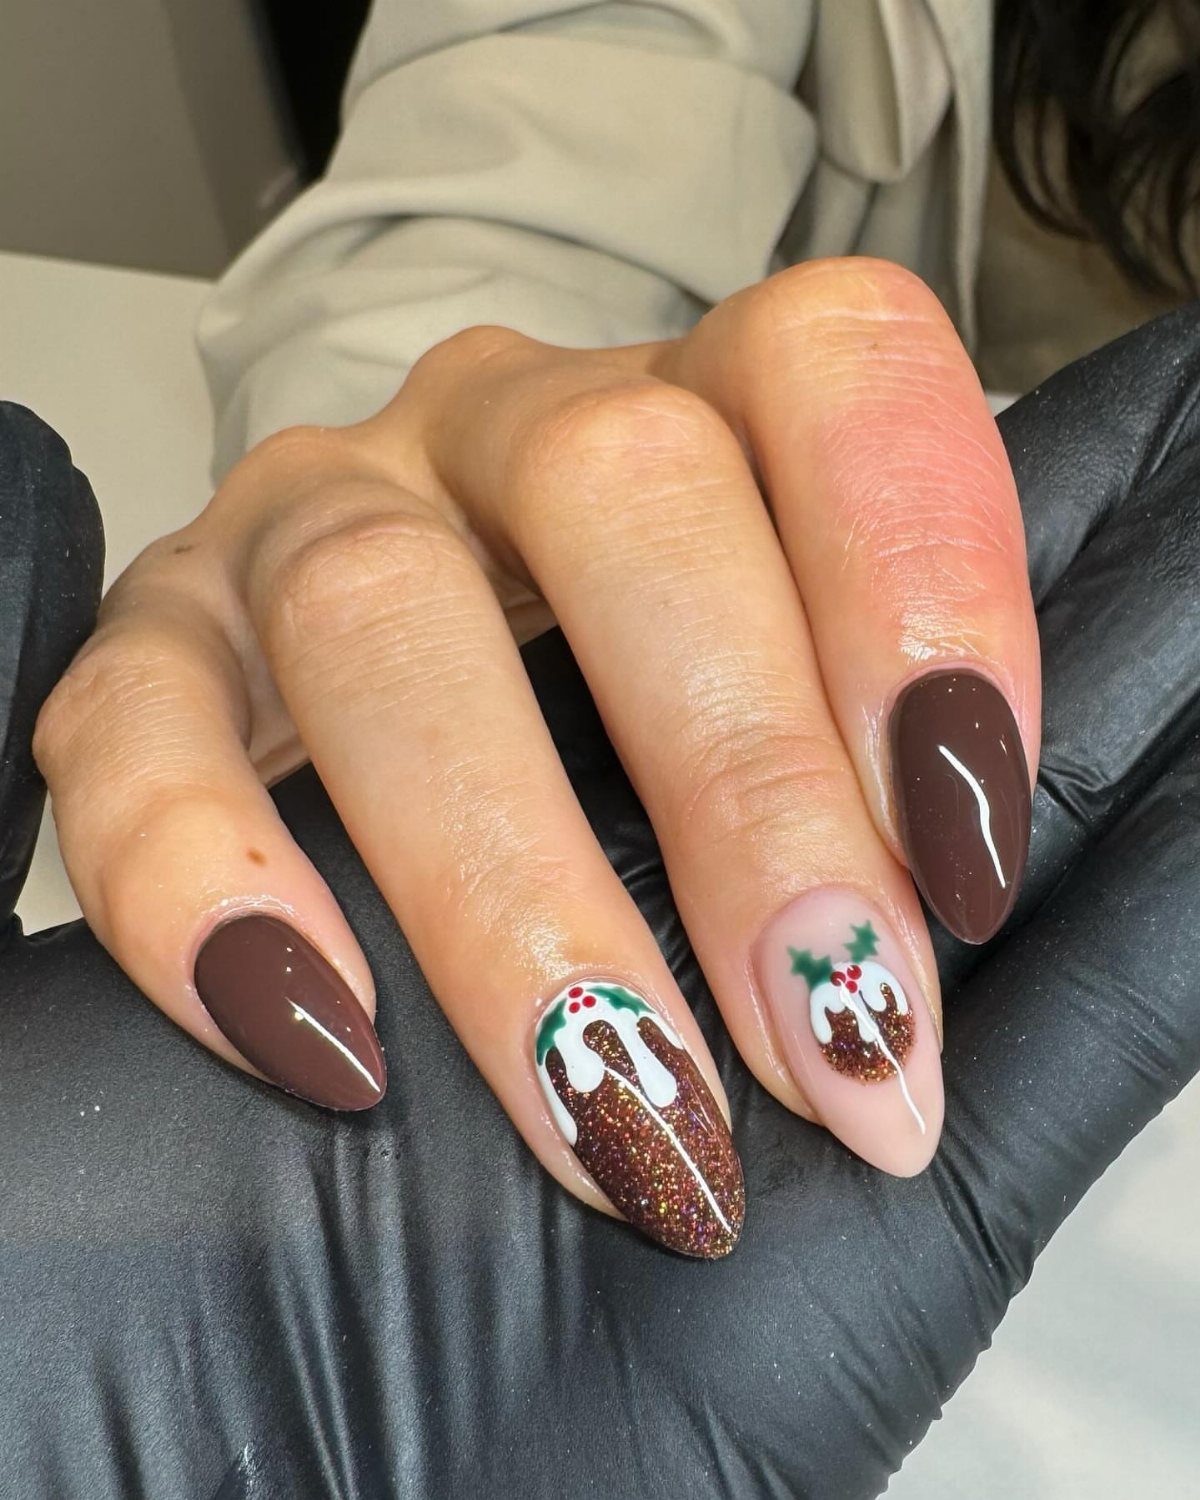
Dark brown polish is the pudding itself, and a cap of white icing on top is all it takes to say Christmas pudding. A rounded almond tip works well here because the white icing has a curve to spill over.
Paint the base in 2 thin coats and let it dry fully. A glossy top coat keeps the white from dulling next to the dark brown.
15. Mismatched Ornament Nails
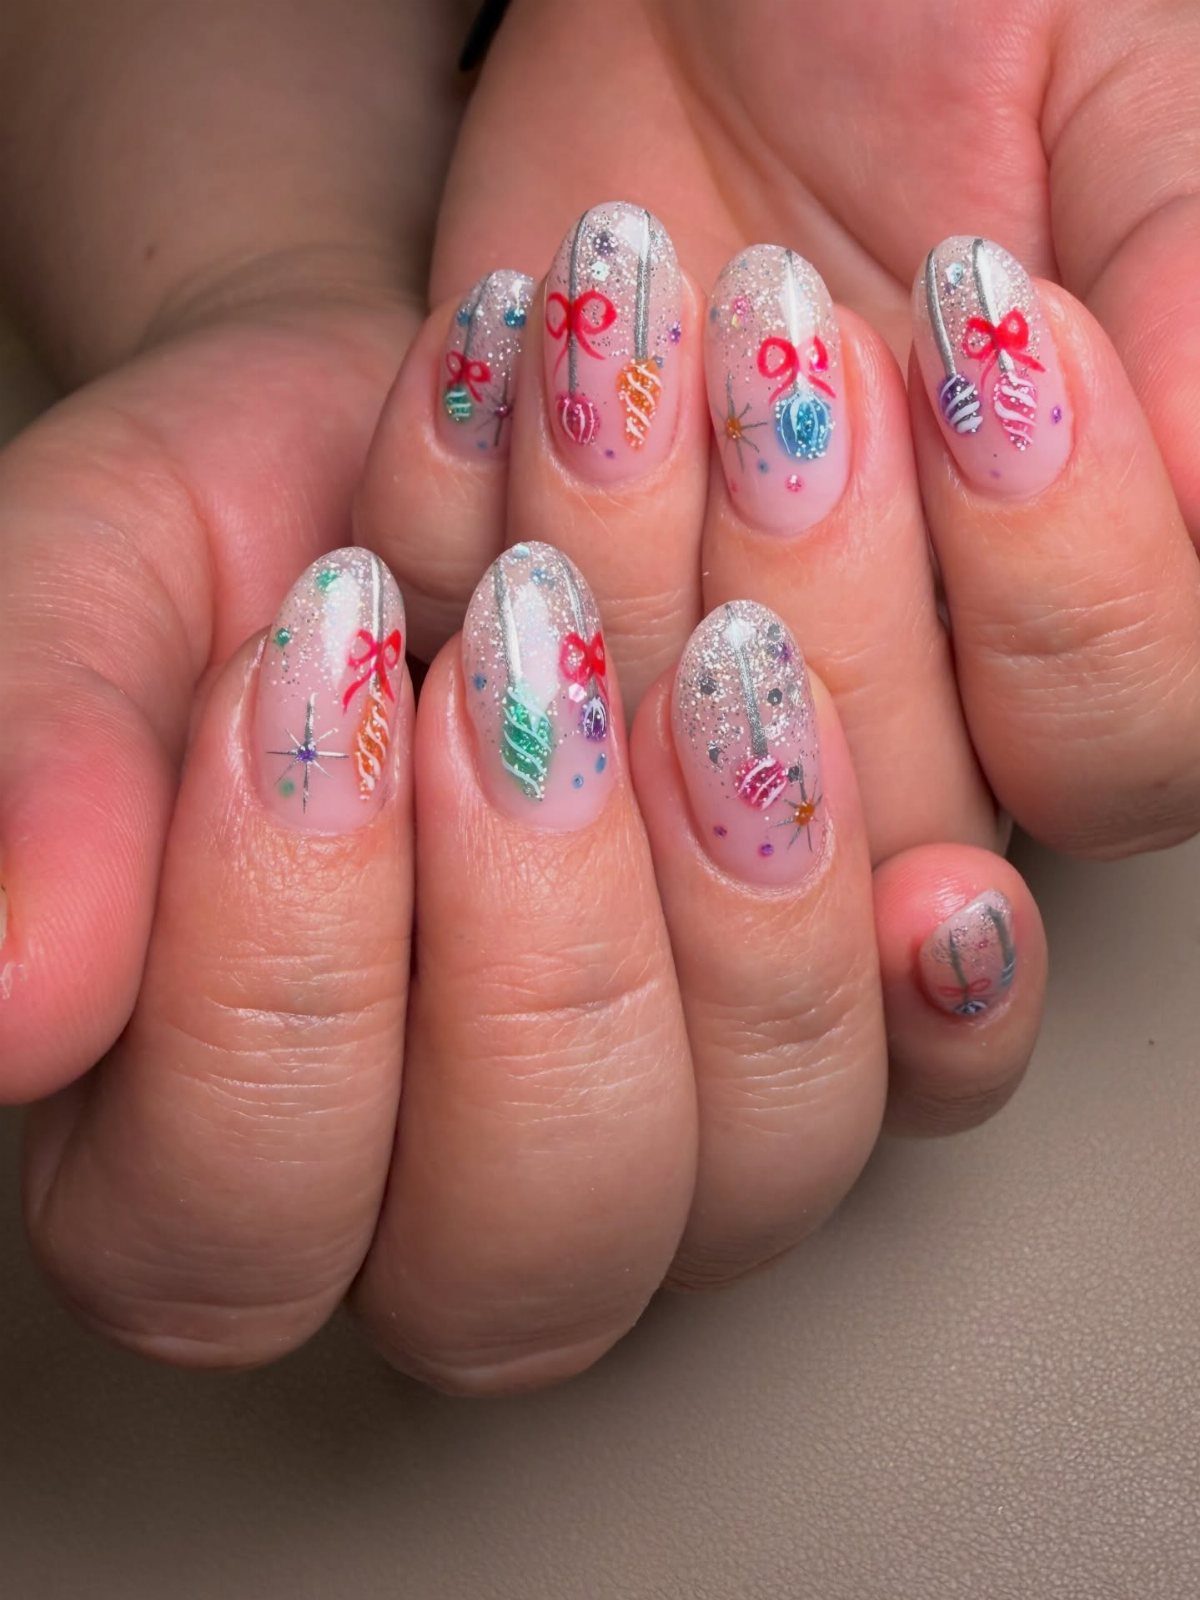
Mismatching is the whole idea: give each nail a different ornament over clear polish and silver glitter, and skip trying to repeat any of them. The glitter holds the set together while the ornaments vary.
Pick 5 or so ornament styles and repeat them across both hands.
Draw each one with a thin brush, and use a dotting tool for the round bodies. I would keep the glitter sheer, since a heavy layer hides the small designs.
16. Christmas Lights Nails
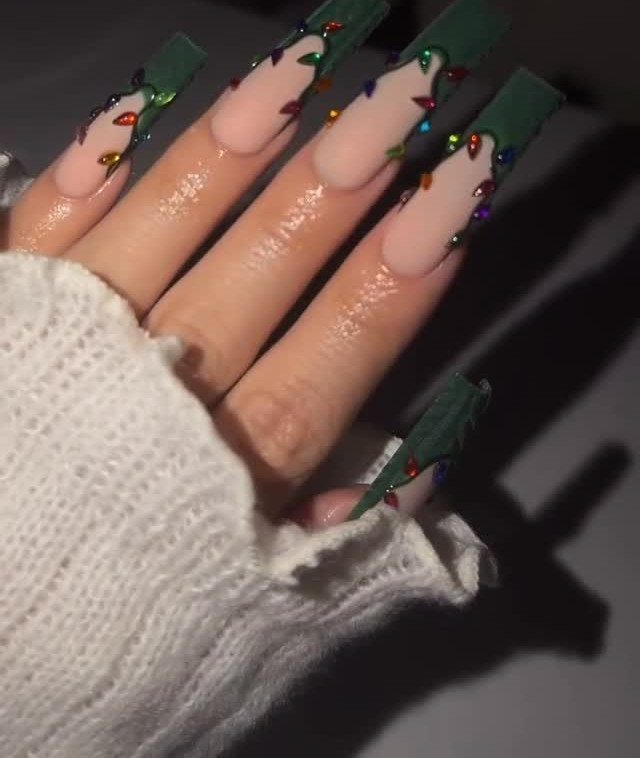
Dark green tips on a nude coffin shape, topped with small 3D light charms, read as a strand of Christmas lights. The charms are the whole trick, so the rest of the set can stay simple.
Set each charm in a dab of gel or nail glue, then cover the edges with top coat. Charms stand up from the nail, so they catch on sweaters and hair; I would warn anyone who types a lot.
17. Christmas Icon Nails
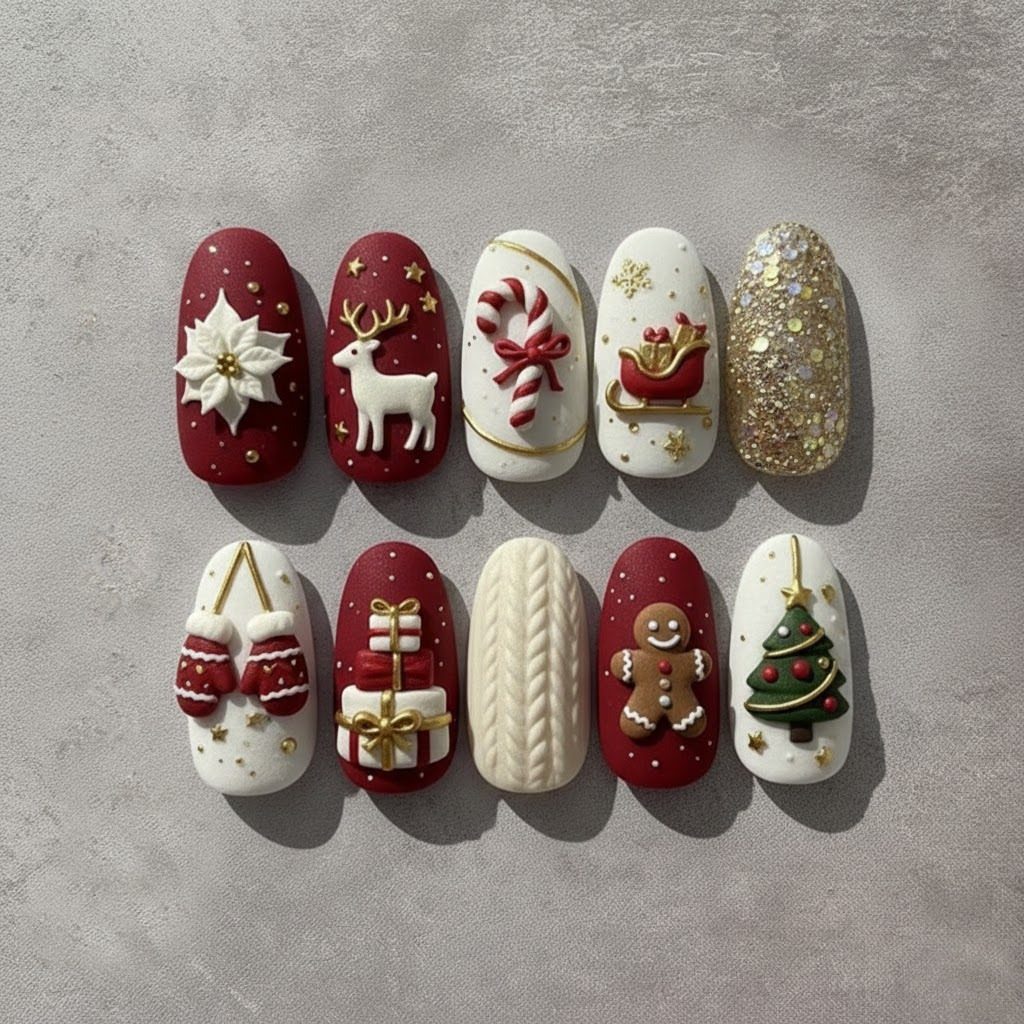
A reindeer, candy cane, gingerbread man, and tree each get their own nail in this set, which makes it a good pick for someone who likes a sampler. The 3D art gives each icon real shape.
Press-on nails suit this style, since the figures are easier to build on a flat surface than on a finger.
Plan the order across both rows before you glue anything on. I would stick with one icon per nail so none of them crowd each other.
Best Colors for Christmas Nails
Red, green, gold, icy blue, and white are the colors that read as Christmas at a glance.
Hunter green is the deeper, richer pick over a bright kelly shade, and icy blue is the one that feels cool on a hot July day.
For a party set, choose one main color and one accent from that group. Red with gold stays warm and classic; icy blue with white feels like snow.
Gemstones are a good way to push a red and green palette further. A few go a long way, so use them sparingly.
Pick the polish shade first, then match the art to it, since a color that clashes with your outfit will bother you more than any design.
Nail Art Techniques
Ombre, French tips, and stickers are the 3 techniques that give the most result for the least skill. Each one suits a different kind of person.
Ombre blends 2 shades, such as red into white or green into gold. A makeup sponge dabbed with both polishes does the blending, and a top coat hides any streaks.
French tips are the tidiest choice for short nails. A candy cane twist on the tip line is one way to make the classic look festive.
Stickers cover the detail work. Snowflake stickers with a little sparkle can make a plain base look finished, and they suit anyone who does not trust a steady hand.
If you combine techniques, limit it to two per set.
Easy DIY Options
Stickers are the quickest route.
Simple painting works too.
Start with a plain base color and one decorated nail. That gives you a finished look in far less time, and a mistake costs one nail instead of ten.
Rushing is the most common reason an easy design turns out smudged.