The technique needed ranges across the list: solid colors, dots and stripes need steadiness, while florals and butterflies need a fine brush.
The range runs from one solid pastel yellow coat with a glossy top coat, to gingham checks, hand-painted florals and butterflies that need patience or a salon visit.
If your hand shakes, stick with dots, stripes or a single accent nail, and save anything with an outline for a day you can go slowly.
1. Speckled Easter Eggs
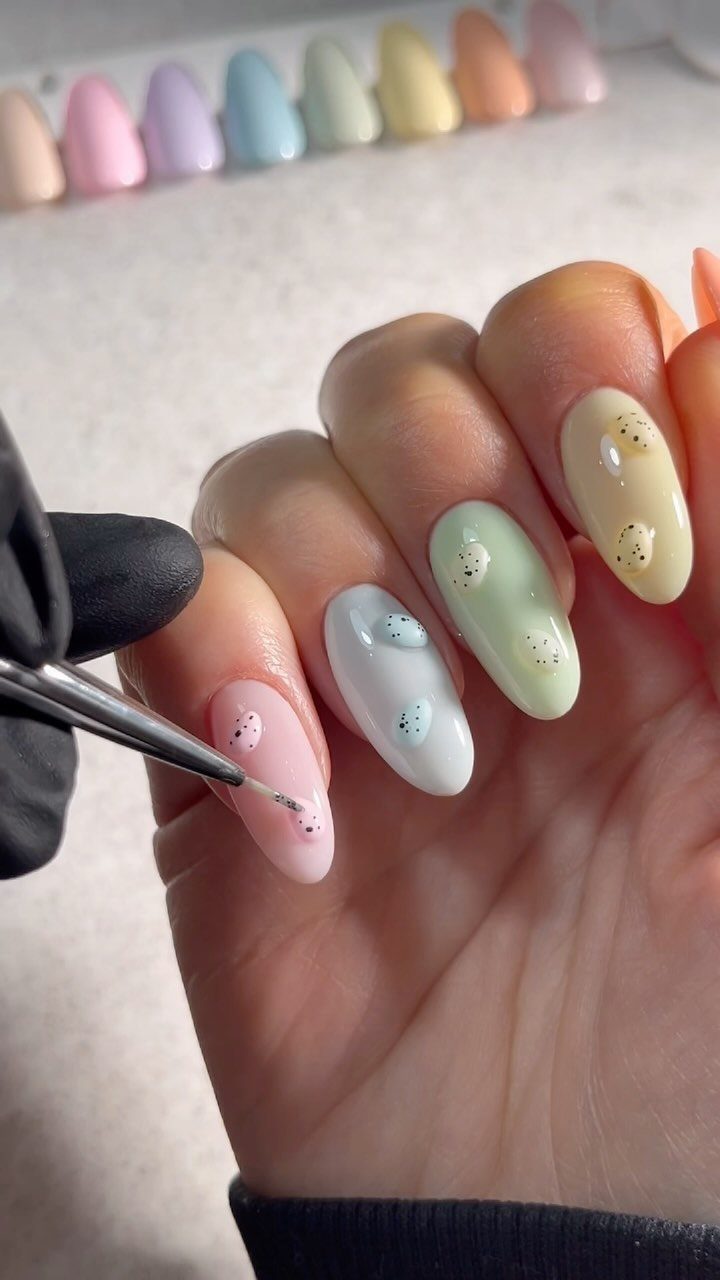
Dark speckles on a pastel base are what turn a plain manicure into a robin’s egg, and almond nails provide the canvas the pattern needs to look like a real shell.
Paint the pastel coat first and wait for it to set completely.
Then flick on the specks with a fine detail brush, or dab with the tip of a toothpick. Keep them uneven in size and spacing; a tidy grid reads as polka dots, not eggs.
I’d vary the pastels from nail to nail while using the same speckle color on all of them.
2. Pastel French
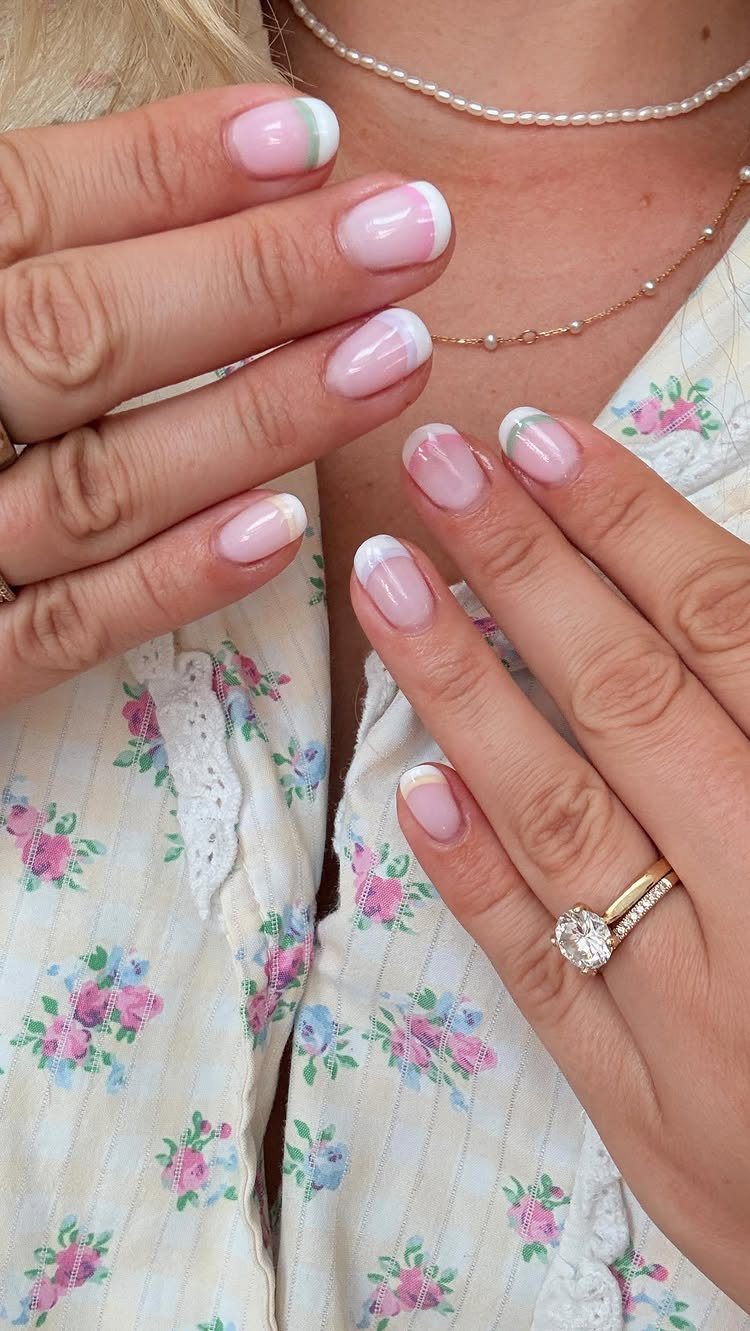
Swap the white tip of a classic French for a soft pastel and the manicure gets seasonal without losing its polish.
Pick one tip color, or alternate two, while using the same nude or sheer pink base so the tips stand out. A thin tip line looks dressier than a thick one.
Of all the Easter designs here, this one works best if you wear a lot of florals or lace, since it adds color without competing with the outfit. It also grows out gracefully.
And with Easter (and the chocolate eggs that come with it) rapidly approaching, there’s no better time to whip out the pastel colours and 3D bunny designs than now. Talk about upgrading your spring manicure!
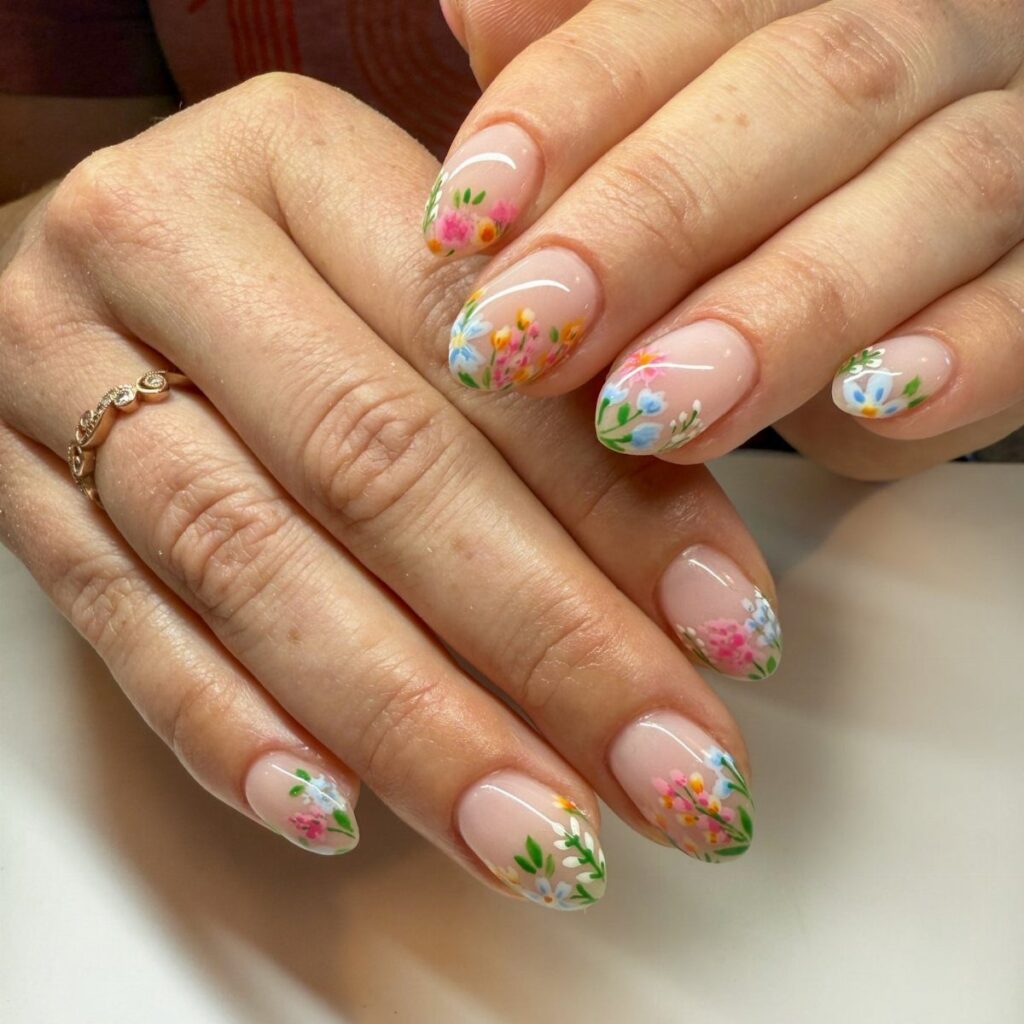
3. Floral Designs
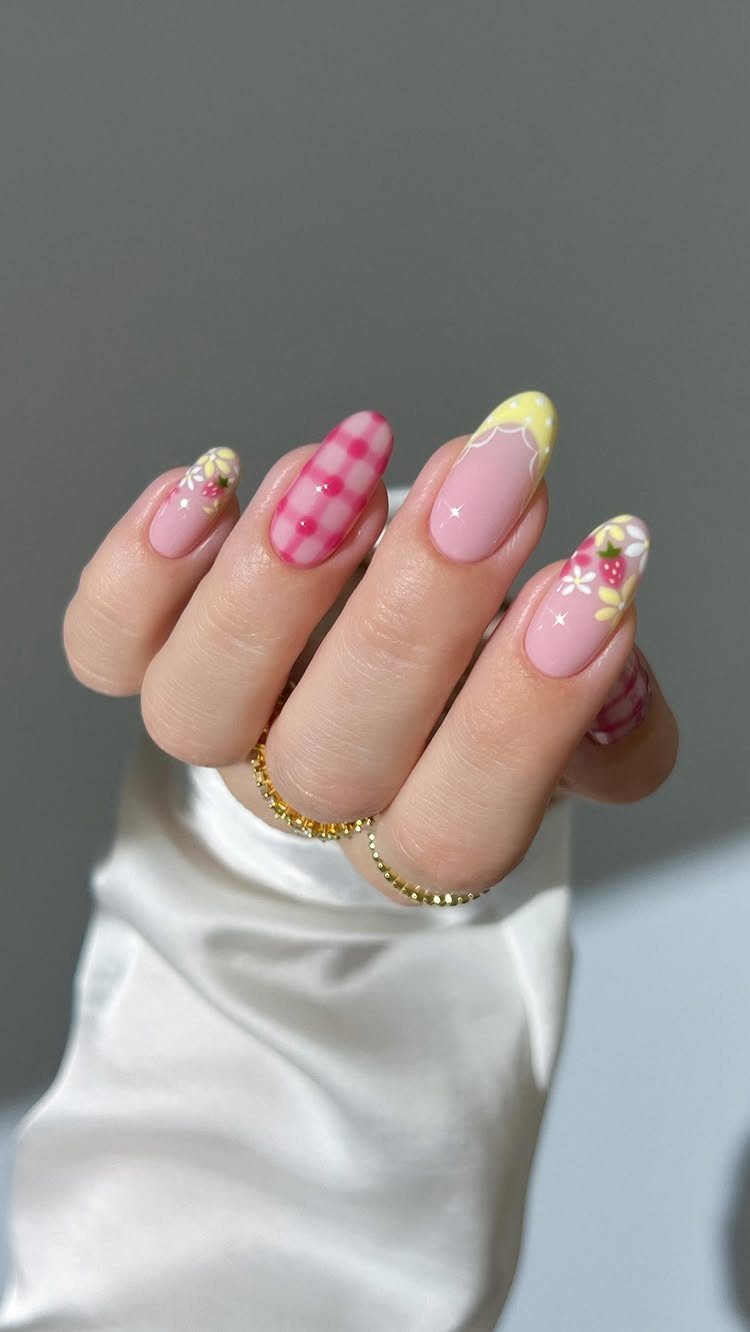
Tiny painted flowers do the most work when the base stays quiet, so begin with a pale pink or cream and allow the blooms to carry the color.
Dot petals around a center with a tool made for dots, then add a small yellow center.
Paint flowers on two or three nails and leave the rest solid. A full set of detailed blooms takes patience, so a salon visit may be worth it for that.
4. Pastel Rainbow Nails
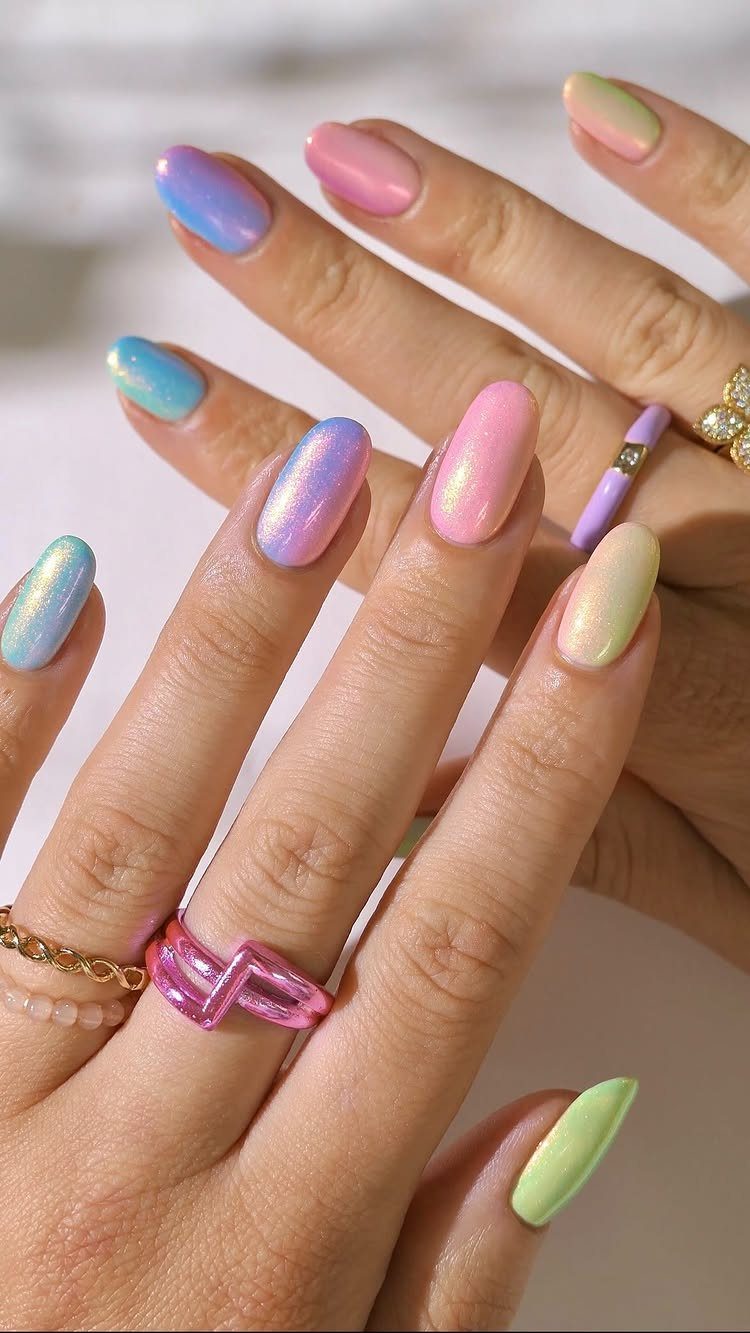
Every nail gets its own color here: pink, purple, blue, yellow and green, with a shimmer finish that catches light.
Buy polishes from one brand’s pastel line so the tones sit well together. Shimmer polish tends to look streaky, so apply two thin coats rather than one thick one.
For the order, I’d run the colors in rainbow sequence across one hand and repeat on the other. It’s the easiest design here to do at home, since it needs no brushwork.
5. Candy-inspired Stripes
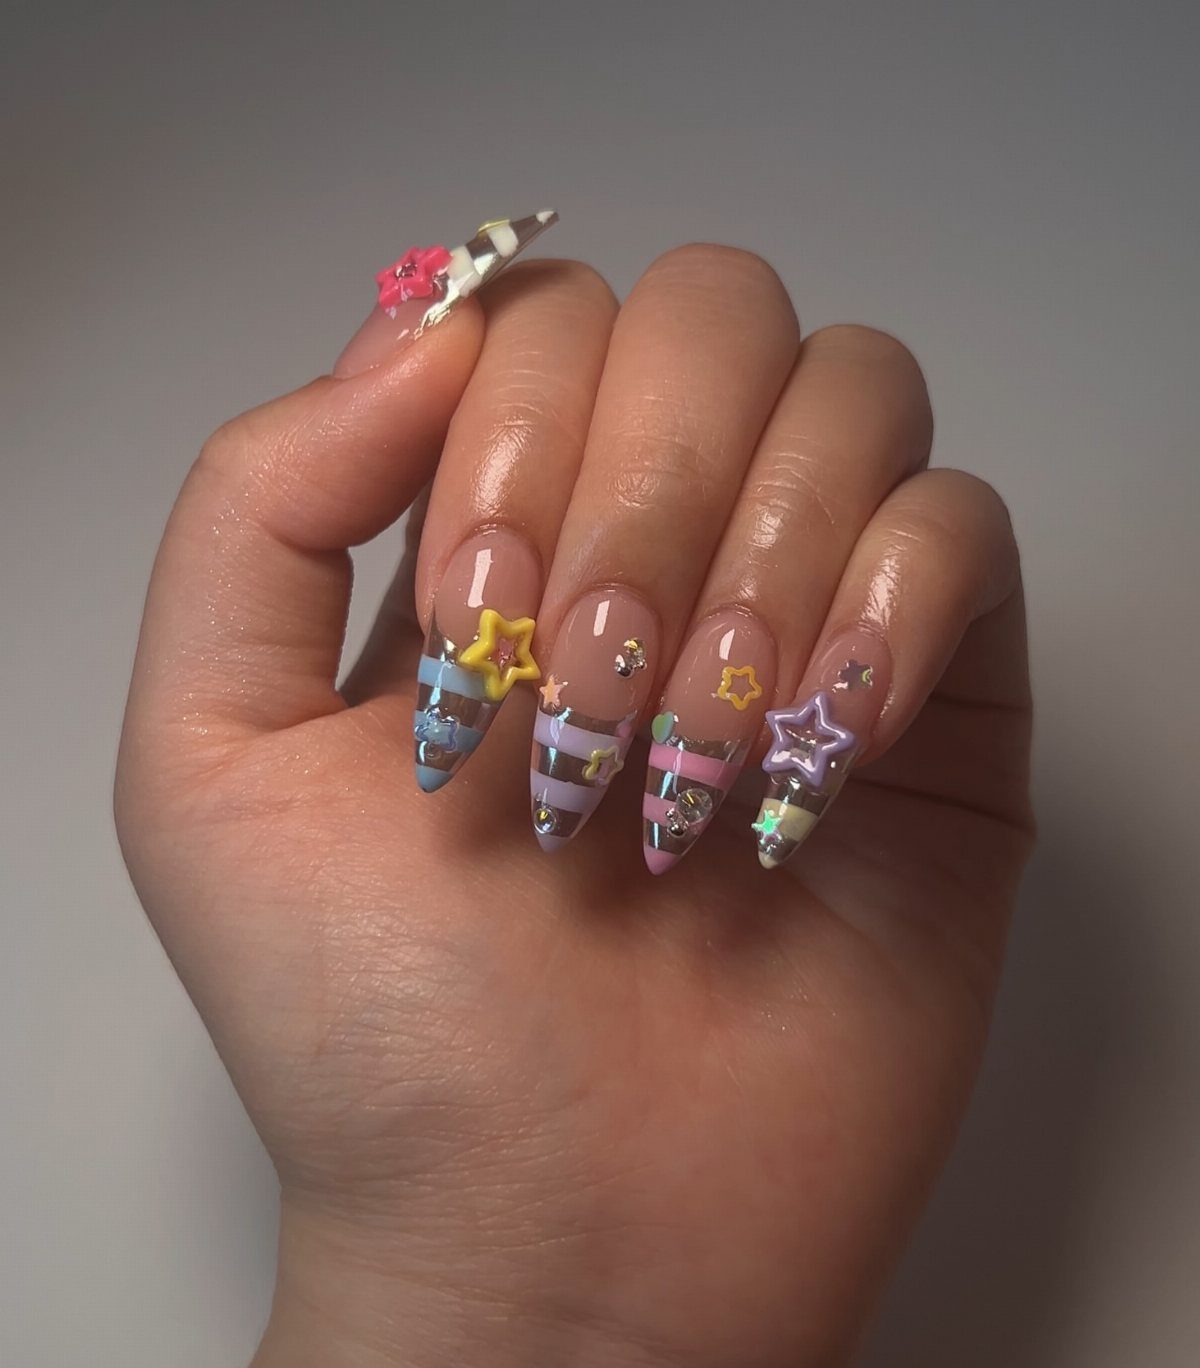
Pastel stripes on almond tips echo the swirled candy in an Easter basket, and star charms plus glitter push the look further toward sweet.
Use striping tape or a thin brush for the lines, and seal the stripes with top coat before gluing on 3D charms, which need a dab of nail glue or builder gel.
Charms catch on sleeves and hair, so I’d limit them to one or two nails.
Keep the stripes narrow. Wide bands look more like a flag than candy.
6. Glitter Ombre
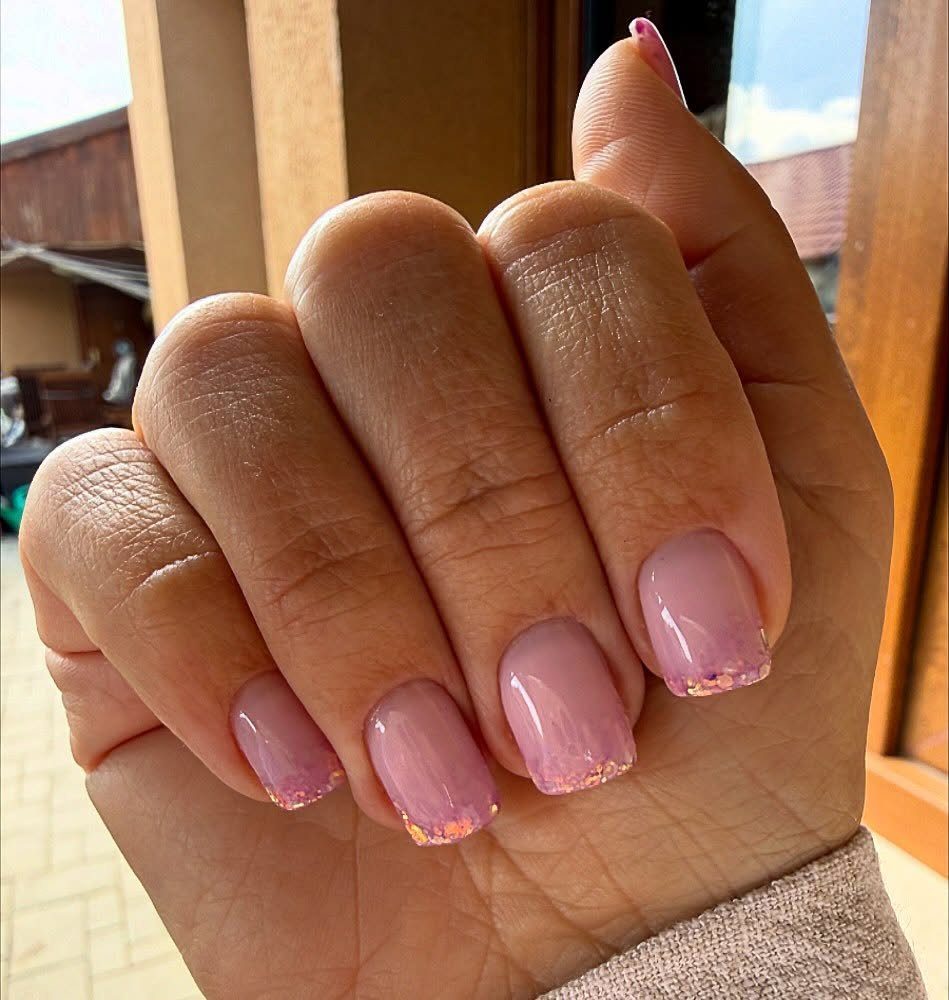
A sheer light pink base fading into gold and pink glitter at the tips gives the glamour of a party manicure while staying soft enough for spring brunch.
To get the gradient, dab glitter polish onto a makeup sponge and press it on the nail tip, building up the sparkle there and thinning it toward the middle.
Finish with a smooth top coat, because glitter leaves a gritty texture.
Choose a fine glitter over chunky pieces if you want it to look blended.
7. Pastel Polka Dots
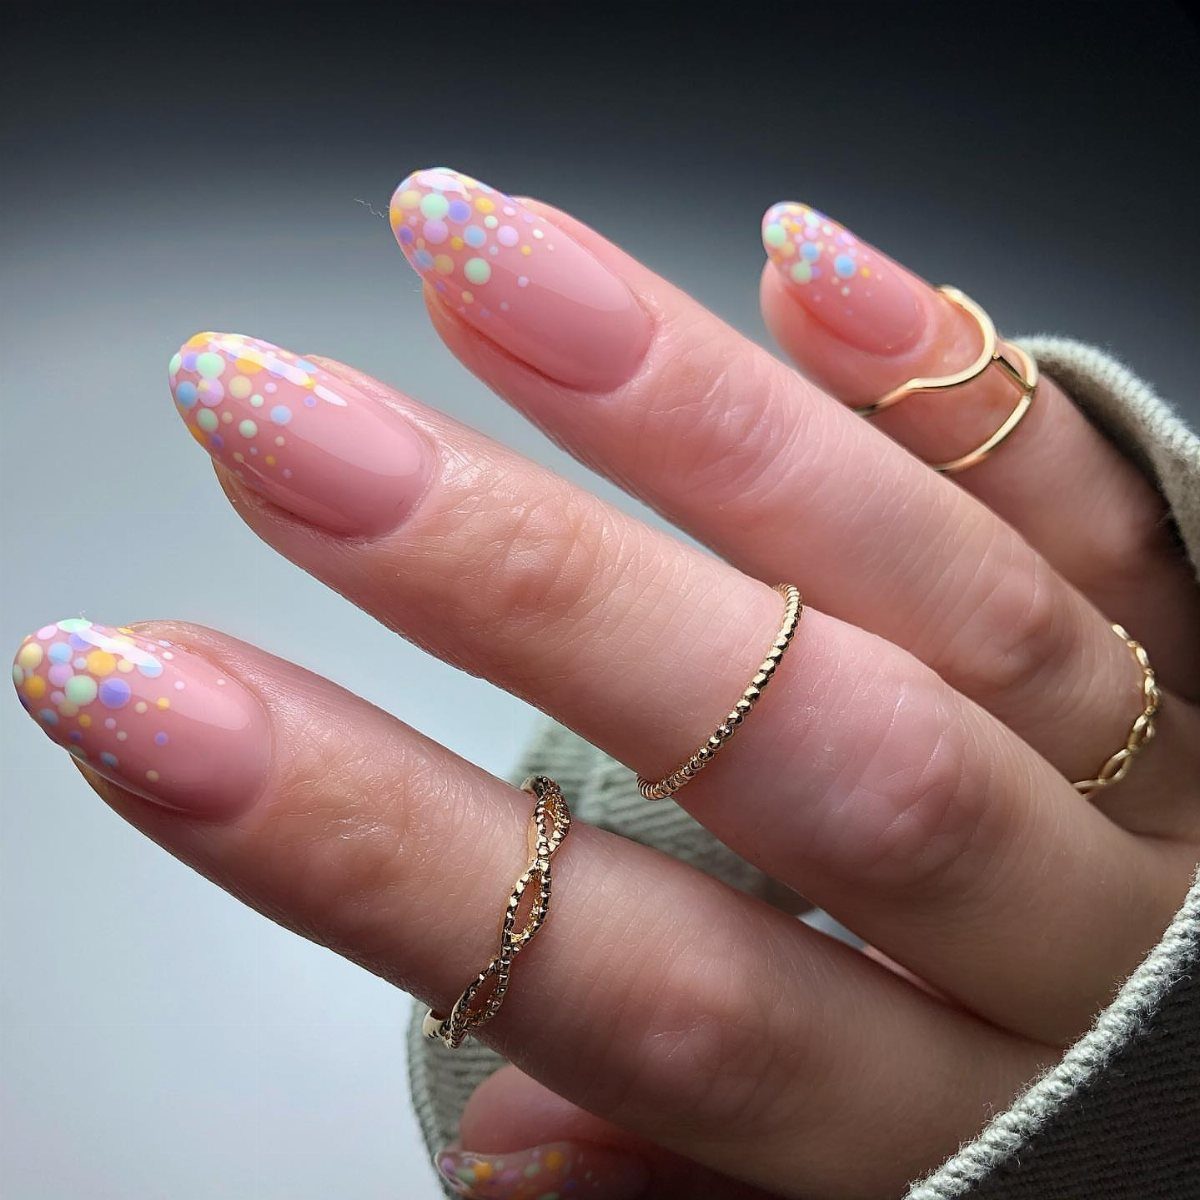
Polka dots in mixed pastels sit at the tips of a nude base here, which keeps the cute factor high without crowding the nail.
Dot with a dotting tool, or the rounded end of a bobby pin, and let each color dry before starting the next so they don’t smear. Space the dots loosely; crowded ones turn busy fast.
I’d keep the palette to a handful of pastels and repeat them on every nail, since that repetition is what makes the set look planned.
8. Bunny Accents
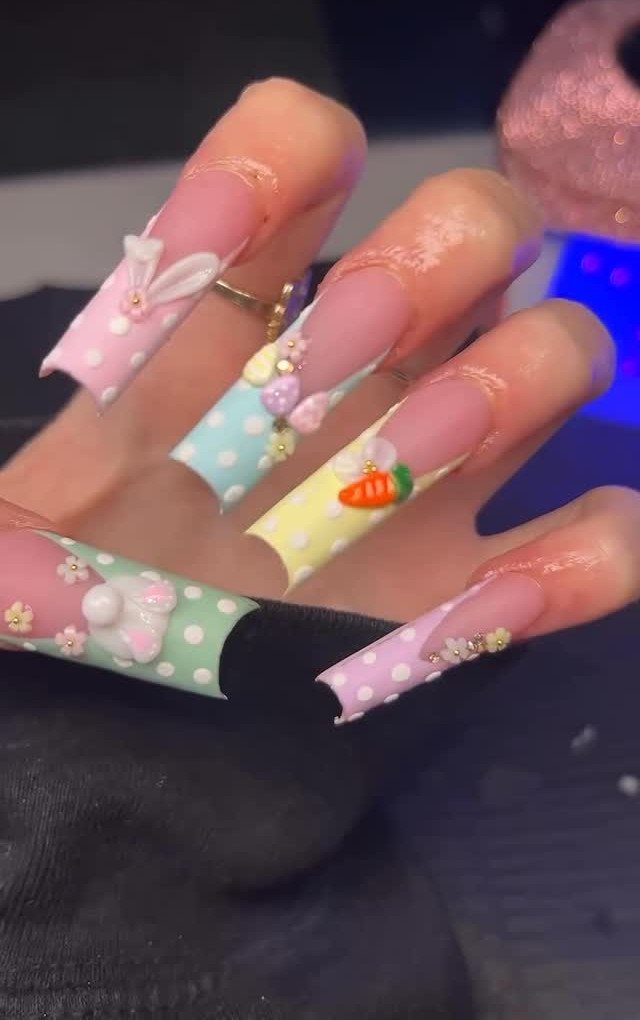
Bunny ears, a carrot and a small flower, all in 3D, sit on top of pastel polka dots on a long square nail.
Press the raised pieces on only after the top coat has set, using nail glue or builder gel. I’d put the bunny on one nail and the carrot on another, leaving the dots to fill the rest.
Raised charms add real bulk, so they suit people who don’t mind a manicure that announces itself. Anyone who types all day may prefer flat painted versions.
9. Carrot Designs
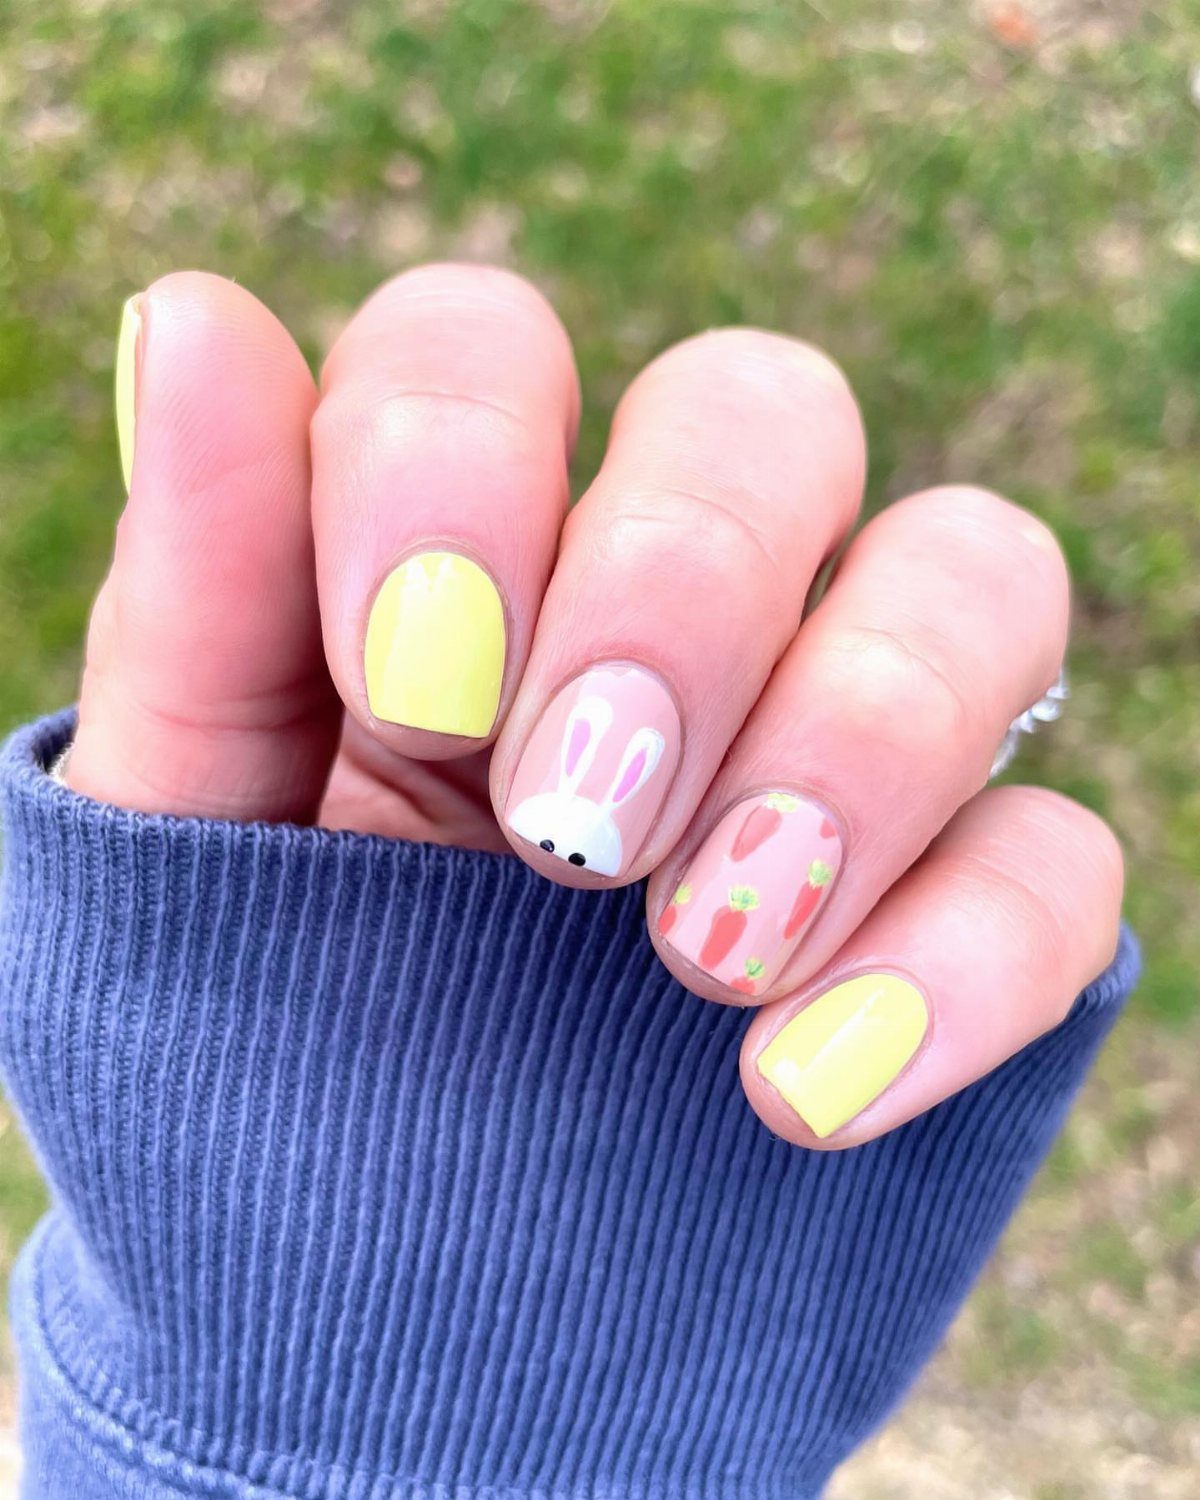
A pastel yellow base with a tiny bunny face and a few orange carrots makes the whole hand read as a garden bed.
Carrots are simple shapes: a small orange teardrop with a dab of green at the top.
Draw them with a fine brush, or dot orange and drag it down to a point. Keep them small, and scatter them rather than lining them up.
Because the bunny face takes the steadiest hand, I’d paint it on a single accent nail and let the carrots fill in the others.
10. Butterfly Accents
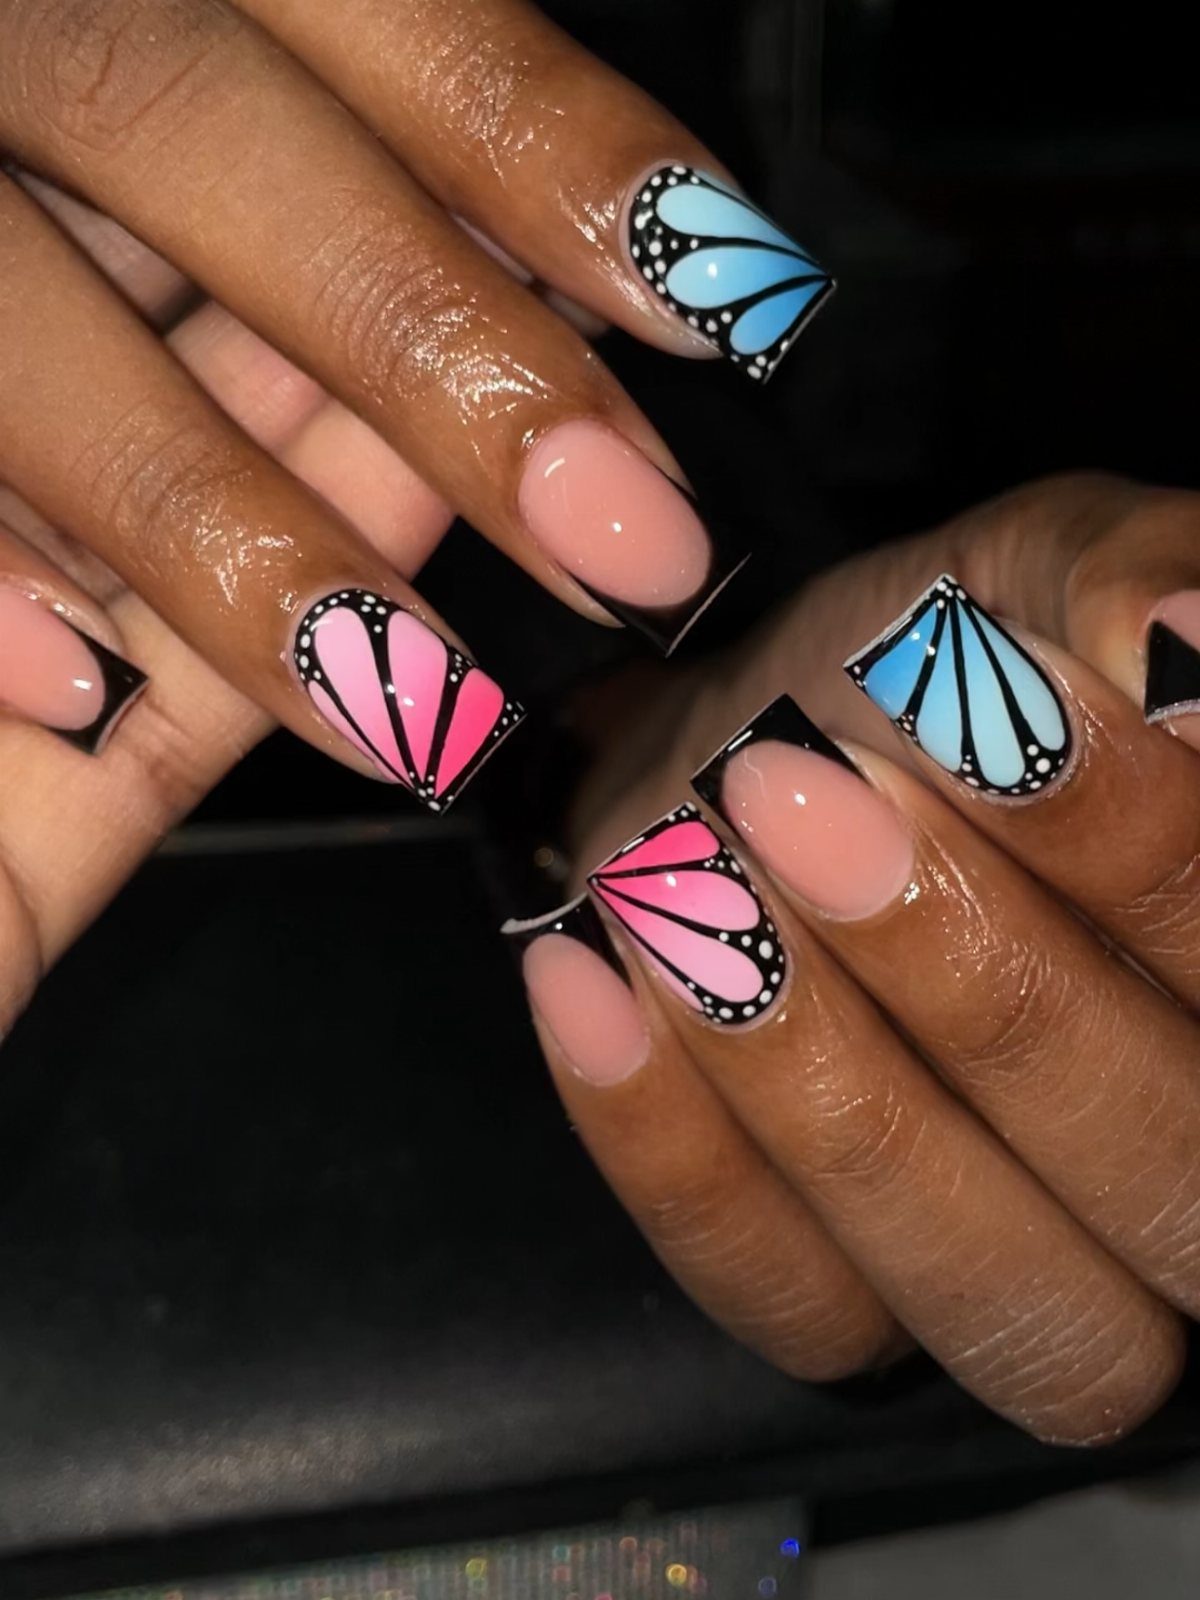
Paint each wing as two soft rounded shapes on either side of a thin center body.
Let the color dry, then trace the black outline with a fine brush. The outline is what makes the wings read as butterflies, so go slowly there.
Stick with one or two butterflies per hand. A full set of them gets fussy.
11. Minimalistic Easter Nails
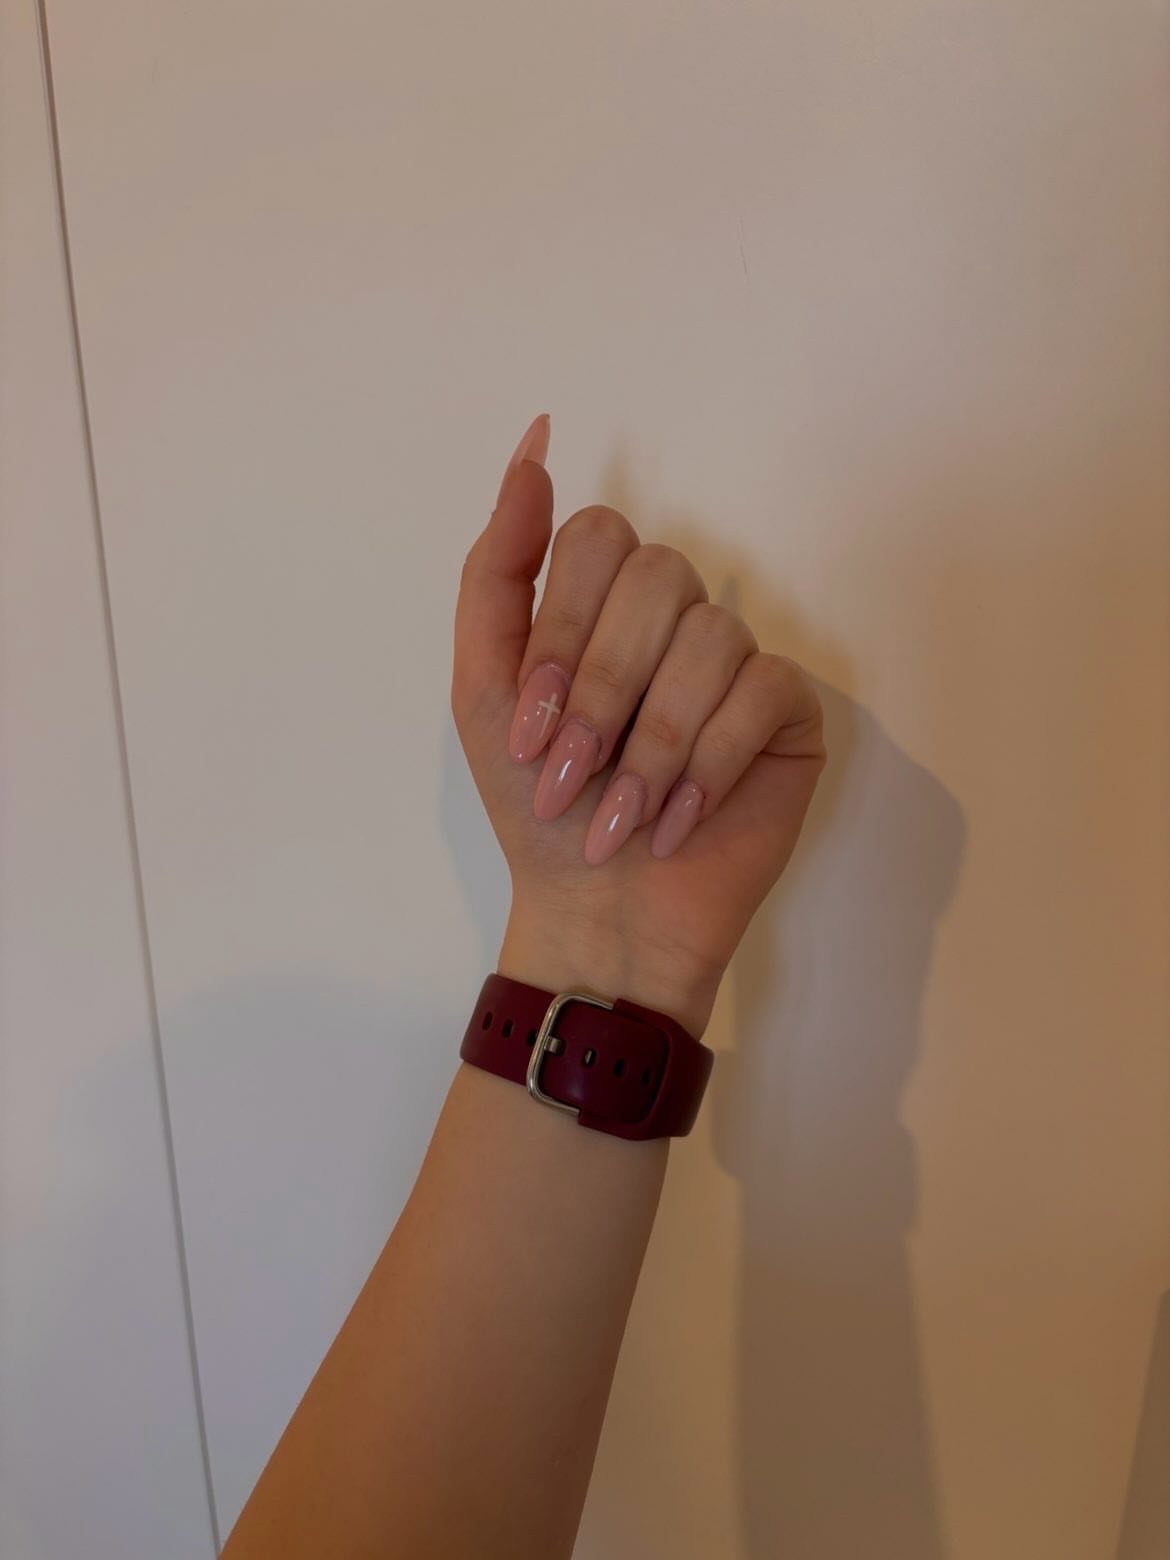
A single small white flower on a light pink nail is about as quiet as an Easter manicure gets.
Paint the whole set in the same sheer pink, then dot white petals around a center on a single accent nail, adding a tiny center if you like. I’d choose the ring finger, since it sits where the eye lands.
This is the best pick here for anyone who wants a holiday nod that still passes at the office.
12. Mix & Match
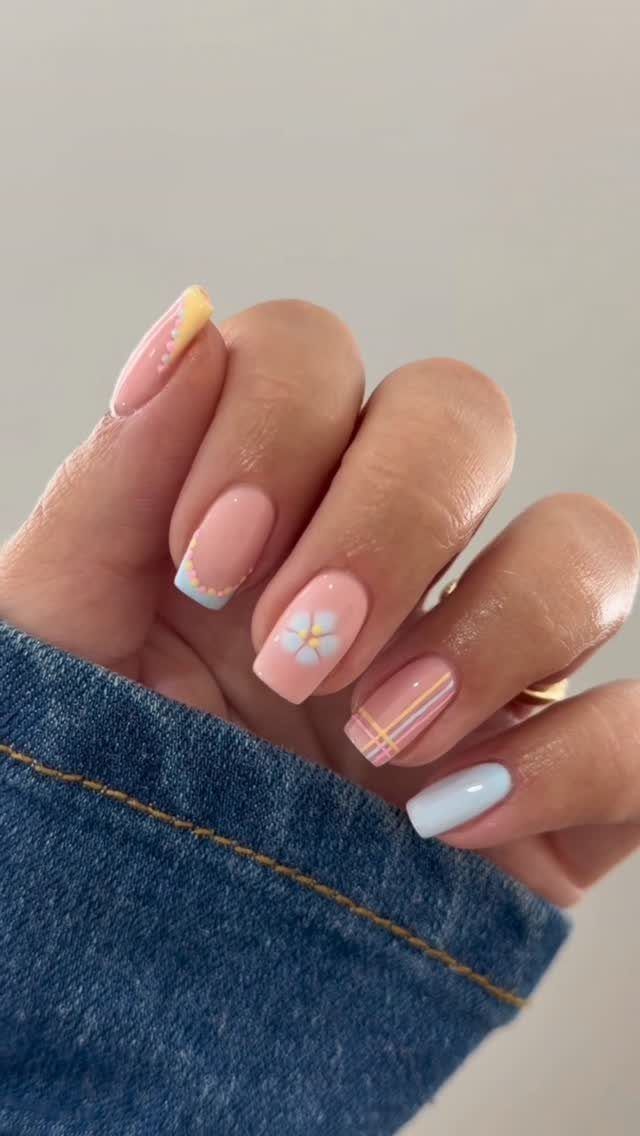
Hold the set together by drawing every design from the same few pastels. Without a shared palette, a mix of patterns looks like a set of mistakes.
At home, I’d do the French tip and a plain accent first, then try gingham last, since its crossing lines take the most patience.
13. Pastel Yellow Nails
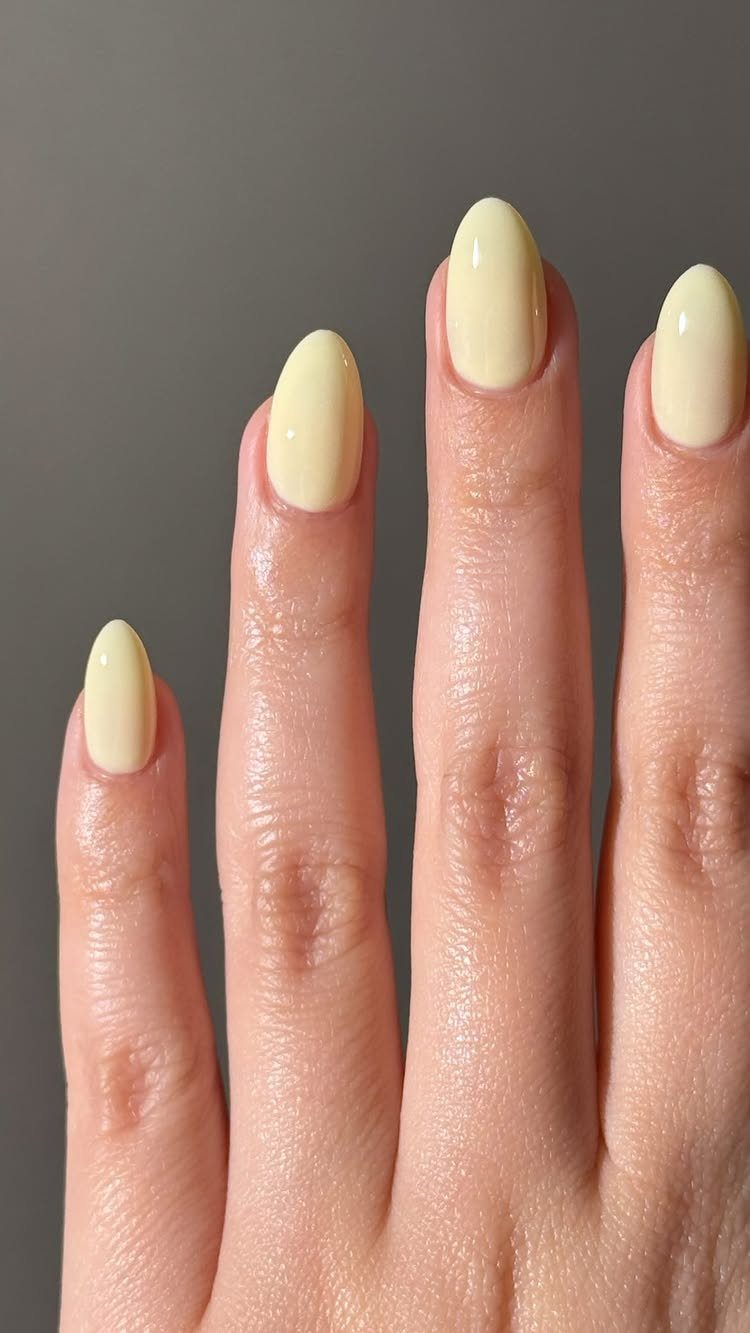
One solid pastel yellow on every nail is a manicure with no art at all, and the gloss does the work. Oval nails keep it soft.
2 thin layers give better coverage than a single heavy coat. Finish with a glossy top coat; a shiny finish is what makes a plain color look expensive.
I’d choose this over the busier designs here if your Easter outfit already has pattern in it. Yellow is cheerful enough that nothing else is needed.
14. Gingham Pattern
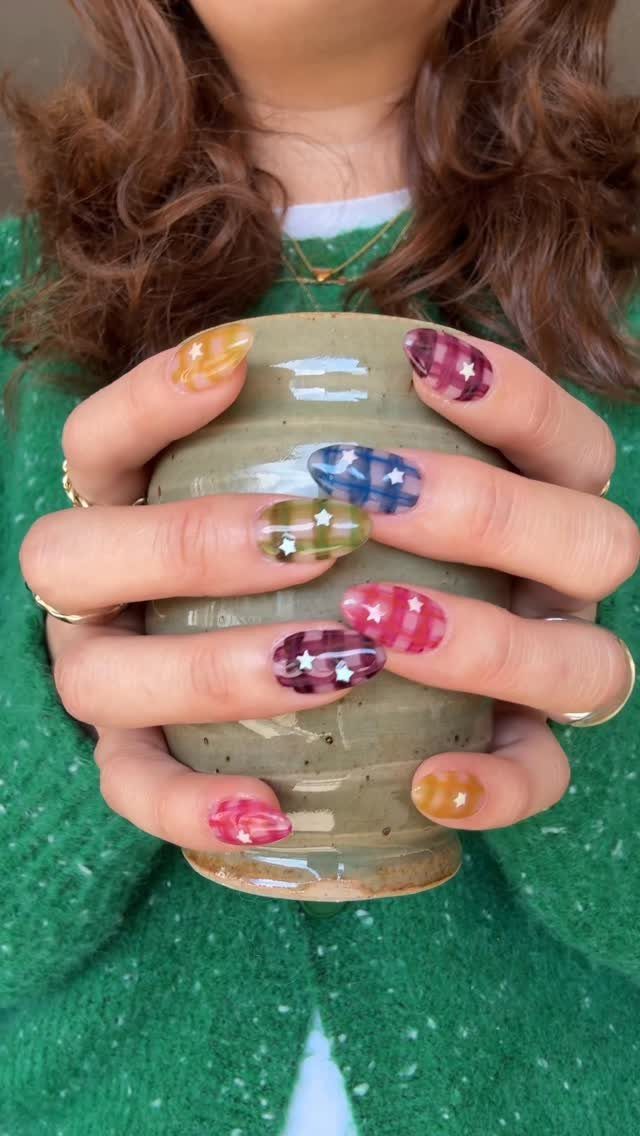
Gingham on nails is a picnic blanket in miniature, and small white stars on top keep it playful.
Lay down a pale base and let it dry. Paint wide, sheer stripes in one direction, dry them, then cross them with stripes the other way so the overlaps read darker.
Striping tape keeps the lines straight, but a thin brush works too. Add the stars last with a dotting tool or fine brush, then seal with top coat.
Gingham asks for patience, which makes it a good candidate for a salon visit. At home, I’d put it on an accent nail or two.
Nail Art Tools and Techniques
A small tool kit covers most of what spring nail art asks for: a dotting pen, a fine striping brush, a French tip tool and, if you want repeatable patterns, nail art stamps.
Each one replaces a steady hand for a different job.
Stamps are the shortcut for detail. They press the same pattern onto every nail with uniform results, which is hard to match freehand.
The French tip tool is the cheapest way to get a clean line along the nail edge. A gel polish kit with a wide color range also saves you from buying single bottles one at a time.
My advice is to buy the dotting pen and the striping brush first. Add stamps only once you know you will use them.
Color Combinations for Spring
Mixing finishes is an easy way to make pastels feel current.
Lavender, mint and baby blue sit well together because they share the same soft, cool tone. Peach can join them if you want some warmth.
For a high-shine option, top mismatched pastels like lilac, mint and peach with a fine pearl powder. The result looks closer to jewelry than polish.
Negative space is another route: block your pastels in sections and leave bare nail between them. Almond and squoval shapes carry these combinations better than stiletto or coffin.
If you add decals like bows, flowers or tiny stars, keep them to a few so the colors stay the focus.
DIY Nail Art Tips
Most of these manicures need only a few tools and a handful of colors. Start every set with a base coat, since it protects the nail and gives the color something to grip.
Keep the details for last, and use a nail art brush for them. A fine brush gives you control that the polish bottle brush never will.
I’d limit a first attempt to four steps or fewer: base coat, color, one detail, top coat. If the detail goes wrong, you can wipe it off and redo it without redoing the whole set.
Practice on a single nail before committing to all ten.
Frequently Asked Questions
What are some easy Easter nail designs?
Rainbow pastel nails are the easiest, since each nail gets its own color and there is no brushwork at all.
Pastel French tips and plain pastel yellow are close behind, and polka dots work if you have a dotting tool. Simple bunny accents or a few painted flowers on two or three nails also keep things festive without much skill.
How do I make speckled Easter egg nails?
Load a thin brush with dark polish, hold it 2–3 inches above your nail, and tap the ferrule with your finger to spray fine dots across the dry pastel base.
Cluster some specks and leave gaps elsewhere; real speckled eggs never space their marks evenly, and control here works against you. Varying the pastel from nail to nail while using one speckle color ties the set together.