Your nail length and skill decide which of these 12 ideas is yours: short natural nails suit glitter, polka dots and foil scraps, while long coffin or stiletto shapes give masks, lettering and 3D beads the room they need.
Purple, green and gold hold nearly every design, with one or two detailed accents per hand doing the most work.
1. Fleur De Lis Nails
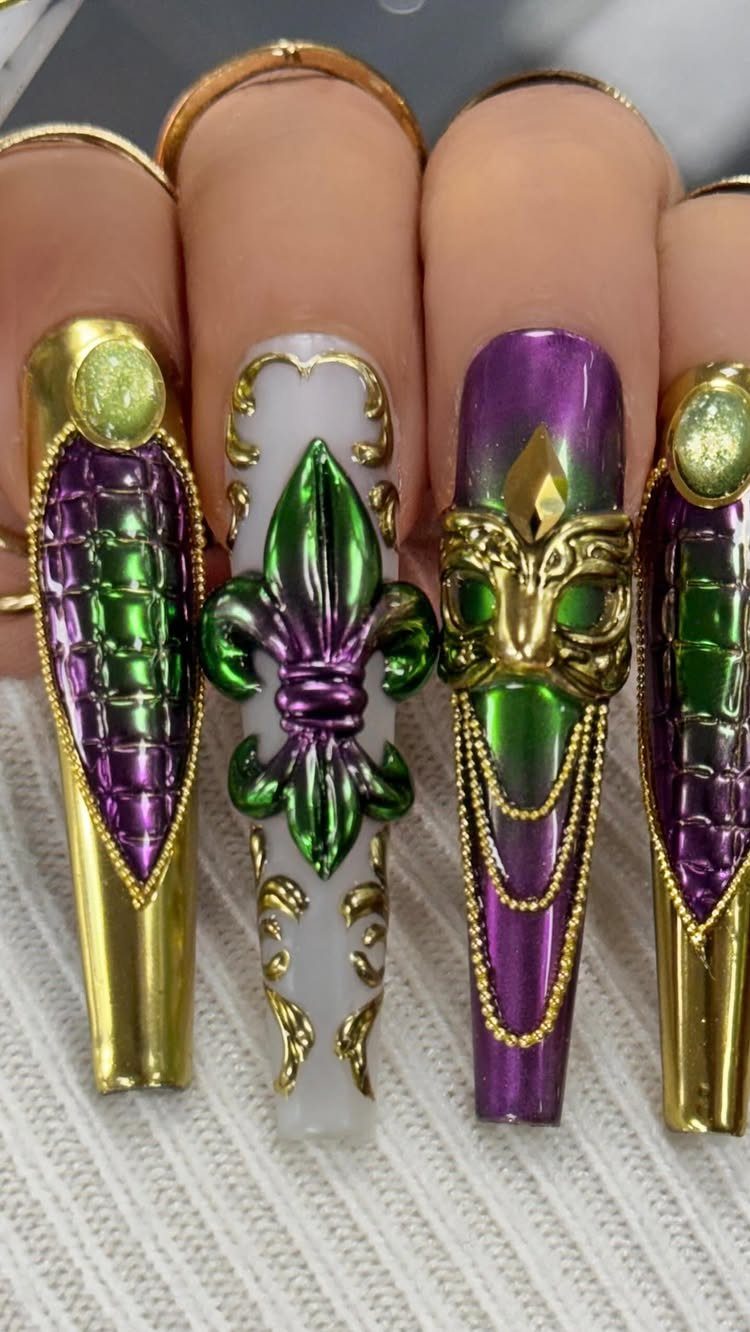
A raised green fleur-de-lis does the work of a whole nail set, so I would pair it with plain purple and gold on the other fingers and keep it to one or two nails per hand.
Gel or hard-gel builder works best for the 3D piece, since it needs height.
Cure the shape in layers, then seal the edges so it doesn’t snag on sleeves. Long coffin nails give it room, but a shorter shape works if you make the symbol smaller.
2. Mardi Gras Glitter
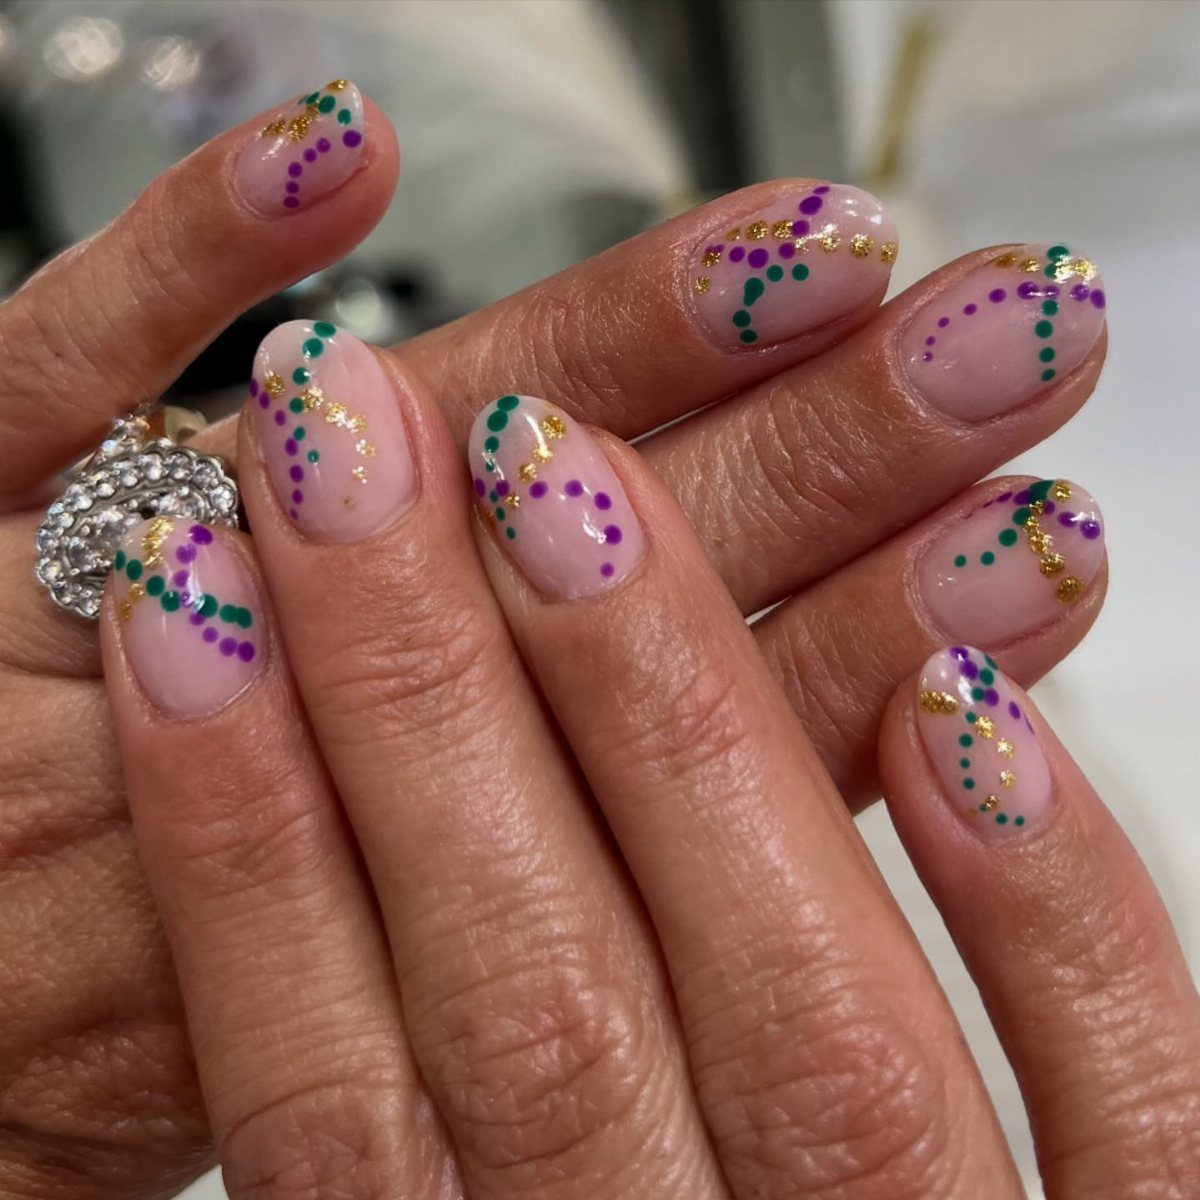
Glitter is the easiest way into Mardi Gras nails, and purple, green and gold dots in wavy lines need only a dotting tool and 3 polishes.
Dab the glitter on with the tip rather than brushing it across, and it stays where you place it. I like a clear top coat over everything to smooth the grit.
Natural nails are enough here; no extensions required. Keep the lines loose, because wobbly waves look better than careful ones.
3. Carnival Foil Nails
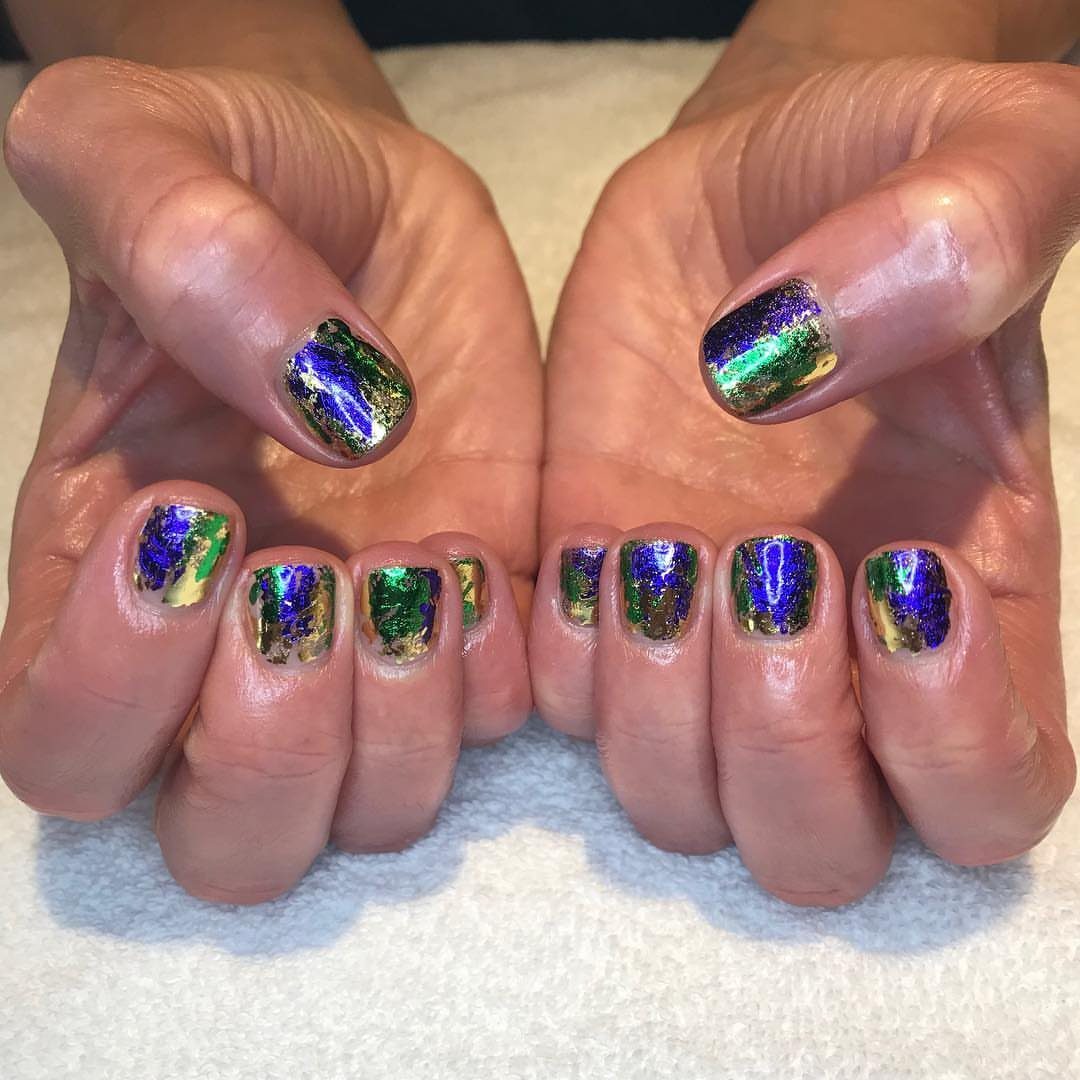
Foil gives purple, green and gold a metallic shimmer that polish alone can’t match, and it suits short nails well.
Brush adhesive over a dry base, wait until it turns clear and tacky, then press the foil on and peel the backing away. Seal with a top coat or the foil will scratch off.
I would tear the foil into small scraps and layer all 3 colors on each nail. It hides uneven spots, which makes it forgiving for beginners.
4. Mardi Gras French Manicure
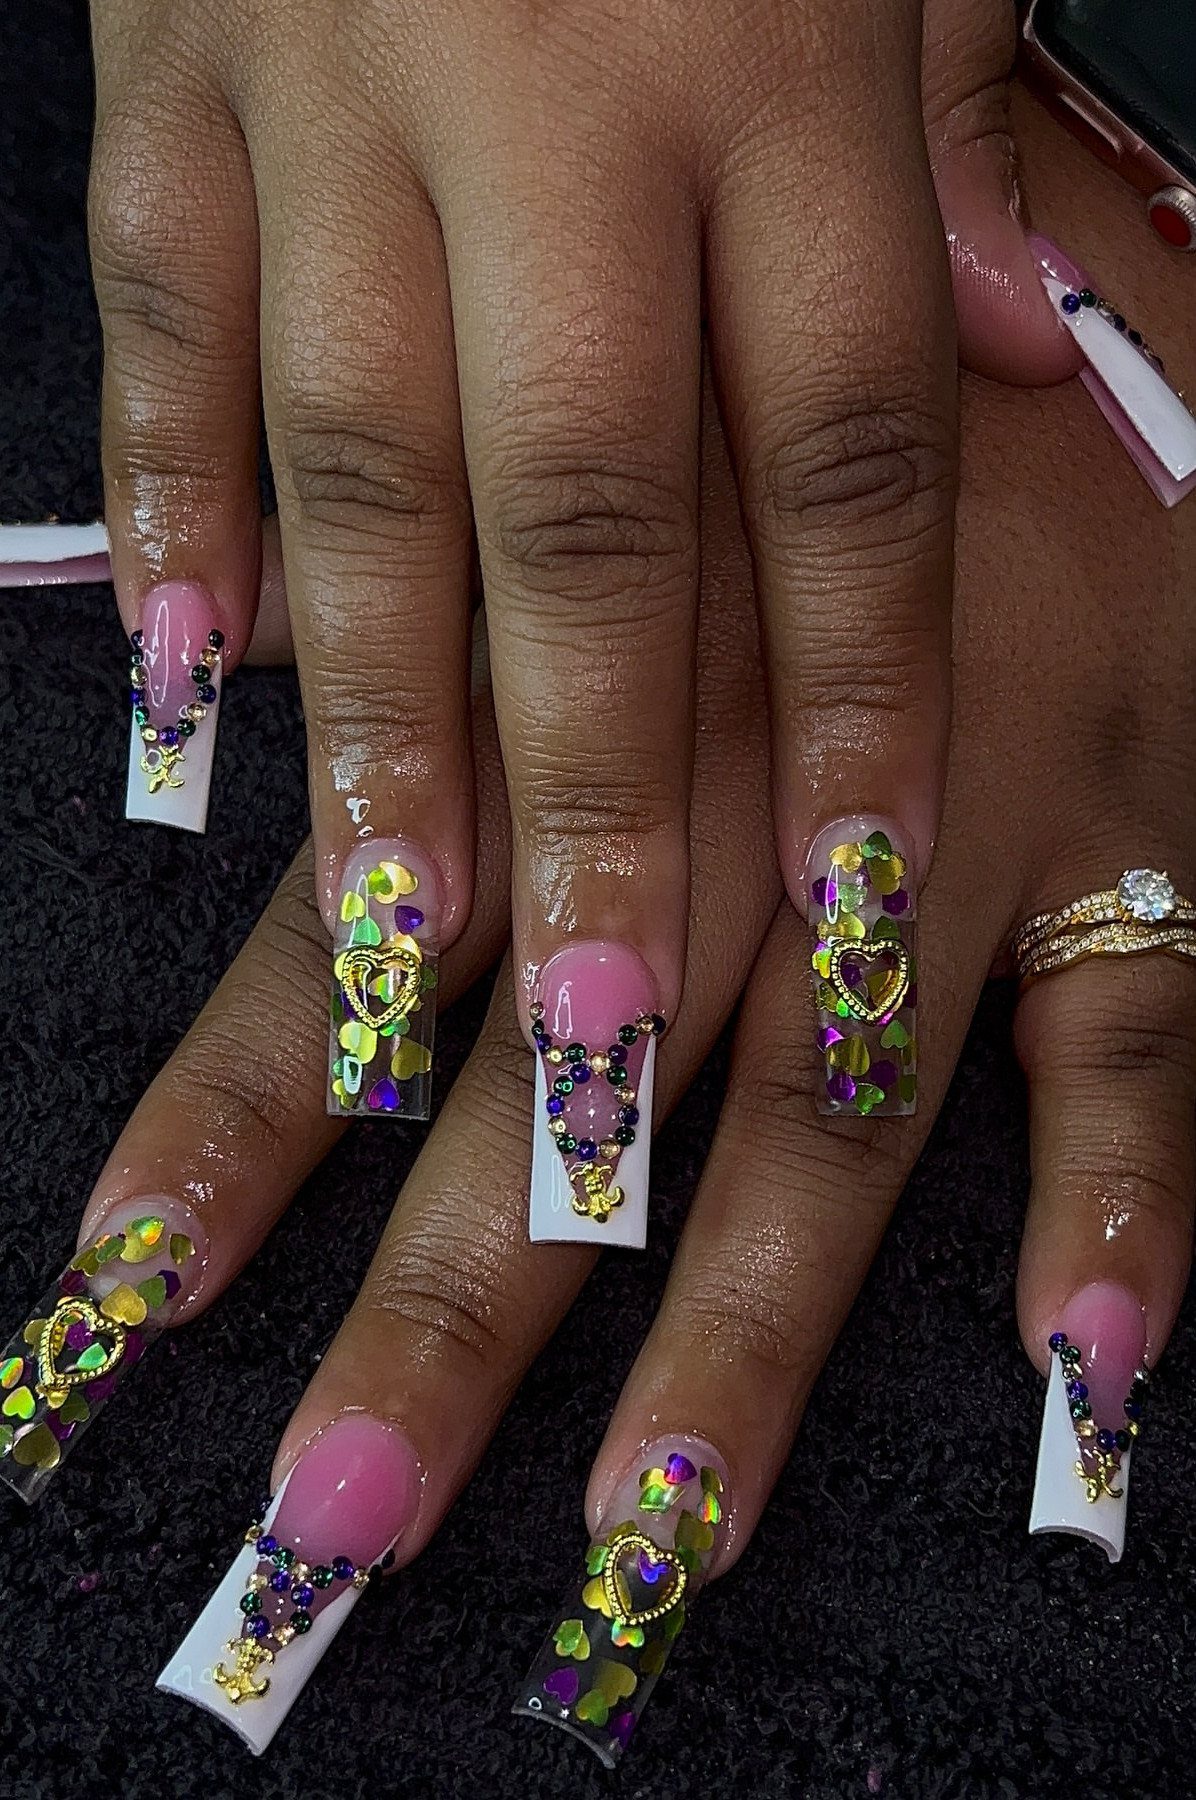
White French tips keep the base clean, so the purple, gold and green can sit in small, deliberate spots.
Paint the tips first and let them dry fully. Then add glitter hearts and gold charms with nail glue, choosing one or two accents per nail so the tip line stays visible.
Long square nails give the most room for this. On short nails, I would drop the charms and keep only the glitter.
5. 3D Mardi Gras Beads Nail Art
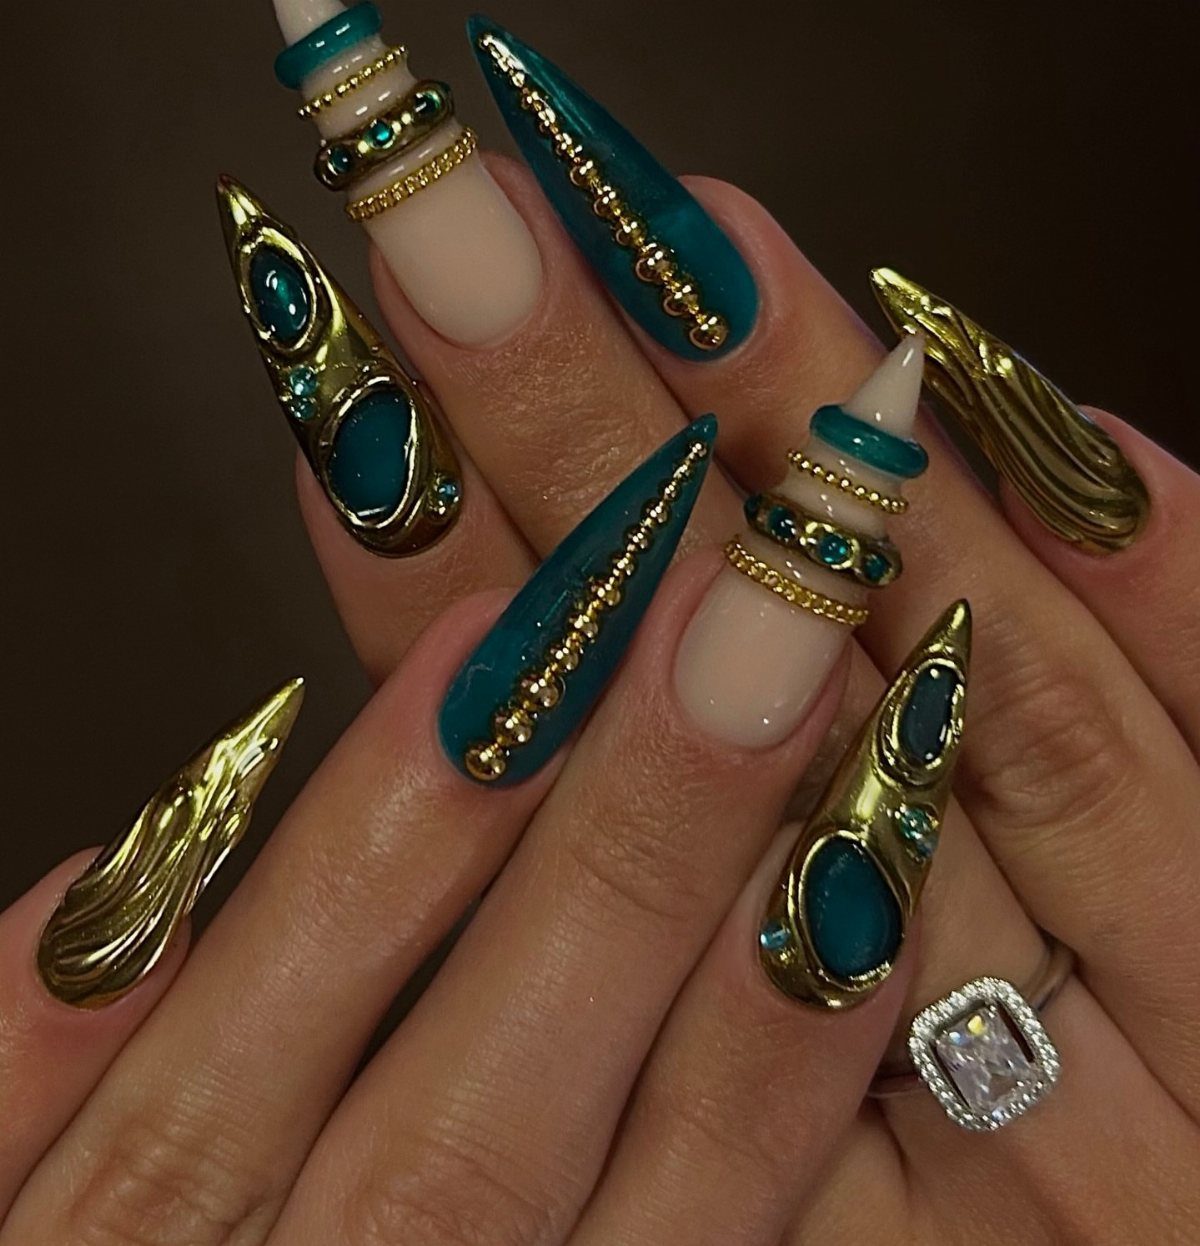
Tiny 3D beads on a nail echo the strands thrown from parade floats, and teal with gold gives them a jewel look.
Press each bead into a bit of builder gel or thick top coat, then cure it in place. Gold metallic lines between the beads hide the gaps.
Skip heavy typing and dishwashing right after, because beads catch on things. I would put them on an accent finger or two rather than all ten.
6. Jester Nail Design
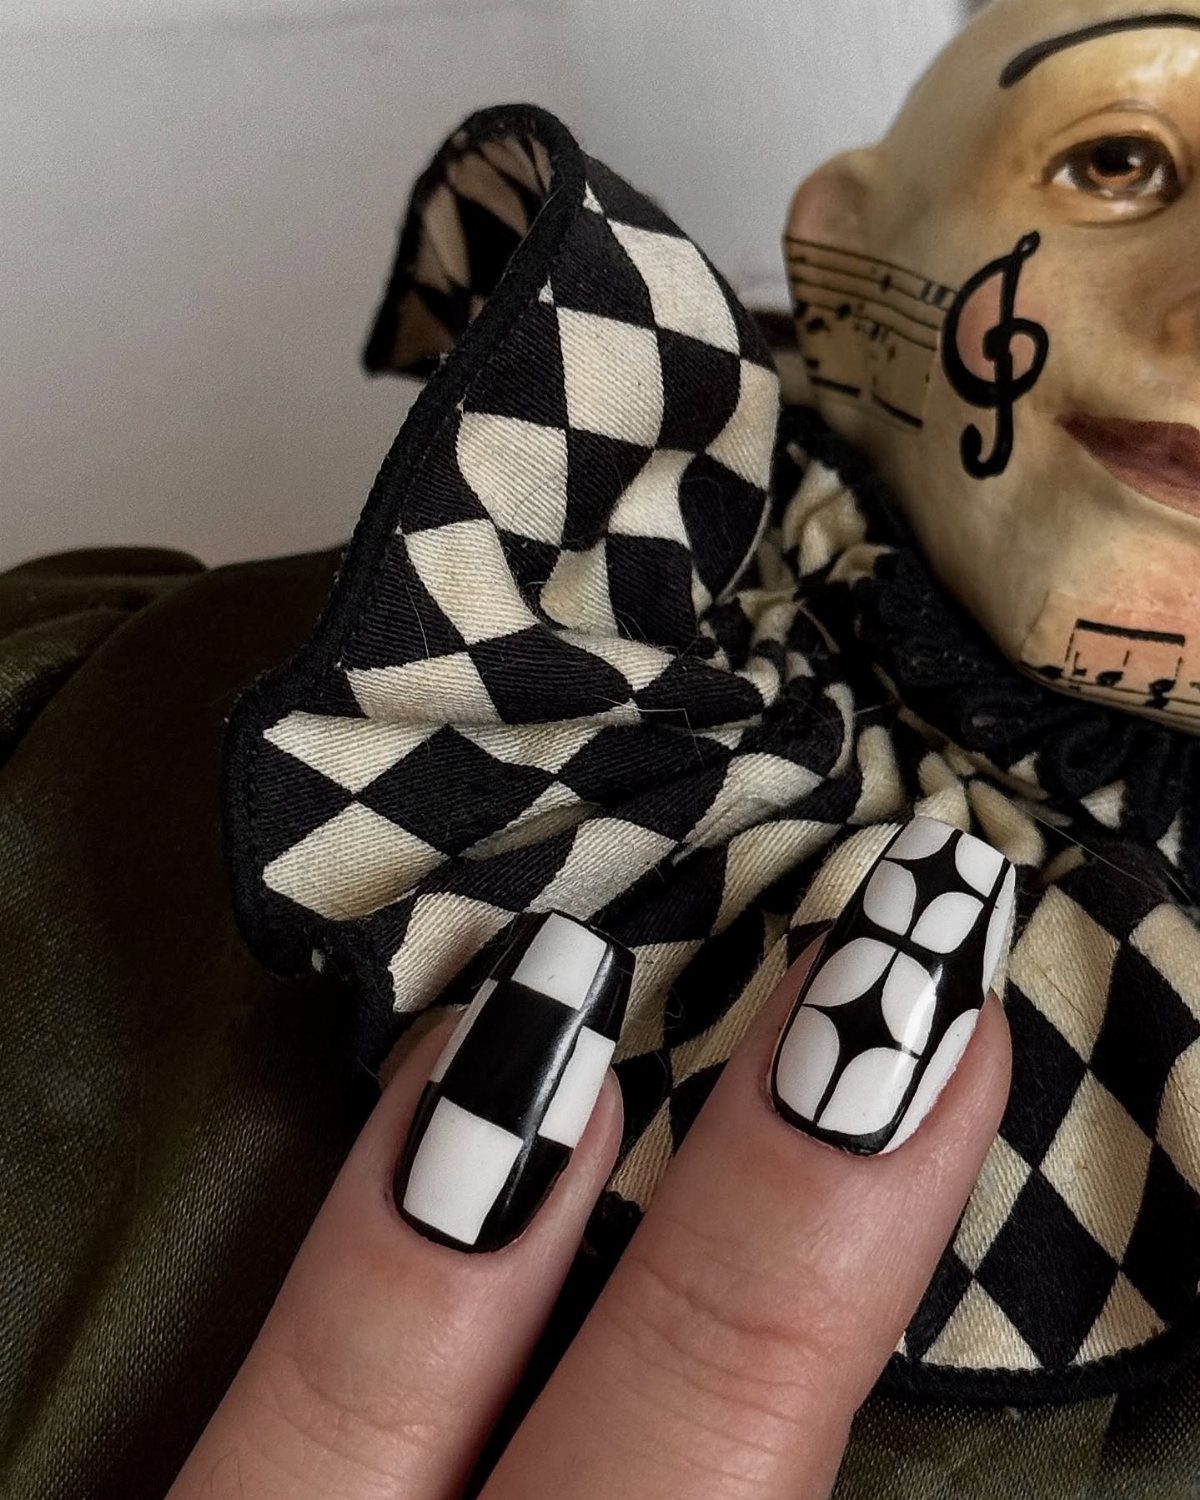
Black and white checks give a jester look without leaning on purple, green and gold, which makes it the odd one out on a Mardi Gras list.
Paint a white base, let it dry, then draw the squares with a thin striping brush or a black nail pen. A pen is easier to control than polish.
I would alternate checked nails with solid black ones so the pattern doesn’t get busy.
7. Mardi Gras Masks Nail Art
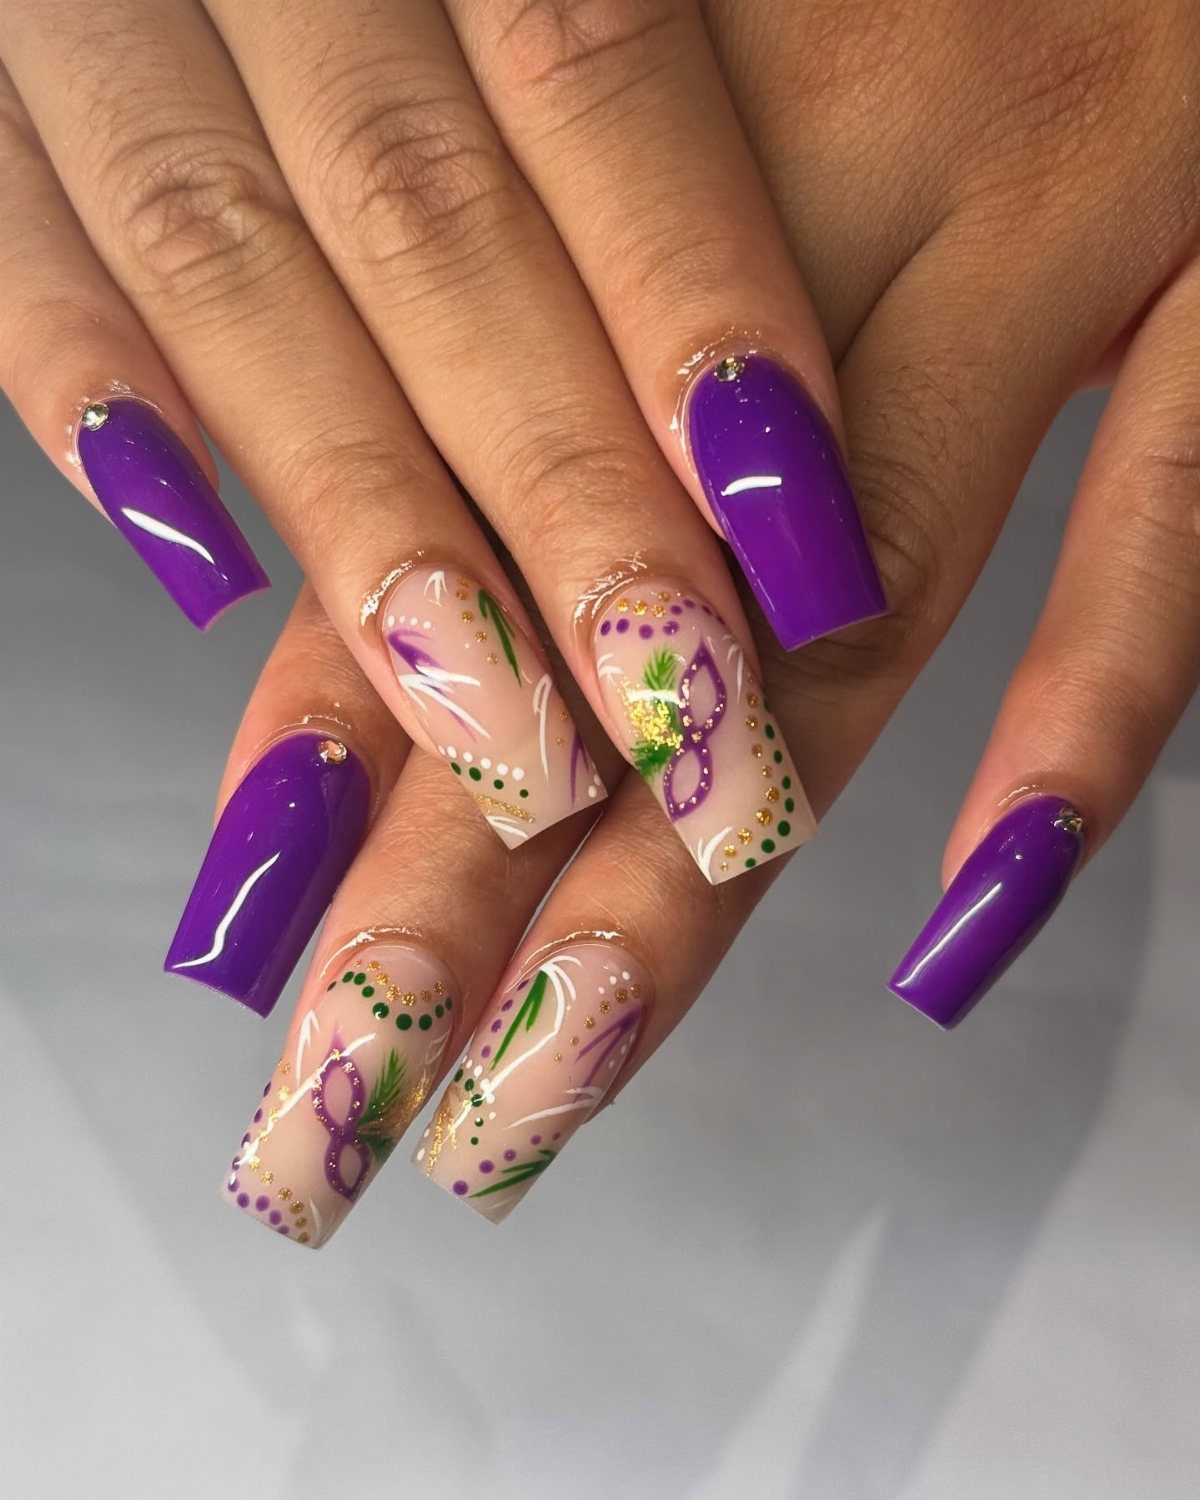
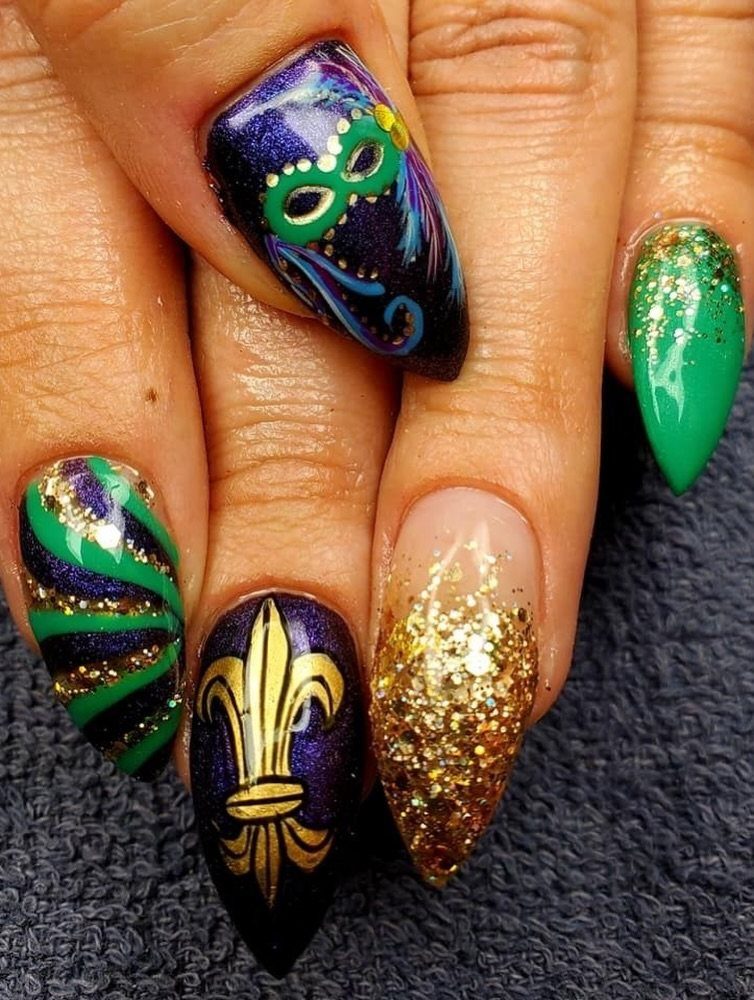
Hand-painted masquerade masks ask for a fine detail brush and some patience, and long coffin nails give the eye shapes room to read.
Start with a purple base, let it dry fully, then paint the mask in gold with green trim. A thin striping brush keeps the edges clean.
I would mask only one or two nails per hand and leave the rest plain purple. Painting the same small face on every finger gets crowded fast.
8. Mardi Gras Water Marble Design
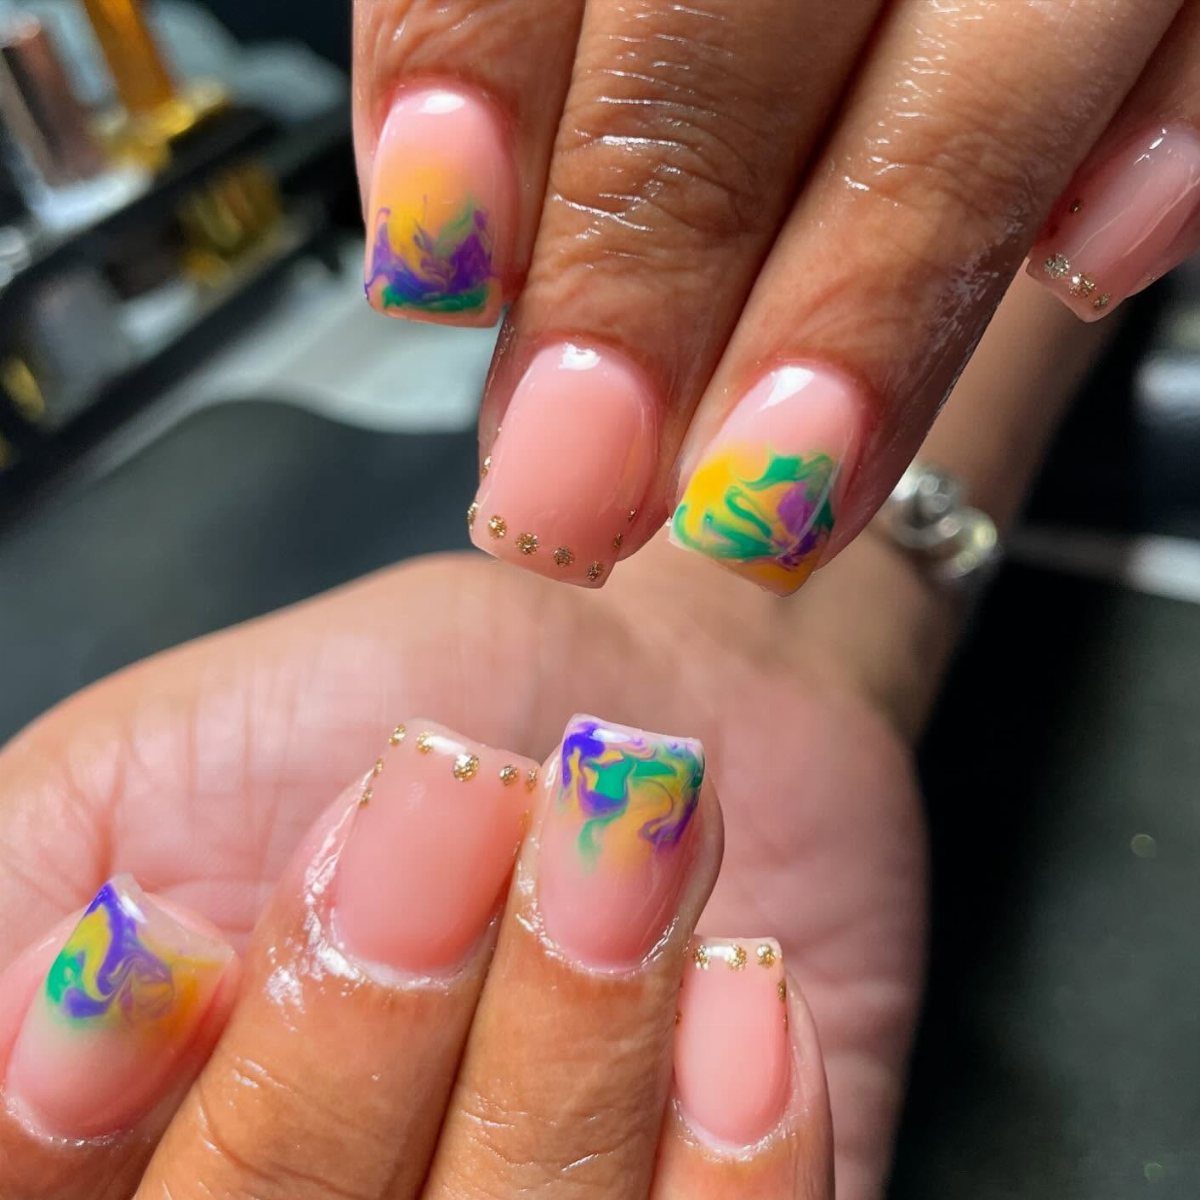
Water marbling swirls purple, green and gold into one pattern, and no two nails come out alike.
Drop the polishes onto water, drag a toothpick through them, then dip a finger in. Wrap a little tape or liquid latex around the skin first, because cleanup is the messy part.
I would add gold glitter after marbling, on just a few nails, so the swirls stay the focus.
9. Mardi Gras Polka Dot Nails
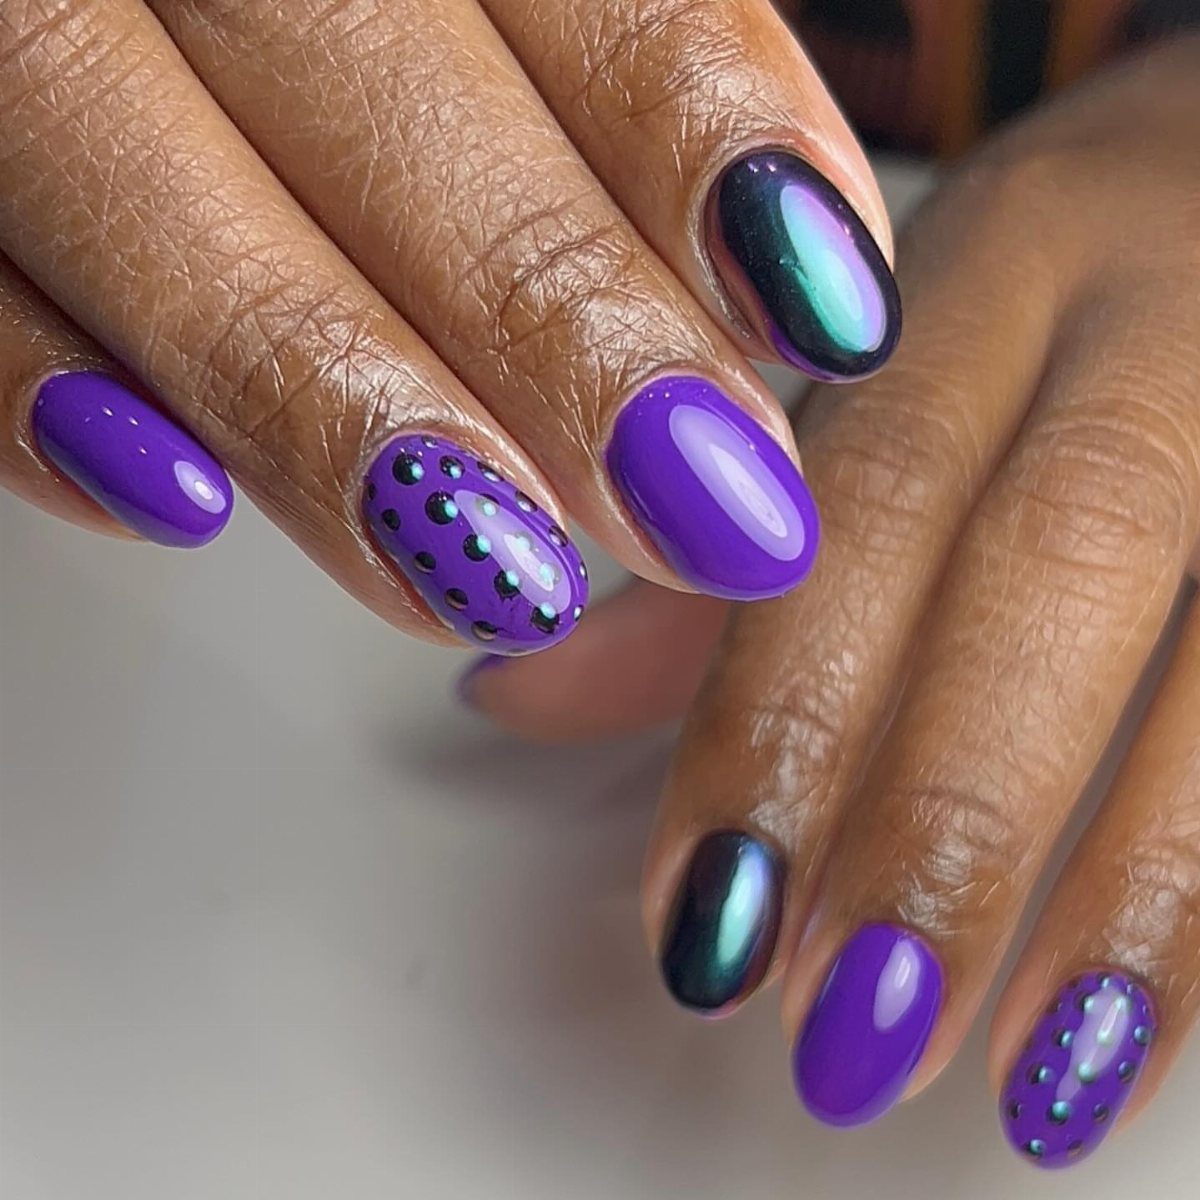
Alternating purple and iridescent dark green nails make polka dots feel like a real Mardi Gras set, and oval shapes suit the round dots.
Use a dotting tool, and dip it fresh for each dot so the size stays even. Small gold and green dots on a few nails are enough; I would leave the others solid so the colors alternate cleanly.
Let each dot dry before the top coat, or it will smear.
10. Mardi Gras Harlequin Nails
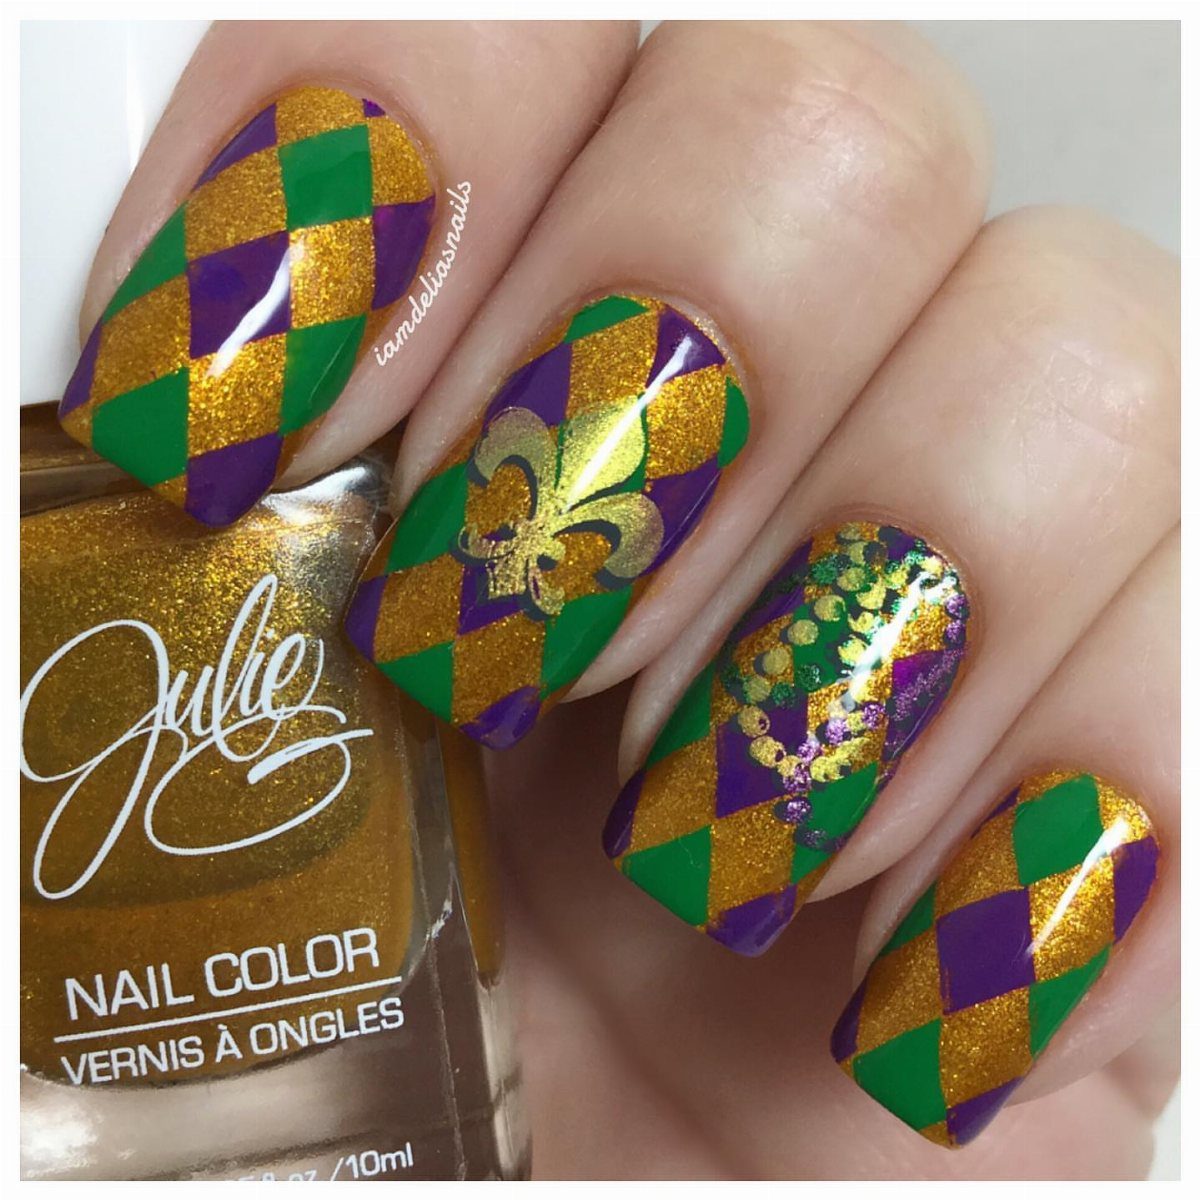
Harlequin diamonds turn purple, green and gold into a pattern that reads as Carnival from across the room.
Paint a base, then draw slanted lines in both directions with a thin striping brush so they cross into diamonds.
Fill alternate diamonds with a second color. Mark the grid lightly first and keep the lines thin.
A fleur-de-lis on one nail is an option if you want a New Orleans nod. Since it is fiddly, I would do the diamonds on two or three nails per hand.
11. New Orleans Lettering Nails
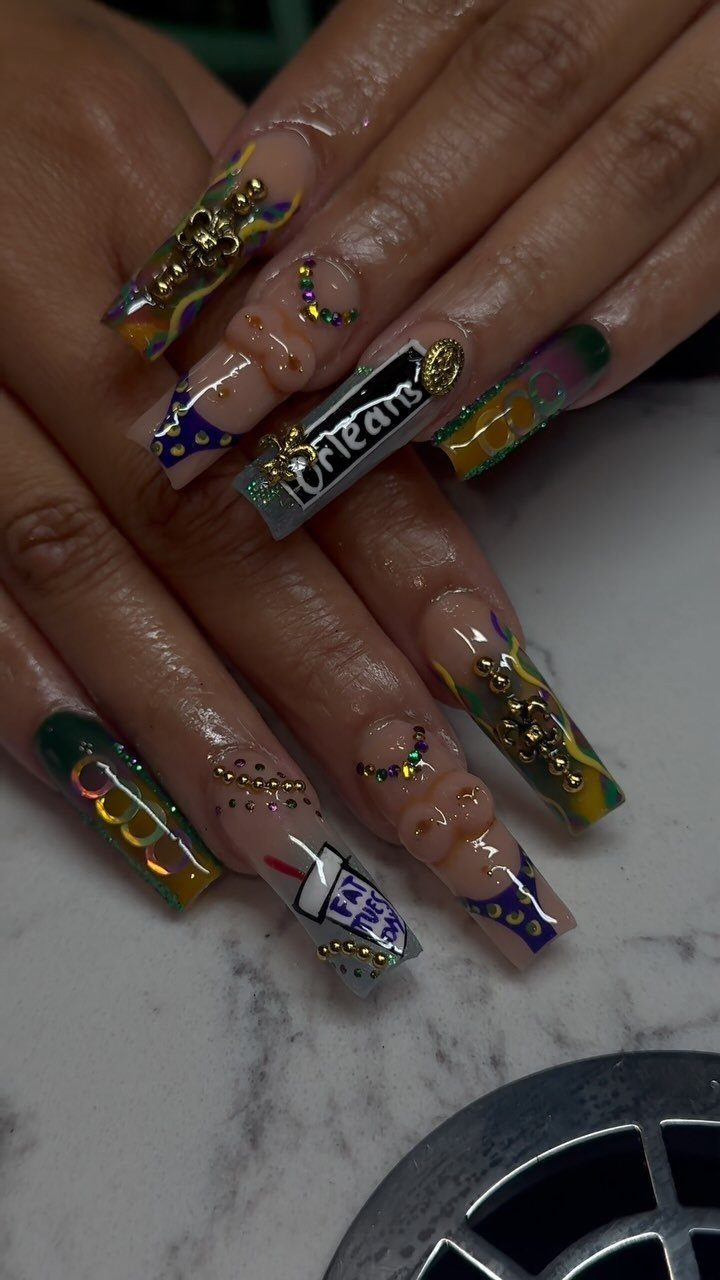
A single word like "Orleans" in script says where the party is, and long coffin acrylics give the letters enough length to stay legible.
Write the lettering with a thin brush or a fine nail pen over a fully dry base, then add 3D gems nearby. Keep the word to one nail so the gems and colors don’t crowd it.
I would practice the script on paper or a tip first. Cursive is hard to fix once it is on the nail.
12. Gem and Butterfly Press-Ons
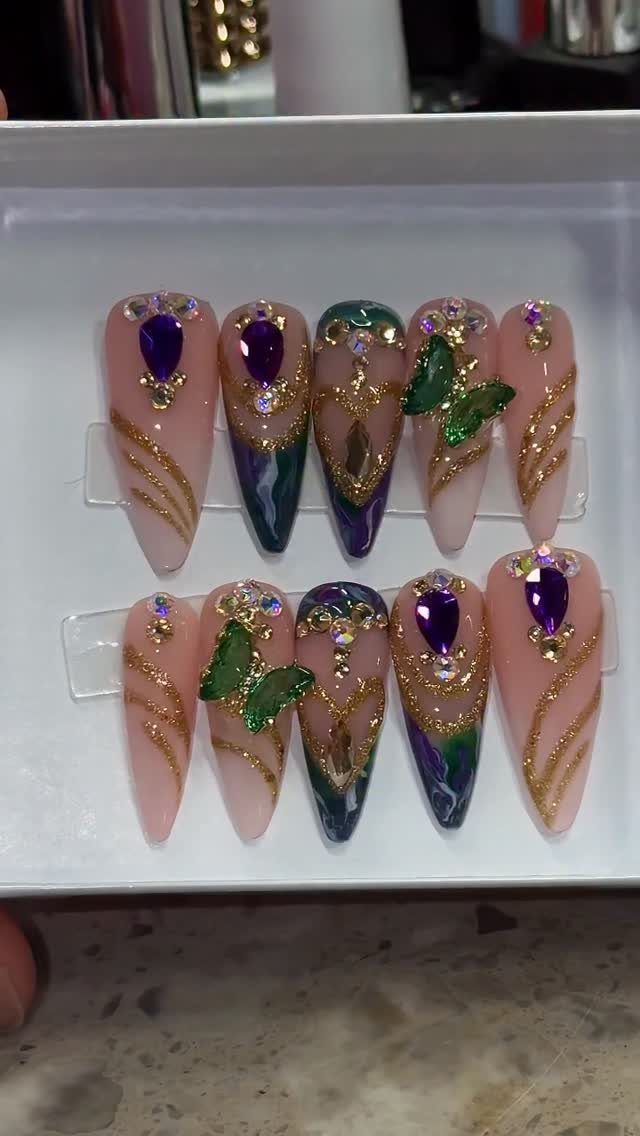
Stiletto press-ons with gold swirls, purple rhinestones and green butterflies are the shortcut for anyone who wants a full set without painting.
Pick a size for each finger, wipe the nails clean, and press on with nail glue. A set like this is done in minutes, where hand-painted art takes hours.
Fit varies: sizes don’t always match every nail, so check them before gluing. Stilettos also catch on things, so I would plan on gentle hands for the night.
Colors of Mardi Gras
Purple stands for justice, green for faith and gold for power, so the 3 colors carry meaning as well as color. Knowing that helps you decide how much of each to use.
Gold is the one to treat with care.
A metallic finish, whether polish, foil or a small metallic accent, catches light in a way matte shades never will. Let gold lead on one or two nails and keep the other colors steadier around it.
Mardi Gras falls on the day before Lent begins, and it ends the Carnival season. If your manicure is for a party that week, book or paint it a day or two ahead so it looks fresh.
But even if you’re nowhere near The Big Easy next week, you can get in on the festivities with a Mardi Gras-inspired manicure. The celebratory colors — purple, green, and gold — represent justice, faith, and power, respectively.
Nail Art Techniques
Ombre and gradient work best when the colors sit close together. Purple fading into green can turn muddy where they meet, so I would run purple into gold or green into gold and let the blend stay short.
A makeup sponge dabbed with 2 polishes gives a softer blend than a brush. Press it on in light taps, build in 2 or 3 passes, and clean up the skin afterward.
Glitter adds depth when it sits in one spot, such as the cuticle edge or the tip. Pair it with a smooth gradient so the surface has both a flat area and a sparkly one.
Inspiration for Designs
Masks, beads, fleur-de-lis and feathers are the symbols people recognize first. Pick the one or two that suit your nail length and skill, then repeat a single symbol rather than mixing all four.
A feather is a good candidate for a thin brush: a few curved strokes in one color, with a lighter shade for the center line. It reads clearly even when it is small.
Keep the base colors simple behind any symbol. The more detailed the symbol, the plainer the nail around it should be.